prep time: 30 min | bake time: 25 mins | total time: 3 hrs
This eggless 12-layer vanilla fudge cake is made with soft, moist vanilla sponge, filled with rich chocolate fudge, and covered in luscious chocolate frosting. Perfect for home bakers looking for a decadent dessert. Vegan Friendly!
12-Layer Vanilla Fudge Cake Recipe That Anyone Can Make At Home
Are you looking for an eggless cake that’s rich, indulgent, and perfect for special occasions?
This 12-layer Vanilla Fudge Cake will become your dream dessert. Each delicate layer of moist vanilla sponge is stacked with velvety chocolate fudge, topped with chocolate buttercream frosting and a luxurious fudge drizzle. Best of all, it can be made completely dairy-free, so everyone can enjoy a slice. It is also completely eggless and vegan friendly! and it is an amazing make ahead recipe for the holidays and celebrations.
Don’t let the “12 layers” intimidate you! This tall, elegant cake is made in a manageable 6-inch (15 cm) pan, making it surprisingly easy to create at home. I’ll guide you step by step, so you can impress your family and friends without stress.
I first made this cake on a quiet weekend and was thrilled at how simple it was once I broke down steps into an easy to follow process. Chilling the sponge layers overnight makes slicing a breeze no crumbs, no mess. Layer by layer, fudge by fudge, this eggless vanilla cake with chocolate fudge frosting comes together into a show stopping dessert that looks as good as it tastes. Cutting into it and revealing those perfect layers feels like a small victory one you’ll savor with every bite.
Baking Equipment that You’ll Need:
3 x 6-inch (15cm) Round Cake Pans
Mixing Bowls
Electric Whisk
Cake Stand
Offset Spatula
Vanilla Cake Ingredients
Milk: It helps create a tender crumb and improves the texture of the sponge.
Lemon Juice or White Vinegar: Used to acidify the milk, creating a vegan-friendly “buttermilk” effect. This reaction helps the cake rise and gives the sponge a light, airy texture.
Vanilla Extract: A natural flavoring that enhances the sweetness and aroma of baked goods. Using pure vanilla extract can elevate the flavor profile of cakes and frostings significantly.
Cane Sugar: or castor sugar essential for sweetness and structure in cakes. It helps to tenderize the batter by interfering with gluten formation, resulting in a soft, moist sponge.
Melted Butter: Adds richness, flavor, and moisture to cakes and baked goods. When melted, it blends easily into the batter, creating a smooth texture and tender crumb.
All-Purpose Flour: A staple baking ingredient that provides structure to cakes and cookies. It contains the right balance of protein to support a tender, yet sturdy, sponge.
Cornstarch: Used to lighten the texture of baked goods by reducing gluten formation. It creates a finer, more tender crumb in cakes and sponges.
Baking Powder: It releases carbon dioxide during baking, creating air pockets in the sponge.
Baking Soda: A strong leavening agent that reacts with acidic ingredients to produce carbon dioxide. This reaction helps baked goods rise and develop a tender crumb.
Salt: Enhances the overall flavor of baked goods by balancing sweetness and intensifying other flavors.
Chocolate Fudge Filling Ingredients
Whipping Cream: It adds richness and a smooth, velvety texture to chocolate fudge fillings. It helps create a glossy, spreadable consistency when combined with chocolate and butter.
Dark Chocolate: This is the foundation of a rich and intense chocolate fudge filling. It melts smoothly when heated and blends easily with cream and butter to create a luscious texture.
Butter: Adds creaminess, flavor, and stability to chocolate fillings. It helps the mixture set properly while keeping it smooth and spreadable.
Dutch-Processed Cocoa Powder: Provides a deep chocolate flavor and a smooth, velvety texture. It is less acidic than natural cocoa, making it ideal for creamy chocolate fillings. Use natural cocoa powder if that’s all you have!
Vanilla Extract: Enhances the chocolate flavor and adds warmth and complexity to the fudge filling.
Powdered Sugar: or icing sugar sweetens the fudge filling while keeping the texture silky and smooth. Sifting the powdered sugar ensures an even consistency and contributes to the overall creaminess of the filling.
Chocolate Buttercream Frosting Ingredients
Butter: The base of chocolate buttercream frosting, providing richness, flavor, and a smooth texture. Using high-quality butter enhances the creaminess and overall taste of the frosting.
Powdered Sugar: Sweetens the buttercream while keeping it silky and lump-free. Sifting the sugar before mixing prevents graininess and helps achieve a light, fluffy frosting. Sifted always!
Cacao Powder: Adds deep, natural chocolate flavor to the frosting without extra sweetness. Sift it!
Whipping Cream: Adds moisture and lightness to the buttercream, making it soft and spreadable. It helps achieve a creamy consistency that is easy to pipe or spread on cakes.
Vanilla Extract: It balances the sweetness and deepens the overall taste profile.
How to Make Vanilla Cake
Preheat your oven to 350°F (175°C). Grease three 6-inch (15cm) cake pans and line the bottoms with baking paper so the cakes don’t stick.
In a small bowl, combine the milk and lemon juice or (white vinegar). Let it sit for 15 minutes until it curdles this creates a tangy “buttermilk” that helps the cake rise and stay soft.
Add the sugar and vanilla to the milk mixture. Use a whisk to stir until the sugar has fully dissolved and the mixture is smooth.
Add all the dry ingredients, to the wet mixture. Whisk everything together until you have a smooth, lump-free batter.
Pour in the melted butter and mix until fully combined. This makes the batter rich and moist.
Divide the batter evenly among the three prepared pans. Bake for 25–30 minutes, or until the tops are firm to the touch and a toothpick inserted in the center comes out clean.
How to Make Chocolate Fudge Filling
In a small saucepan, combine whipping cream, dark chocolate, and butter.
Melt gently. Heat the mixture over low to medium heat, stirring constantly until the chocolate and butter are completely melted and smooth. Do not let it boil just warm it enough to combine everything.
Remove the pan from heat. Whisk in the sifted cocoa powder, vanilla extract, and sifted powdered sugar until the mixture is smooth and glossy.
Pour the mixture through a fine strainer into a bowl to remove any lumps. Press plastic wrap directly onto the surface to prevent a skin from forming.
Chill until thick. Let the chocolate fudge filling cool in the fridge for 1 hour, or ideally overnight at room temperature, until it becomes thick and easy to spread between cake layers.
How to Make Chocolate Buttercream Frosting
Place the butter in a mixing bowl and beat on medium speed with an electric mixer until it becomes light and fluffy. This gives your frosting a smooth, airy texture.
Sift the powdered sugar and add it to the butter in two parts. Mix on medium speed until fully combined and smooth.
Use a spatula to scrape down the sides of the bowl to ensure all ingredients are evenly mixed.
Sift the cacao powder and add it to the mixture. Beat until it is completely combined and smooth.
Pour in the whipping cream and vanilla extract. Mix on medium speed until the frosting is fluffy, light, and easy to spread.
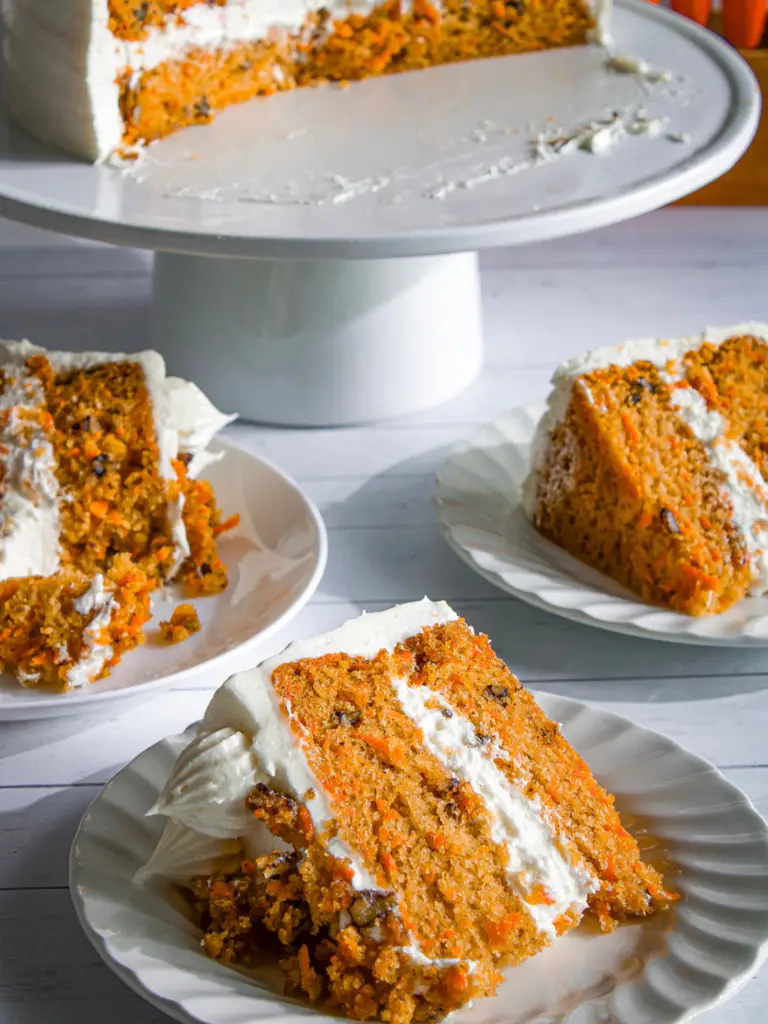
How to Assemble 12-Layer Vanilla Fudge Cake
After baking, wrap the sponge cakes tightly in plastic wrap and chill them overnight. This firms up the cakes, making them easier to slice and stack without breaking.
Slice the cakes evenly. Use a long serrated knife to cut each sponge horizontally into two even layers. Even layers help your cake look professional and stack neatly.
Place the first layer on a cake board or stand. Spread 2–3 tablespoons of chocolate fudge filling evenly over the surface, then top with the next sponge layer. Repeat this process until all layers are stacked.
Chill while stacking.After every 3–4 layers, chill the cake for 15–20 minutes. This helps the layers set and makes the cake more stable for frosting.
Apply a crumb coat: Spread a thin layer of chocolate buttercream over the cake to trap crumbs. Chill the cake for 20–30 minutes before applying the final layer of frosting.
Frost the Cake: Evenly spread the remaining buttercream over the top and sides of the cake for a smooth finish.
Add a fudge drizzle. Warm slightly and stir to emulsify the remaining chocolate fudge icing slightly until it’s pourable. Drizzle it over the top and sides to create beautiful chocolate drips.
Decorate and set. Decorate with any remaining chocolate frosting as desired. Refrigerate the cake for at least 1 hour, or overnight, to let the layers and frosting set perfectly.
Yes! Baking the sponge layers a day ahead and storing them wrapped in the fridge makes assembly much easier. You can also prepare the chocolate fudge filling and chocolate buttercream 1–2 days in advance to save time on the day you assemble the cake.
Absolutely. This Vanilla Fudge Cake is completely eggless while remaining rich, moist, and indulgent. It’s perfect for anyone looking for an egg-free dessert option.
Yes. Substitute the milk, butter, and chocolate with plant-based alternatives like almond milk, oat milk, vegan butter, or dairy-free chocolate. The cake stays just as delicious and creamy without dairy.
Chill the cakes first, as cold sponges are firmer and easier to slice. Use a long serrated knife or a cake leveler to cut each cake into even layers for a professional-looking result.
Store the assembled cake in the fridge, especially if it contains dairy. Before serving, let it sit at room temperature for 30–60 minutes to soften and enhance the flavor.
Yes. You can freeze the sponge layers (well-wrapped) for up to a month. For fully assembled cakes, freeze without the final fudge drizzle and add it after thawing. Always thaw overnight in the fridge.
Chill the cake in the fridge after stacking every 3–4 layers to help it set. Make sure the chocolate fudge filling is thick and cool before spreading between layers for stability.
Yes, you can use vanilla buttercream or whipped cream. Keep in mind that lighter frostings may not support the weight of multiple layers as well as chocolate buttercream.
The cake stays fresh for 3–4 days in the fridge when stored in an airtight container. For the best taste and texture, bring it to room temperature before serving.
My Easy Tips for Making an Eggless Vanilla Fudge Cake
Bake the Sponge Layers in Advance: Bake your sponge cakes a day before assembling the cake and let them rest wrapped in the fridge. Chilling the layers makes them firmer, easier to handle, and prevents crumbling when slicing. This simple step helps you achieve clean, even layers every time.
Slice Each Cake Layer Evenly: Use a long-serrated knife or a cake leveler to cut each sponge into equal layers. Chilled cakes are much easier to slice neatly, giving your cake a professional look. Even layers also make stacking smoother and prevent a wobbly cake.
Prepare the Chocolate Fudge Filling Ahead of Time: Make the chocolate fudge filling a day in advance and let it chill in the fridge. This allows it to thicken properly, so it stays in place between layers. Prepping the filling ahead makes assembling the cake much easier and less messy.
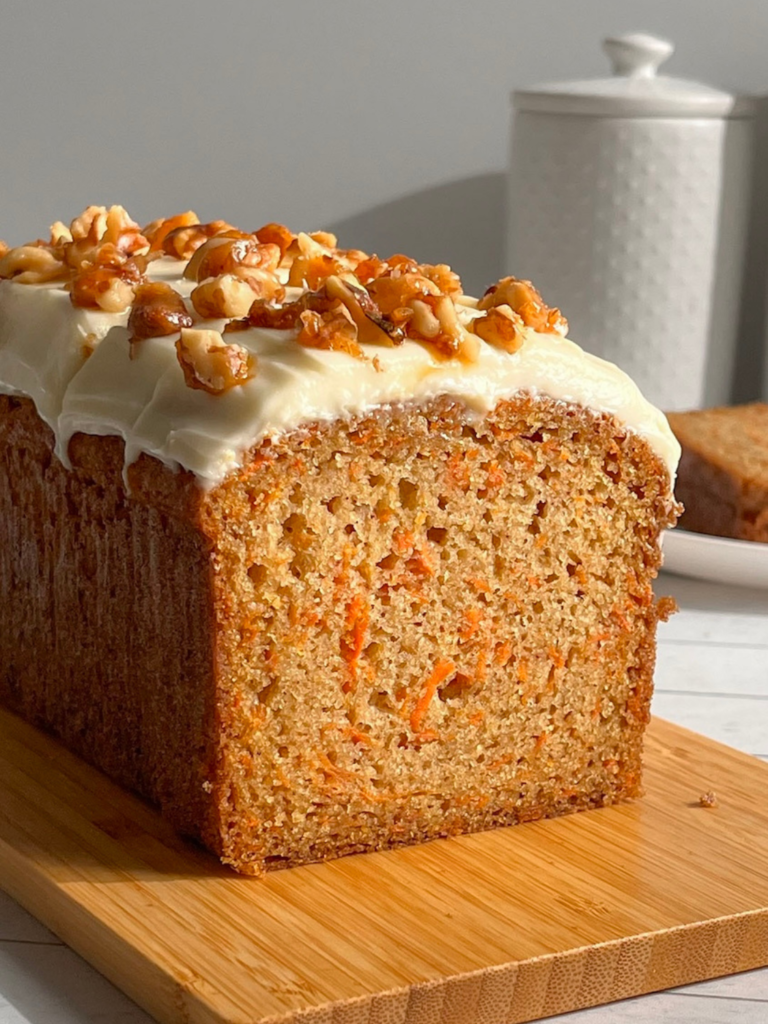
Level Your Cakes: Trim any domed tops from your sponge layers before stacking. Level layers create a stable, even cake, which is especially important for multi-layered or tall cakes. This step ensures your final cake looks polished and professional.
Use a Thin Crumb Coat of Frosting: Spread a thin layer of buttercream over the cake to trap crumbs before applying the final frosting. Chill the cake for 20–30 minutes after the crumb coat to set it in place. This technique gives your finished cake a smooth, clean appearance.
Assemble on a Sturdy Base: Use a strong cake board or stand to support the weight of multi-layered cakes. A sturdy base prevents the cake from collapsing or tilting while stacking and frosting. This is essential for tall or heavily layered cakes.
Make It Dairy-Free Easily: Swap regular butter and chocolate for plant-based alternatives to make the cake completely dairy-free. This keeps the cake indulgent and flavorful while accommodating dietary preferences. Vegan and dairy-free options work just as well without compromising taste.
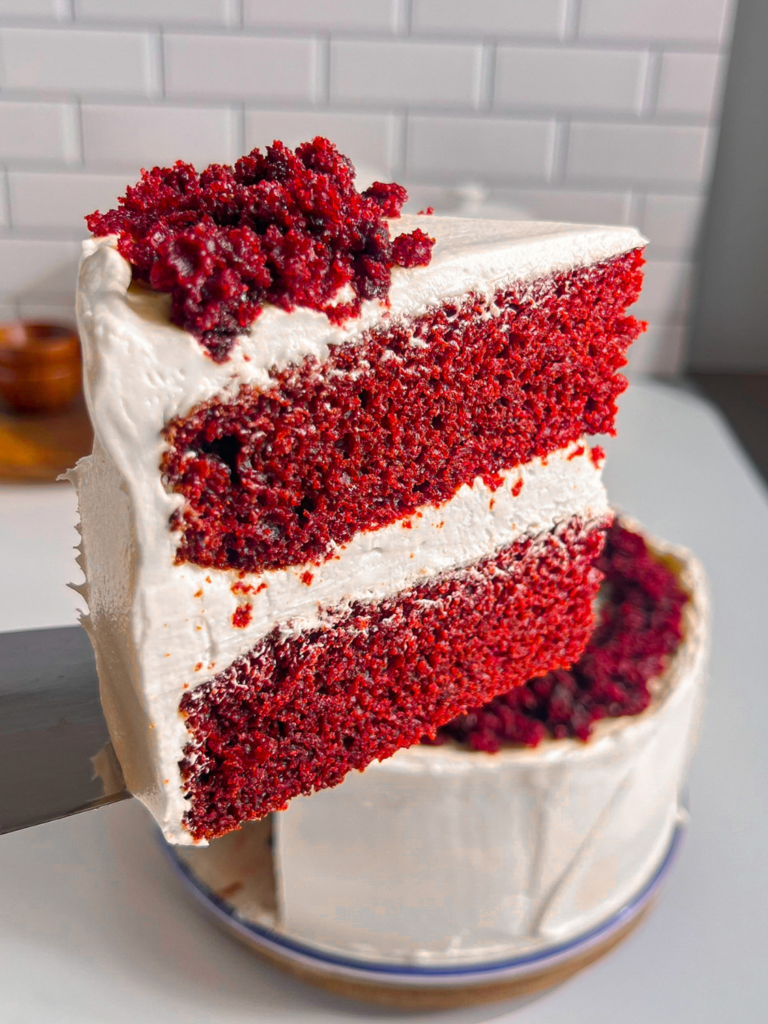
Imagine cutting into a tall, golden vanilla sponge and discovering 12 perfectly even layers, each smothered in rich, glossy chocolate fudge. This Eggless Vanilla Fudge Cake is moist, indulgent, and completely free of eggs yet it’s still light, fluffy, and full of flavor. With simple ingredients and easy steps, even beginner bakers can create a dessert that steals the spotlight at any celebration.
What makes it extra special? You can make it dairy-free, too! Swap in plant-based milk, butter, and chocolate, and you’ve got a cake everyone can enjoy. Whether it’s a birthday, an anniversary, or a cozy weekend treat, this cake proves you don’t need eggs to bake something spectacular.
Make Baking Fun and Shareable
Eggless baking is all about joy, creativity, and a little chocolate indulgence. Snap a photo of your finished cake, tag me @pastrybysaloni, and inspire other bakers to try eggless desserts. Don’t worry if it’s a little rustic—every slice tastes like a bakery masterpiece!
Keep the Eggless Inspiration Going Once you’ve mastered this cake, try these next:
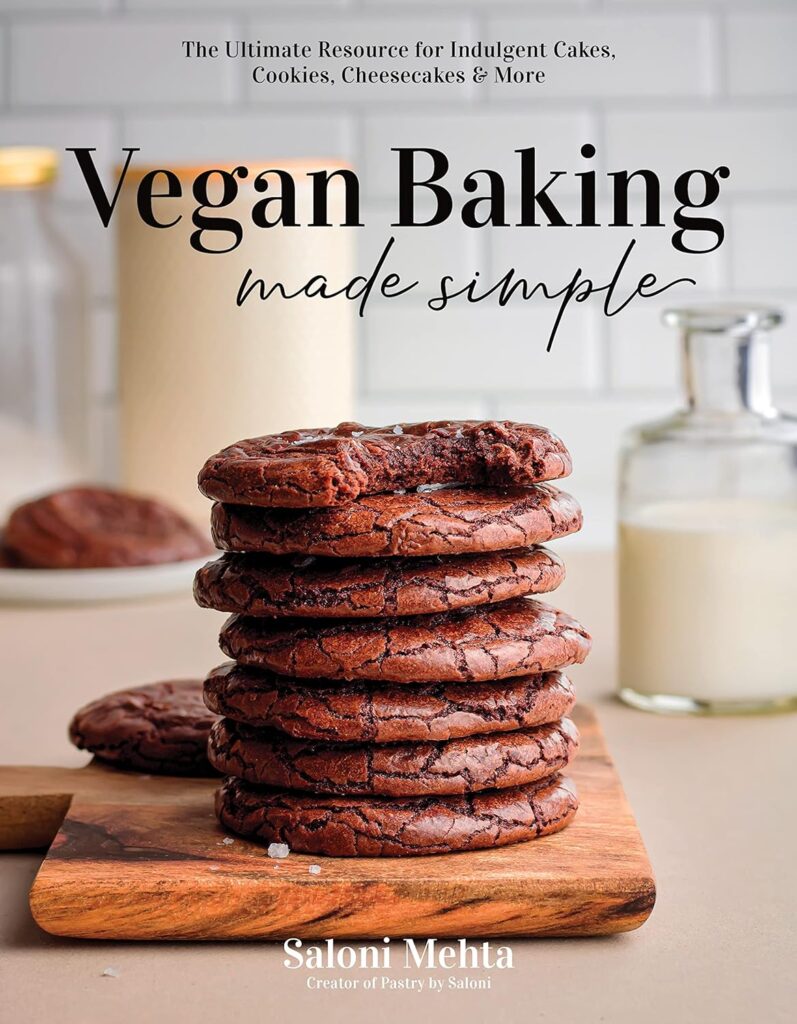
For even more ideas, my cookbook Vegan Baking Made Simple is packed with easy, eggless recipes for cakes, cookies, and breads—no fancy tools required. Keep your kitchen full of delicious, egg-free treats all year long.
Meet Saloni
I’m a former pastry chef with a love for breads, cakes and everything in between! My recipes are easy to follow, egg free and are designed to be shared with others!
This eggless 12-layer vanilla fudge cake is made with soft, moist vanilla sponge, filled with rich chocolate fudge, and covered in luscious chocolate frosting. Perfect for home bakers looking for a decadent dessert. Vegan Friendly!
15gDutch Processed Cocoa Powder, sifted; or use natural cocoa powder
2tspVanilla Extract
80gPowdered Sugar, or icing sugar; sifted
Chocolate Buttercream Frosting Ingredients
150gButter*at room temp; see notes for options
150gPowdered Sugar*sifted
40gCacao Powdersifted
30mlWhipping Cream*at room temp; see notes for options
2tspVanilla Extract
Instructions
How to Make Vanilla Cake
Preheat your oven to 350°F (175°C). Grease three 6-inch (15cm) cake pans and line the bottoms with baking paper so the cakes don’t stick.
In a small bowl, combine the milk and vinegar. Let it sit for 15 minutes until it curdles this creates a tangy “buttermilk” that helps the cake rise and stay soft.
Add the sugar and vanilla to the milk mixture. Use a whisk to stir until the sugar has fully dissolved and the mixture is smooth.
Add all the dry ingredients to the wet mixture. Whisk everything together until you have a smooth, lump-free batter.
Pour in the melted butter and mix until fully combined. This makes the batter rich and moist.
Divide the batter evenly among the three prepared pans. Bake for 25–30 minutes, or until the tops are firm to the touch and a toothpick inserted in the center comes out clean.
How to Make Chocolate Fudge Filling
In a small saucepan, add the whipping cream, dark chocolate, and butter.
Heat the mixture over low to medium heat, stirring constantly until the chocolate and butter are completely melted and smooth. Do not let it boil just warm it enough to combine everything.
Remove the pan from heat. Whisk in the sifted cocoa powder, vanilla extract, and sifted powdered sugar until the mixture is smooth and glossy.
Strain for extra smoothness. Pour the mixture through a fine strainer into a bowl to remove any lumps. Press plastic wrap directly onto the surface to prevent a skin from forming.
Let the chocolate fudge filling cool in the fridge for 1 hour , or ideally overnight at room temperature, until it becomes thick and easy to spread between cake layers.
How to Make Chocolate Buttercream Frosting
Place the butter in a mixing bowl and beat on medium speed with an electric mixer until it becomes light and fluffy. This gives your frosting a smooth, airy texture.
Sift the powdered sugar and add it to the butter in two parts. Mix on medium speed until fully combined and smooth.
Use a spatula to scrape down the sides of the bowl to ensure all ingredients are evenly mixed.
Sift the cacao powder and add it to the mixture. Beat until it is completely combined and smooth.
Pour in the whipping cream and vanilla extract. Mix on medium speed until the frosting is fluffy, light, and easy to spread.
How to Assemble Your Vanilla Fudge Cake
After baking, wrap the sponge cakes tightly in plastic wrap and chill them overnight. This firms up the cakes, making them easier to slice and stack without breaking.
Use a long serrated knife to cut each sponge horizontally into two even layers. Even layers help your cake look professional and stack neatly.
Place the first layer on a cake board or stand. Spread 2–3 tablespoons of chocolate fudge filling evenly over the surface, then top with the next sponge layer. Repeat this process until all layers are stacked.
Chill while stacking. After every 3–4 layers, chill the cake for 15–20 minutes. This helps the layers set and makes the cake more stable for frosting.
Apply a crumb coat. Spread a thin layer of chocolate buttercream over the cake to trap crumbs. Chill the cake for 20–30 minutes before applying the final layer of frosting.
Evenly spread the remaining buttercream over the top and sides of the cake for a smooth finish.
Warm the remaining chocolate fudge icing slightly in the microwave for 5-7 seconds and stir until it’s pourable. Drizzle it over the top and sides to create beautiful chocolate drips.
Decorate with any remaining chocolate frosting as desired. Refrigerate the cake for at least 1 hour, or overnight, to let the layers and frosting set perfectly.
Notes
Cups vs. Scale: Cup measurements are common in the U.S., but they’re not always accurate because ingredients can settle differently. For best results, use a digital kitchen scale and measure in grams.
Prepare First: Before you start baking, measure and prepare all your ingredients so the process goes smoothly.
Teaspoons and Tablespoons: Always use measuring spoons, not regular spoons you eat with, for accurate results.
Milk: You can use any unsweetened dairy-free milk (like almond, soy, or oat milk) or whole dairy milk, depending on your preference.
Cream: For vegan and dairy-free cake use vegan whipping cream ( country crock / so delicious or a dairy-free alternative such as coconut cream.
Butter: You can use salted butter (dairy or dairy-free). For vegan baking, choose plant-based butter sticks.
Sugar: Cane sugar, granulated sugar, or caster sugar all work. If you’re baking vegan, choose organic cane sugar or vegan-friendly brands, since some sugars are processed with bone char.
Chocolate: Choose dark or semi-sweet baking chocolate (60% cocoa or higher). For vegan versions, use dairy-free dark chocolate that doesn’t contain milk solids or butter — cocoa butter is fine because it’s plant-based.


One Response
Pronto la haré y te comentaré.Gracias