prep time: 15 min | bake time: 45 min | total time: 1 hour
Soft and moist eggless chocolate orange marble loaf cake with beautiful chocolate swirls and fresh citrus flavor. Easy to make and can be made dairy-free.
Home » Chocolate Orange Marble Loaf Cake (Eggless)
Better than Bakery, Chocolate Orange Loaf Cake without eggs ?
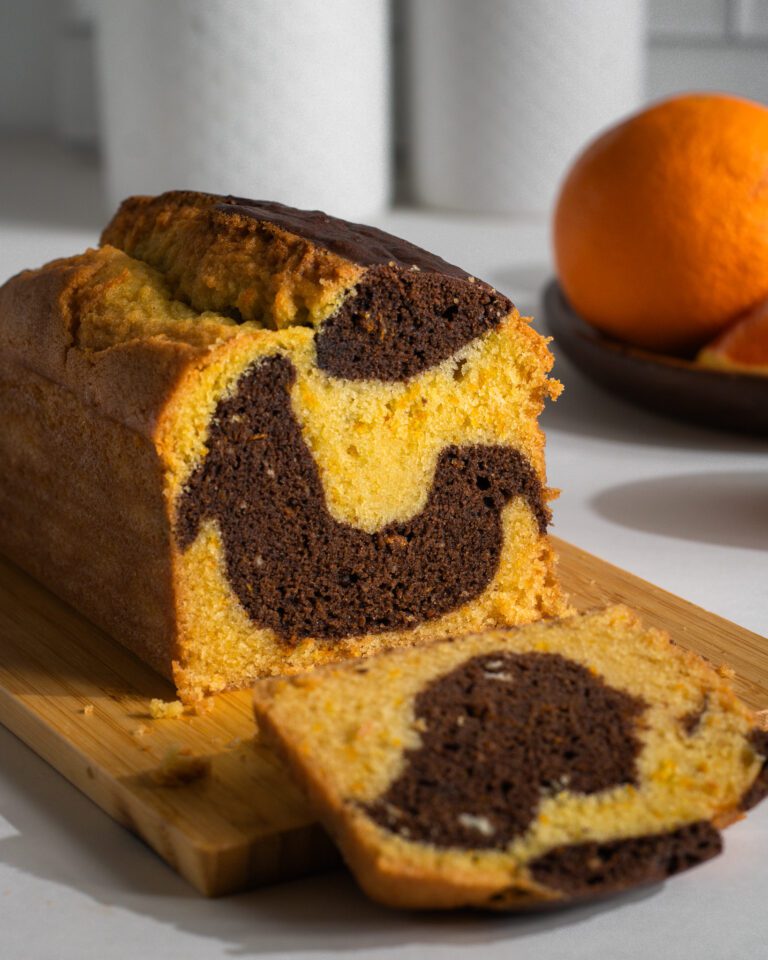
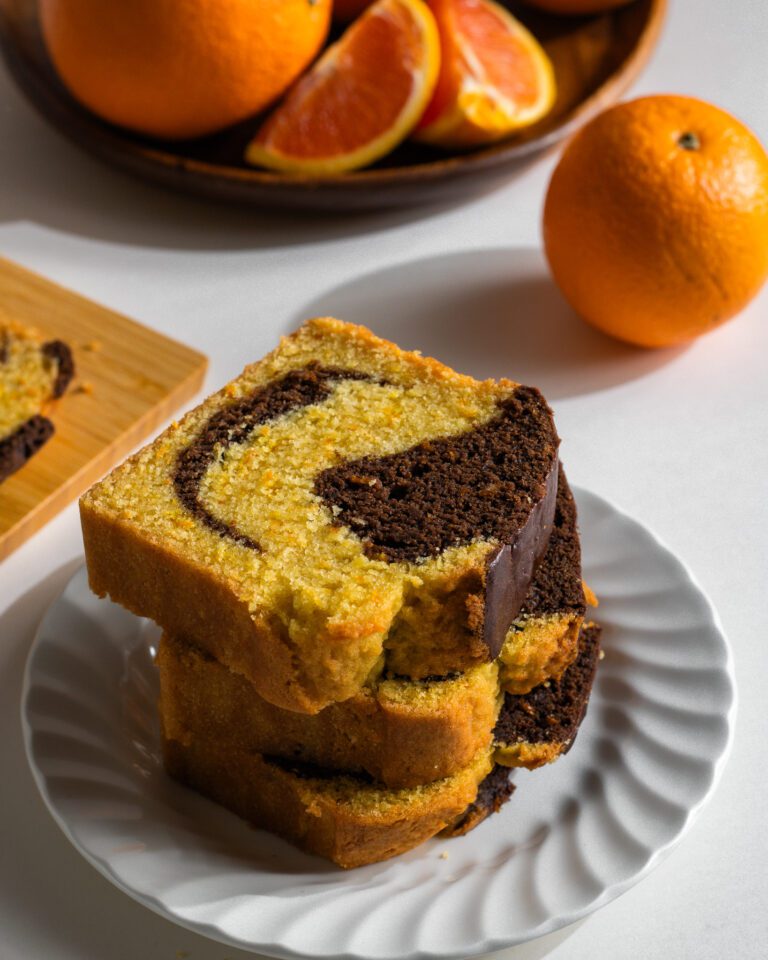
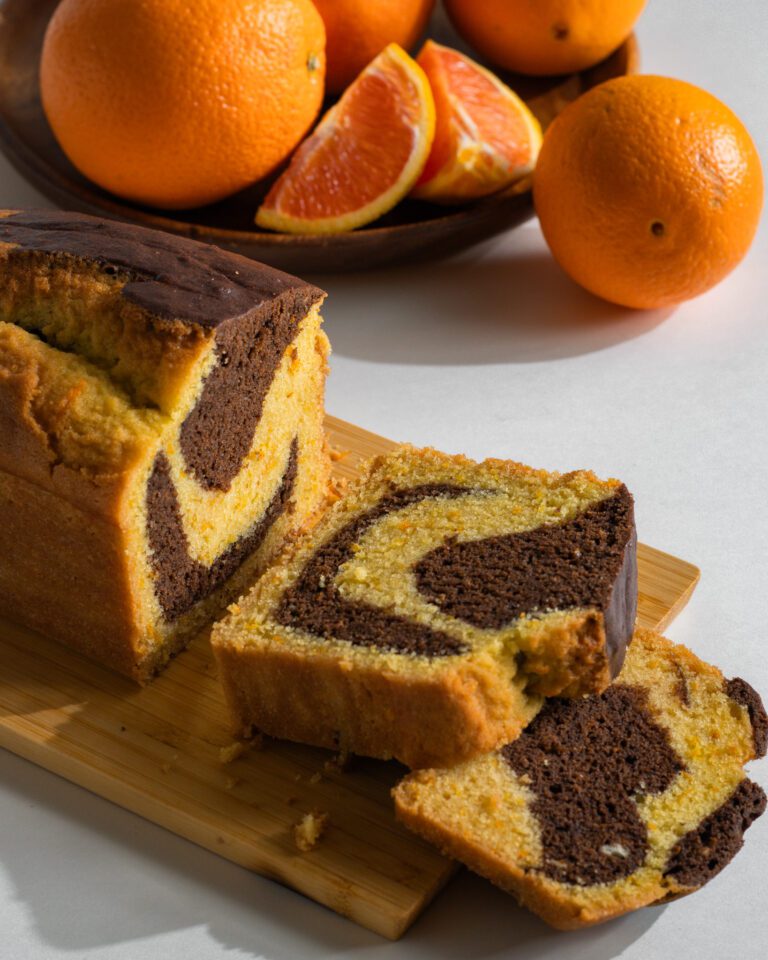
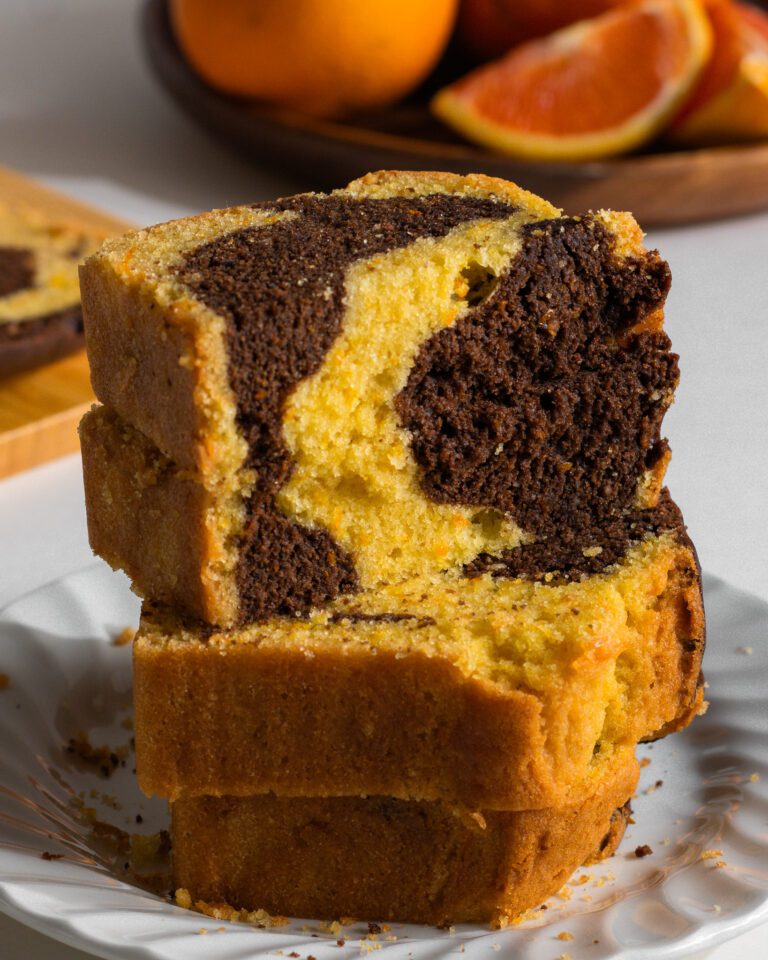
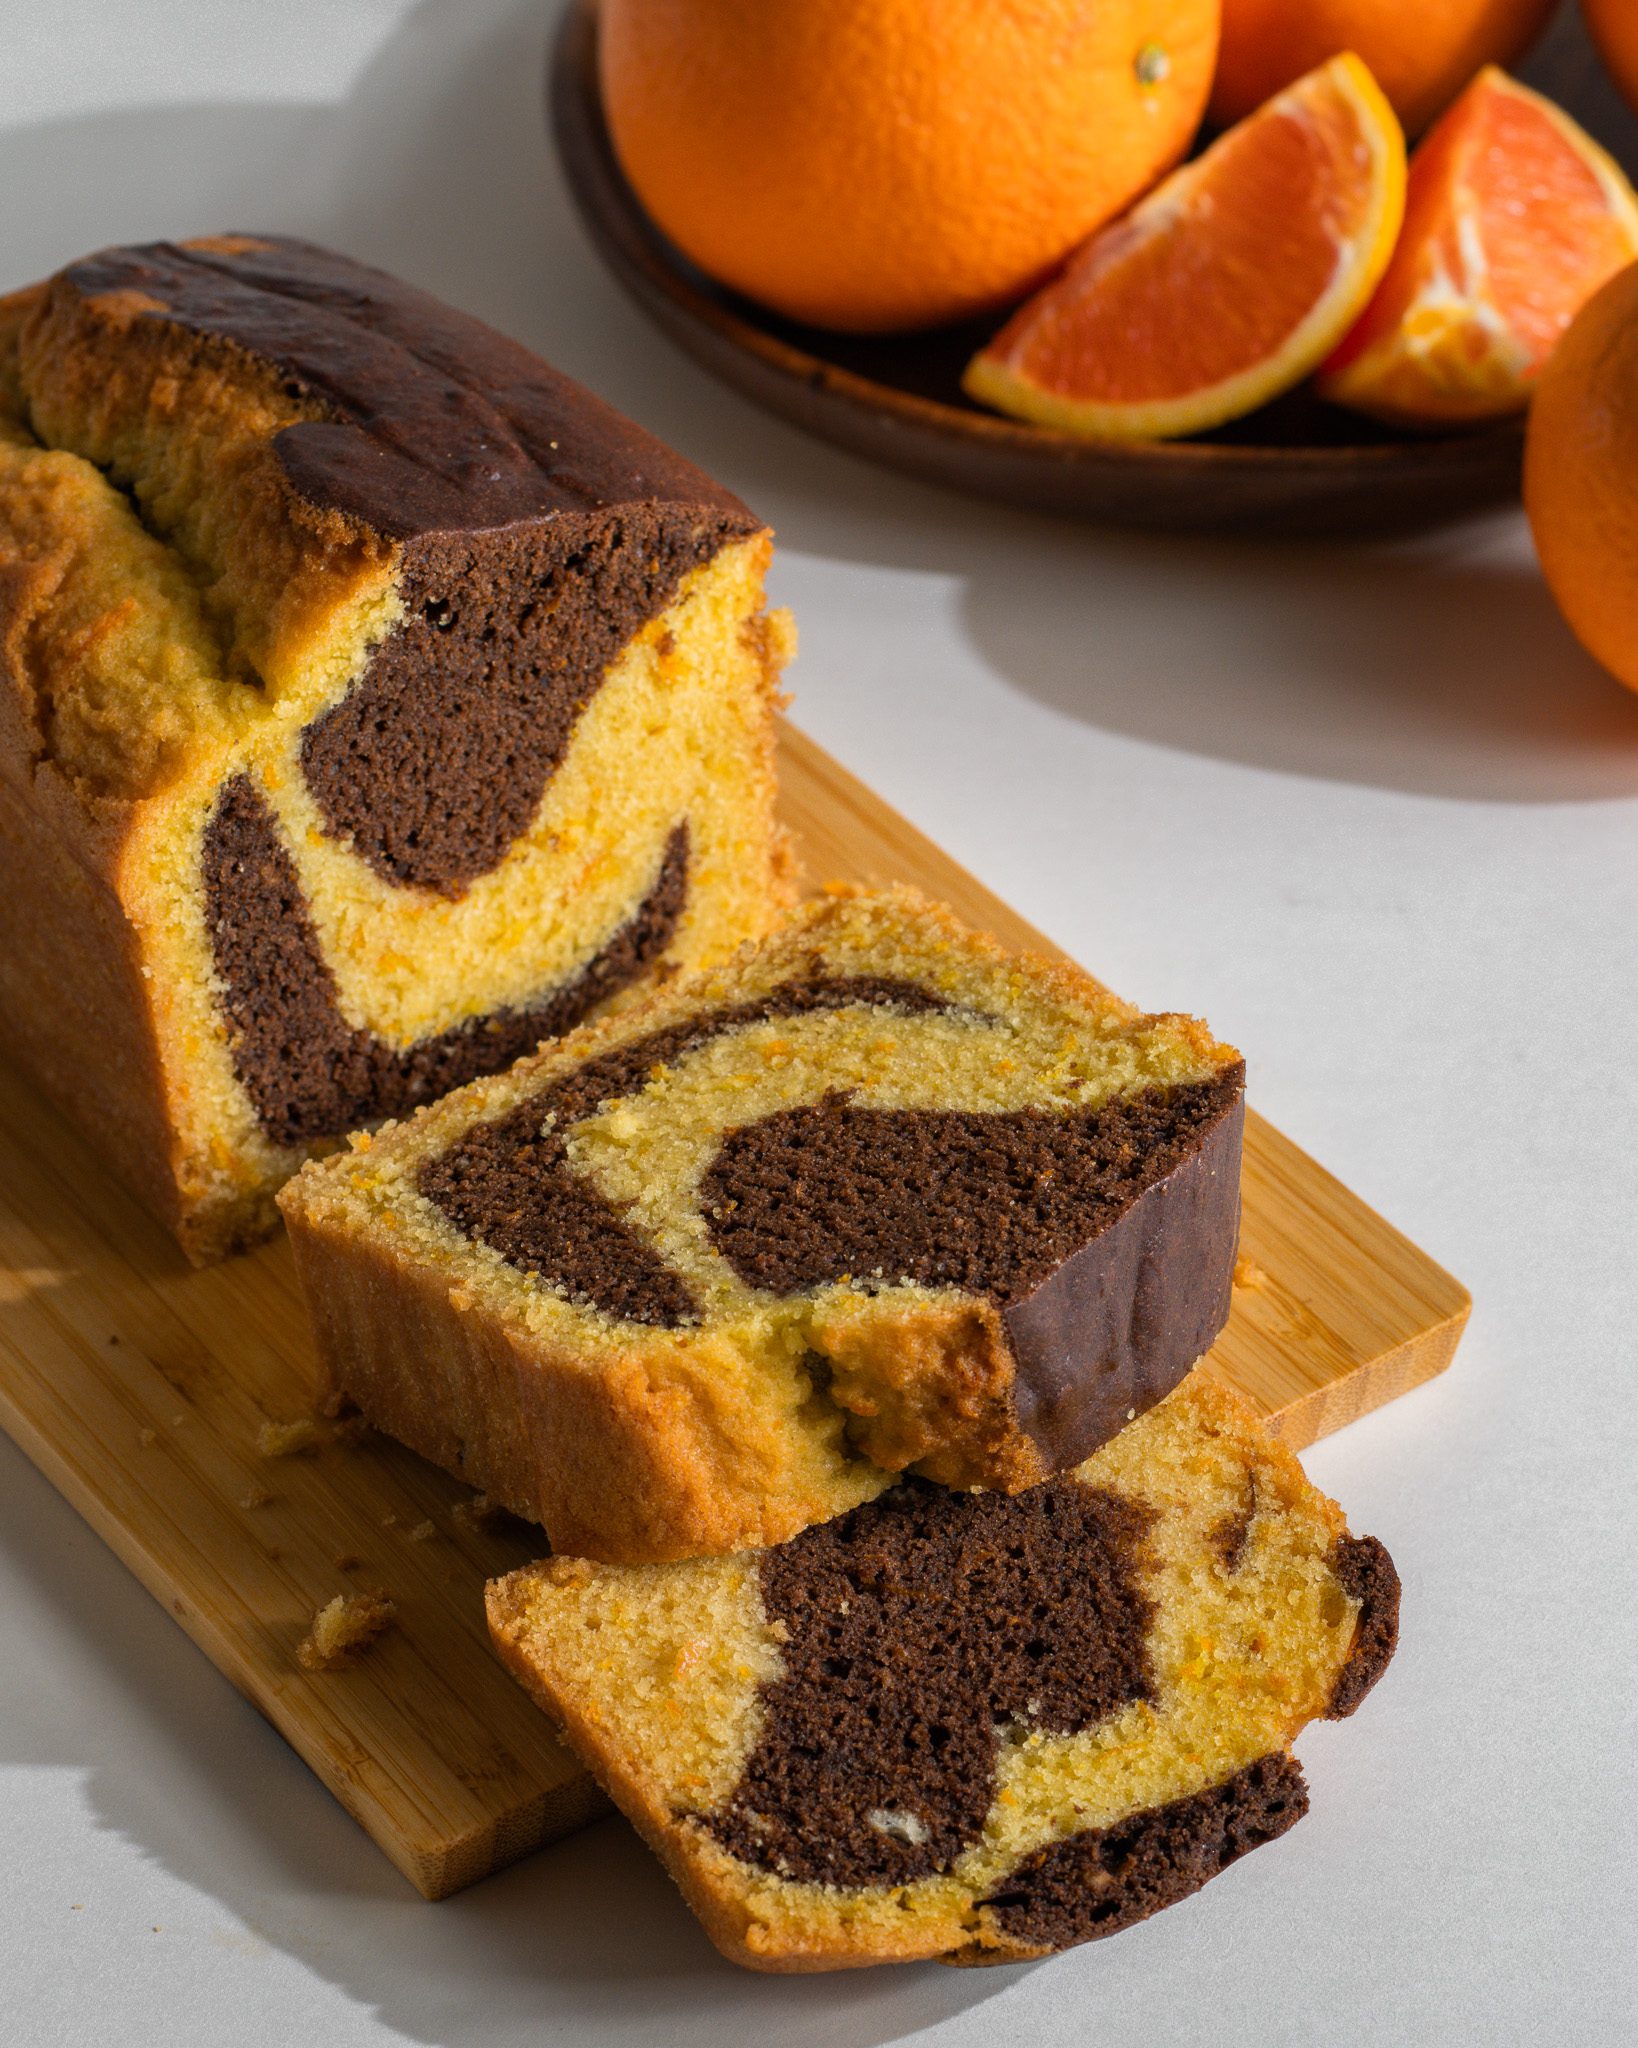
If you love the classic pairing of chocolate and orange, this Chocolate Orange Marble Loaf Cake is the kind of bake that feels both comforting and a little special. It’s soft, moist, and beautifully swirled with two flavors that complement each other perfectly. The citrusy brightness from fresh orange balances the richness of chocolate, creating a loaf cake that’s flavorful without being overly sweet.
The marbled pattern makes every slice look unique, with ribbons of chocolate running through a fragrant orange cake base. It’s the type of cake that works just as well for a quiet afternoon tea as it does for sharing with friends and family.
Best of all, this recipe is completely eggless and can easily be made dairy-free with a few simple swaps.
Tools You’ll Need to Make Chocolate Orange Loaf Cake
Make your baking experience even better with these essentials:
Now that you’re all set with the right tools, let’s get baking!
Chocolate Orange Loaf Cake – eggless! Ingredients
Orange Zest: Adds bright citrus aroma and fresh orange flavor, giving this eggless chocolate orange marble loaf cake its signature citrus fragrance.
Cane Sugar or Castor Sugar: Sweetens the cake and helps create a soft, tender crumb while enhancing the orange zest flavor.
Milk (dairy or dairy-free): Provides moisture and keeps the eggless loaf cake soft, light, and fluffy.
Fresh Orange Juice: Boosts the natural citrus flavor and keeps the chocolate orange loaf cake fresh and moist.
Vanilla Extract: Adds warmth and depth, balancing the bright citrus notes in this orange loaf cake.
Butter and Oil: Adds richness and tenderness, giving the cake a soft bakery-style texture.
All-Purpose Flour: Provides structure while keeping the crumb soft and delicate.
Baking Powder & Baking Soda: Work together to help the cake rise and create a light, fluffy texture.
Salt: Enhances the sweetness and intensifies the chocolate and orange flavors.
Cocoa Powder: Creates the rich chocolate batter used for the classic chocolate orange marble swirl.
How to Make Orange Loaf Cake?
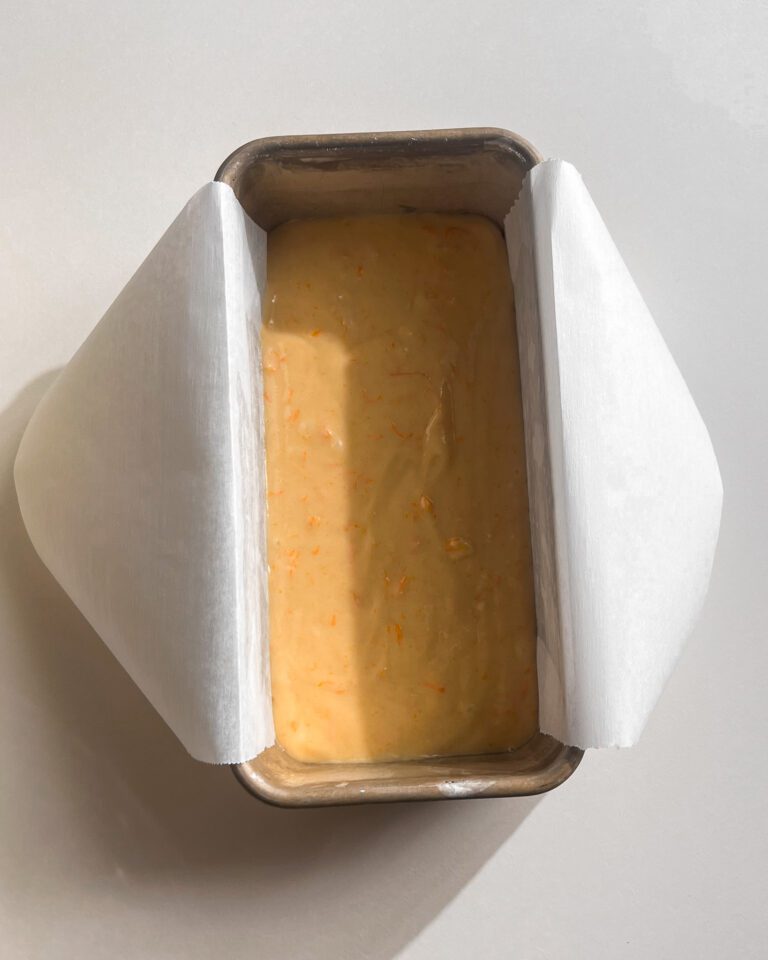
Preheat the oven to 350°F (175°C). Grease an 8- or 9-inch loaf pan and line it with parchment paper, leaving an overhang on the sides for easy removal.
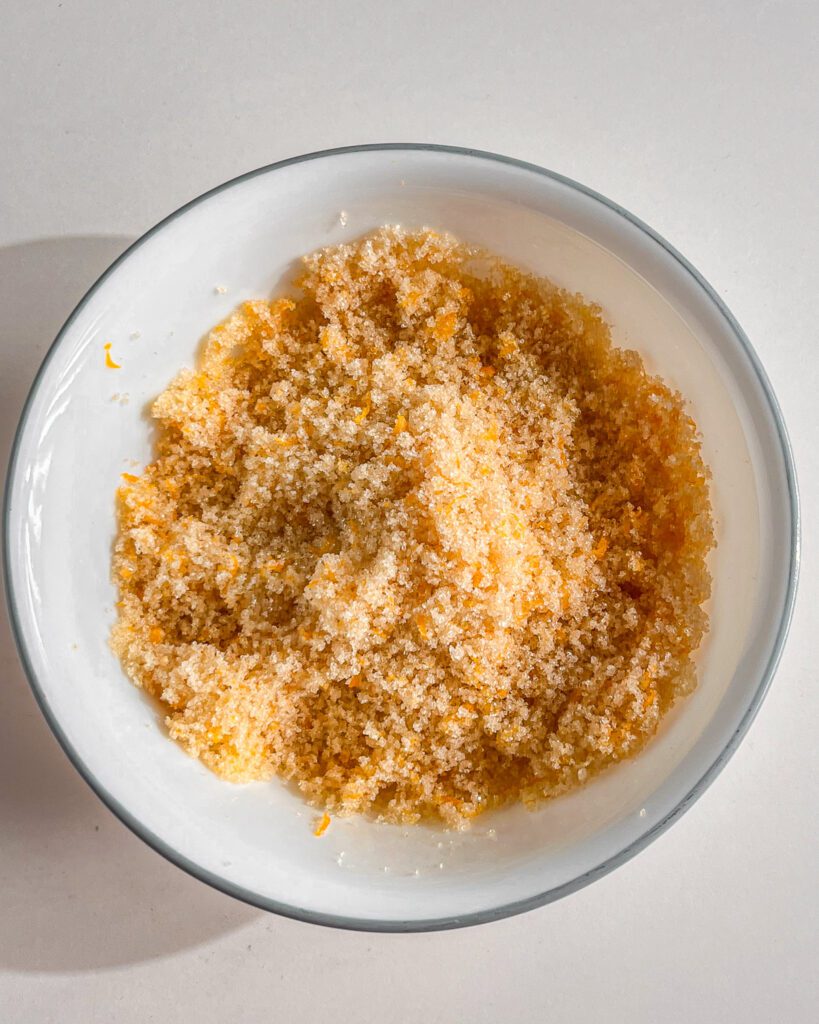
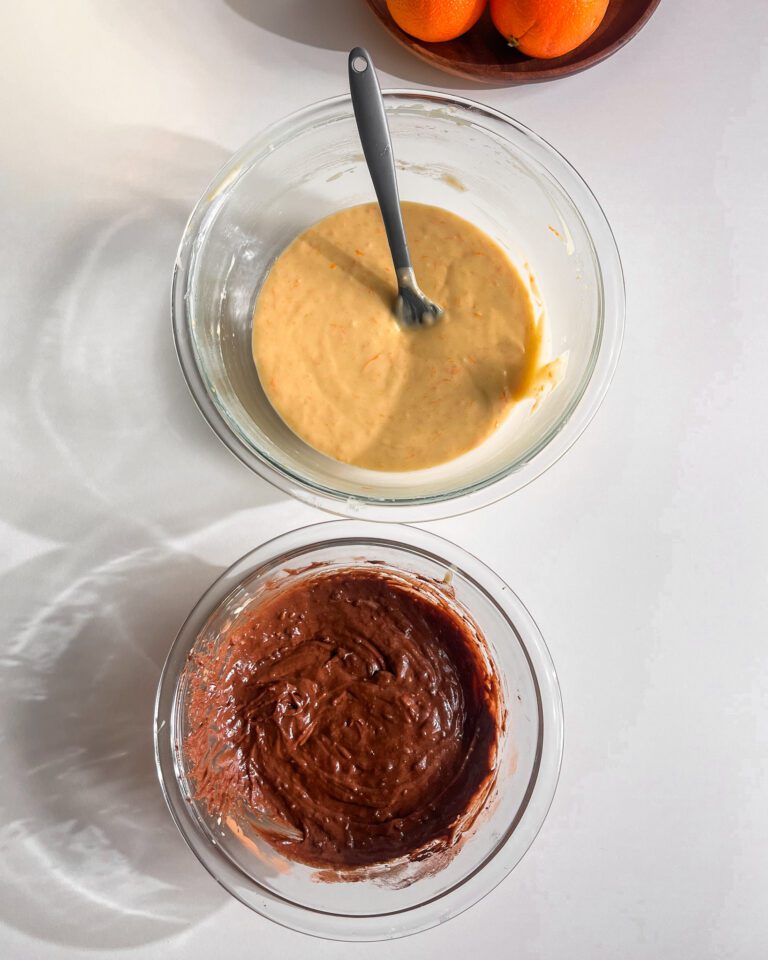
Zest the orange first, then squeeze the juice and set both aside. In a small bowl, combine the sugar and orange zest. Rub the zest into the sugar using your fingers to release the citrus oils and enhance the flavor.
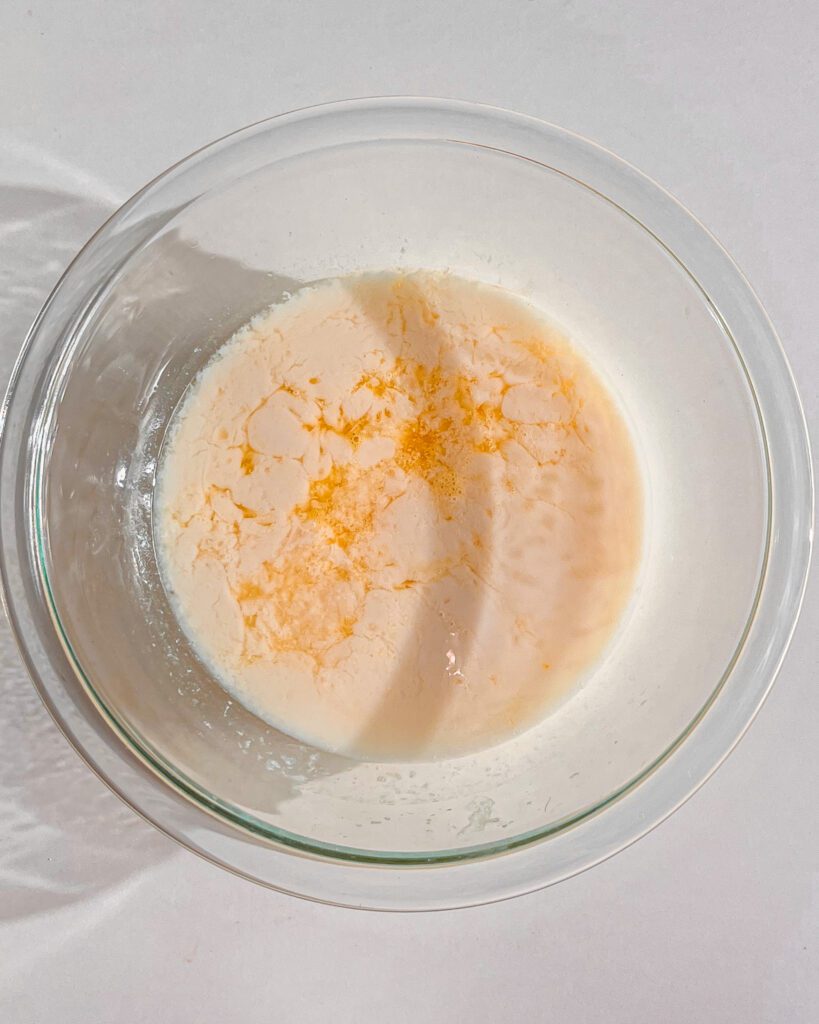
In another bowl, whisk together the milk, fresh orange juice, and vanilla extract. Add the orange-zest sugar mixture and stir until well combined.
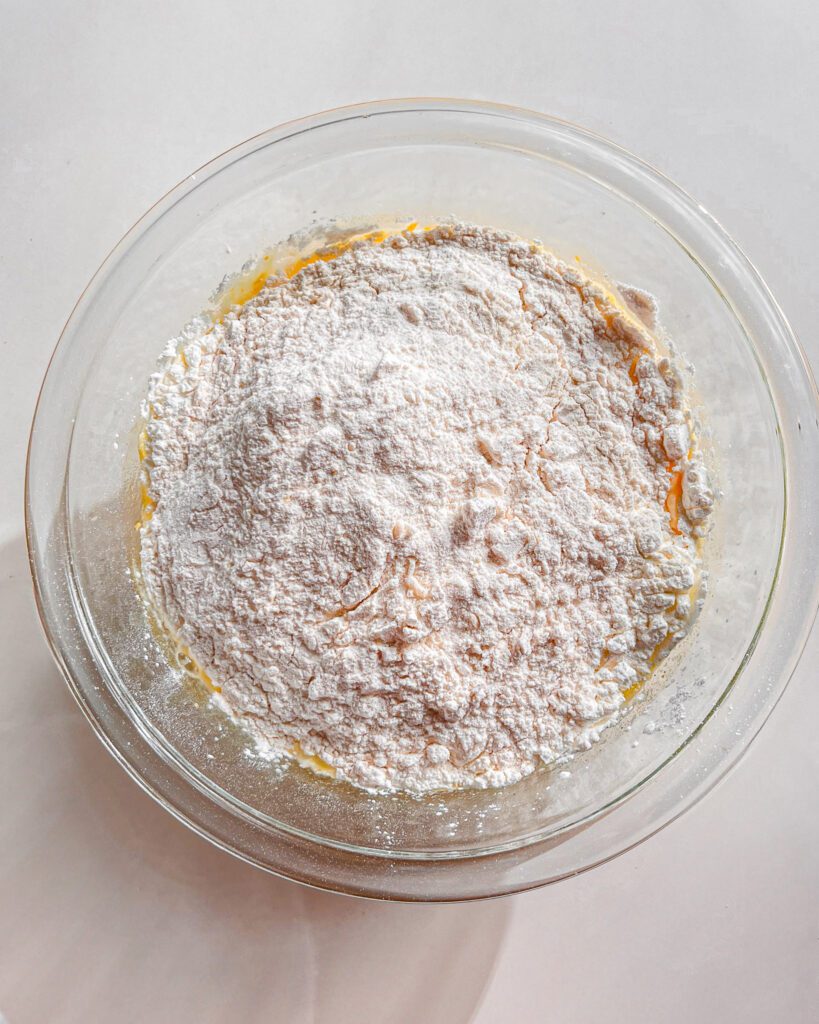
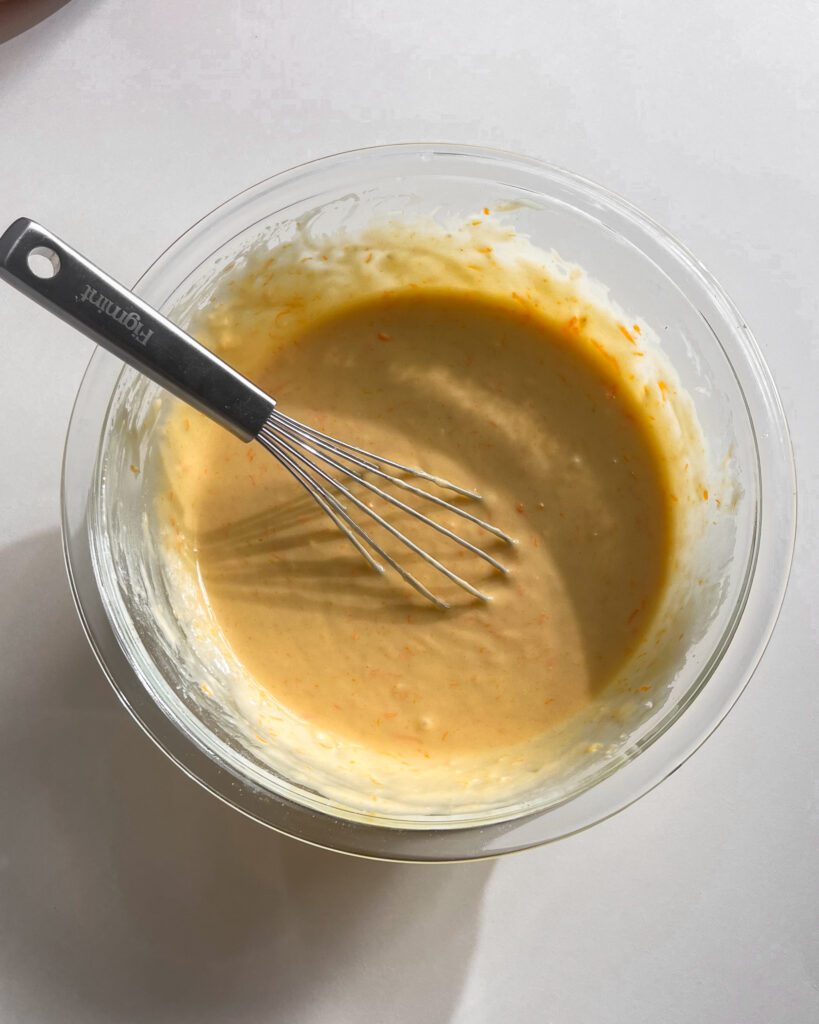
Whisk together the flour, baking powder, baking soda, and salt, then add the dry ingredients to the milk-orange mixture and whisk until smooth. Add the melted butter and oil to the batter and mix until fully combined.
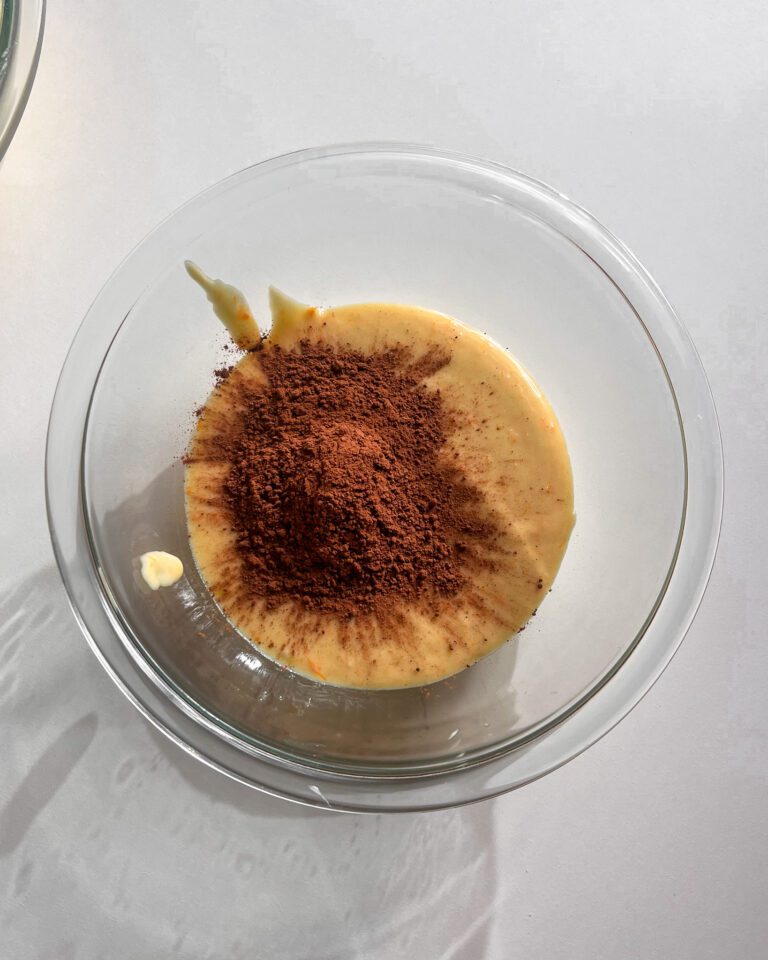
Transfer about one-third of the batter to a separate bowl. Add the sifted cocoa powder with water then stir to create the chocolate batter.
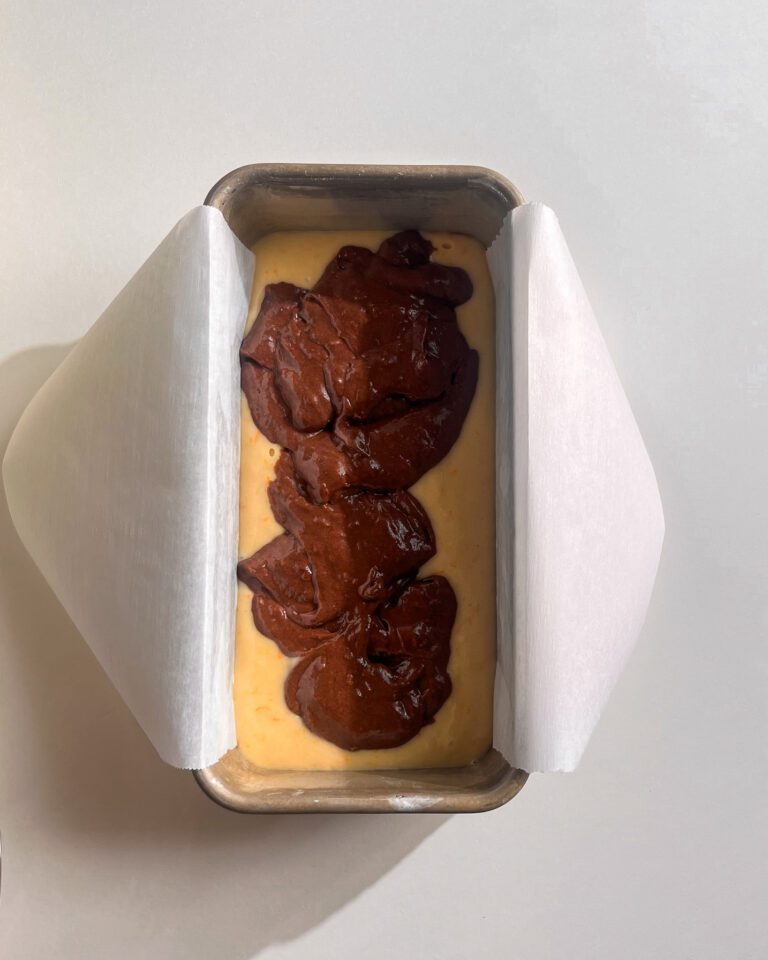
Pour the batter into the prepared loaf pan, alternating between the orange and chocolate batters. Start with the orange batter followed by the chocolate batter, aiming for about two layers of each flavor. Gently tap the pan on the counter to level the batter. If desired, lightly swirl with a knife to create a marble effect.
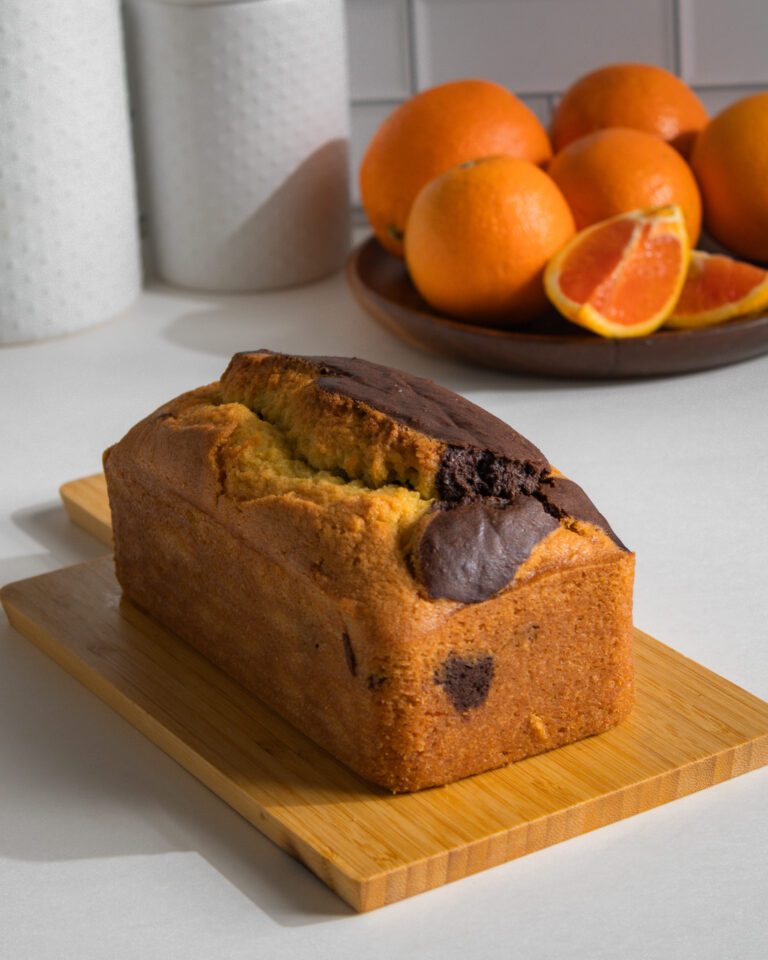
Bake for 45–50 minutes, or until the top is set and a toothpick inserted into the center comes out clean. The loaf will have a crust when freshly baked, which will soften as the cake cools. The flavor deepens even more the next day.
Let the cake cool in the pan for about 25 minutes, then lift it out using the parchment overhang and transfer to a wire rack to cool completely.
Store in an airtight container or wrap in foil to keep the loaf moist for 2–3 days at room temperature or up to 7 days in the refrigerator.
How to Create the Marble Effect
Once the batter is prepared, a portion of it is mixed with cocoa powder to create the chocolate layer. The orange batter and chocolate batter are then spooned into the loaf pan in alternating layers.
Using a knife or skewer, gently swirl the batters together. The key is to swirl lightly or skip this step so the two colors stay distinct and create that beautiful marbled pattern once baked.
Tips for the Best Marble Loaf Cake
Use fresh orange zest to get the most vibrant citrus flavor and color.
Make sure not to over-mix the batter once the flour is added, as this can make the cake dense.
When creating the marble pattern, swirl gently rather than mixing the batters completely together Or you can skip swirling and let it bake naturally.
Allow the cake to cool completely before slicing so the crumb sets properly and the marbled pattern stays clean.
You can use any type of sweet, juicy orange, such as Navel, Cara Cara, or Valencia oranges. Navel oranges are commonly used in baking due to their sweetness and ease of peeling. Just make sure to use fresh oranges for the best flavor and aroma!
You can replace the butter with oil, like sunflower oil, avocado oil or vegetable oil. Keep in mind that different oils may slightly alter the flavor or texture of the cake.
The cake is done when it’s firm to the touch and a toothpick or cake tester inserted into the center comes out clean. Baking times can vary depending on your oven, so it’s a good idea to start checking around 45 minutes.
Although I have not tried. You could bake this cake in a regular round cake pan or square pan. Just be sure to adjust the baking time, as the cake may bake faster or slower in a different pan size.
To make orange zest, simply use a microplane or a fine grater to gently scrape the outer peel of the orange. Be careful not to grate too deep, as the white pith underneath can be bitter. You only want the bright, flavorful outer layer. Zest one orange to get enough for this recipe!
Watch This Video For Making Jumbo Chocolate Oreo Muffins
Did You Make This Chocolate Orange Loaf Cake Recipe?
I need to see your delicious creations! Whether you’re whipping up a batch for a cozy morning treat or impressing friends with your baking skills, these muffins are sure to be a hit. Snap a photo, tag me @pastrybysaloni, and let’s celebrate your masterpiece together!
If you’re loving this recipe, you’re in for a treat, literally. My collection of eggless and dairy-free bakes is packed with indulgent goodies, from rich, fudgy desserts to light, buttery pastries (minus the butter, of course!). Trust me, your sweet tooth will thank you!
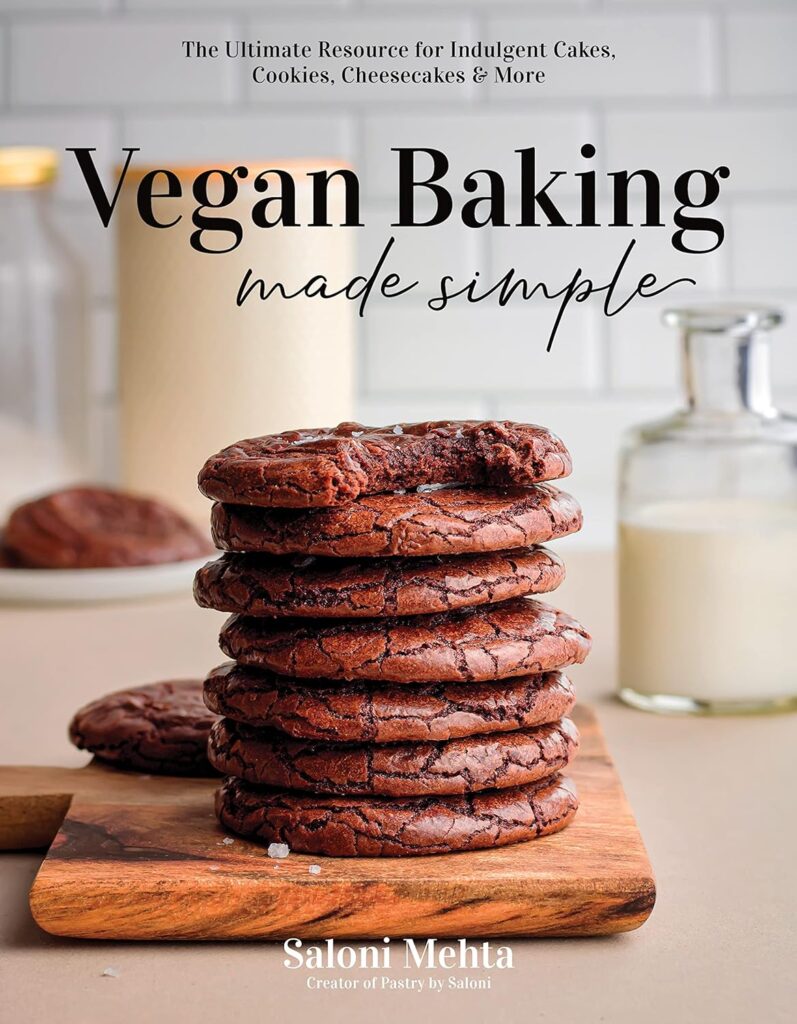
And finally… grab a copy of my cookbook Vegan Baking Made Simple – this is perfect for anyone looking to learn more about baking traditional recipes without dairy or eggs! Available on Amazon HERE
No ratings yet
Chocolate Orange Marble Loaf Cake (Eggless)
Soft and moist chocolate orange marble loaf cake made without eggs. A beautiful swirl of citrus and chocolate flavors with an easy dairy-free option.
180mlMilkat room temperature; see notes for options
90mlOrange Juicefreshly squeezed
1tspVanilla Extract
245gAll Purpose Flour
1tspBaking Powder
1/4tspBaking Soda
1/8tspSalt
75gButtermelted; see notes for option
45mlSunflower Oilor any neutral oil of choice
Chocolate Batter
20g Cocoa Powder
30mlWater
Instructions
For the Chocolate Orange Loaf
Preheat the oven to 350°F (175°C). Grease an 8- or 9-inch loaf pan and line it with parchment paper, leaving an overhang on the sides for easy removal.
Zest the orange first, then squeeze the juice and set both aside. In a small bowl, combine the sugar and orange zest. Rub the zest into the sugar using your fingers to release the citrus oils and enhance the flavor.
In another bowl, whisk together the milk, fresh orange juice, and vanilla extract. Add the orange-zest sugar mixture and stir until well combined.
Whisk together the flour, baking powder, baking soda, salt and add the dry ingredients to the milk-orange mixture. Mix until combined.
Add the melted butter and oil to the batter and mix until fully incorporated and smooth.
Transfer about one-third of the batter to a separate bowl.Add the sifted cocoa powder with water then stir to create the chocolate batter.
Pour the batter into the prepared loaf pan, alternating between the orange and chocolate batters. Start with the orange batter followed by the chocolate batter, aiming for about two layers of each flavor.
Gently tap the pan on the counter to level the batter. If desired, lightly swirl with a knife to create a marble effect. I did not swirl the batter.
Bake for 45–50 minutes, or until the top is set and a toothpick inserted into the center comes out clean. The loaf will have a crust when freshly baked, which will soften as the cake cools. The flavor deepens even more the next day.
Let the cake cool in the pan for about 25 minutes, then liftit out using the parchment overhang and transfer to a wire rack to cool completely.
Store in an airtight container or wrap in foil to keep the loaf moist for 2–3 days at room temperature or up to 7 days in the refrigerator.
Notes
Cup vs weighing scale: The US customary cup measurement serves as a rough estimate, as it can have uncertainties, so for precise results, it's recommended to weigh your ingredients using a digital scale in grams.
Before you start to make any recipe, measure and prepare your ingredients so the process will go smoothly and easily.
For teaspoon (tsp) and tablespoon (tbsp) measurements, please use measuring spoons and not the type of spoons you eat with for accuracy.
Milk: You can use any dairy-free unsweetened milk (like almond, soy, oat) or dairy based whole milk
Butter: You can use salted Dairy-free butter sticks or any butter of your choice
Sugar: Cane sugar can be substituted with granulated sugar or castor sugar. Ensure the sugar is vegan-friendly (some sugars are processed with bone char) or use organic cane sugar.
Meet Saloni
I’m a former pastry chef with a love for breads, cakes and everything in between! My recipes are easy to follow, egg free and are designed to be shared with others!
I usually use natural unsweetened cocoa powder in my recipes unless otherwise mentioned to keep the recipes cost effective.
And thank you so much for your sweet message 🥹❤️ That truly means a lot! At the moment I don’t have openings, but you can always keep an eye on my website and social pages for any future opportunities.


4 Responses
Hi. which cocoa powder do you use for this recipe? dutch or natural unsweetened?
saloni, I wish to join your team. how can I go about it?
Hi Srishti
I usually use natural unsweetened cocoa powder in my recipes unless otherwise mentioned to keep the recipes cost effective.
And thank you so much for your sweet message 🥹❤️ That truly means a lot! At the moment I don’t have openings, but you can always keep an eye on my website and social pages for any future opportunities.
hi. is 75 gms butter before melting or after melting?
Hi
The recipe calls for 75g melted butter whether you measure it before or after melting, it should still equal 75g.