prep time: 30 min | rest & chill time 2 hrs | total time: 3 hrs
Indulge in a slice of nostalgia with this Eggless Black Forest Cake! It is vegan-friendly, and irresistibly delicious. Rich, moist chocolate layers meet sweet cherries and fluffy whipped cream for a classic treat everyone can enjoy!
Learn how to make a rich, moist, and decadent eggless Black Forest Cake at home with this easy, step-by-step recipe. Made with soft layers of eggless chocolate sponge cake, sweet cherry filling, and fluffy dairy-free whipped cream, this classic German-inspired dessert is perfect for birthdays, holidays, or any celebration.
In my family, Black Forest Cake was the go-to dessert for every celebration. Though we’re not German, its rich chocolate layers, fluffy whipped cream, and juicy cherries became a cherished tradition. It reminds me of birthdays, anniversaries, and the happy moments we shared around the table. For me, it’s more than just a cake it’s a bite of home and a sweet piece of the past.
What makes this homemade Black Forest Cake even better? It’s completely egg-free and can be made fully dairy-free, too. You can use fresh or frozen cherries, or keep it simple with canned cherry pie filling. However you choose to make it, this vegan-friendly Black Forest Cake is sure to impress.
Ready to bake a showstopping, eggless version of this classic chocolate cherry cake? Let’s dive into the recipe!
Equipment You’ll Need
To make this Eggless Black Forest Cake, you’ll need the following tools:
Milk: Acts as the primary liquid in the batter, hydrating the dry ingredients and helping to dissolve sugar. When combined with vinegar, it creates a buttermilk substitute, which adds tenderness and acidity to activate the baking soda.
White Vinegar (or Lemon Juice): It slightly curdles the milk, mimicking buttermilk, which enhances the cake’s texture and moisture.
Plain Unsweetened Yogurt: Adds moisture and a subtle tang to the cake. Its creaminess enriches the texture, while its acidity supports leavening when used with baking soda.
Castor Sugar (or Cane Sugar): Sweetens the cake and contributes to its tender crumb. Its fine texture dissolves easily into the batter, promoting even mixing and consistent sweetness.
Light Brown Sugar: Provides additional sweetness along with a mild molasses flavor, which deepens the chocolate notes. It also adds moisture and a slightly fudgier texture compared to white sugar alone.
Vegetable or Sunflower Oil: The fat component that makes the cake soft and moist. Oil stays liquid at room temperature, keeping the cake tender for longer than butter-based recipes.
Vanilla Extract: Enhances the flavor of the chocolate and adds a warm, sweet aroma. Even in chocolate cakes, vanilla provides balance and depth
Cocoa Powder: The primary chocolate flavor in the sponge. It also contributes to the cake’s structure and color. Natural cocoa works best in acidic recipes, helping the cake rise when paired with baking soda.
Baking Powder: A chemical leavening agent that helps the cake rise by releasing carbon dioxide when exposed to heat. It gives the sponge a light, fluffy texture.
Baking Soda: Reacts with acidic ingredients (like vinegar and yogurt) to create lift and airiness in the batter. Essential for achieving a soft, well-risen cake in eggless recipes.
All-Purpose Flour: Forms the structural base of the cake. When hydrated and mixed, the proteins form gluten, which holds the cake together while allowing it to remain soft.
Salt: Balances the sweetness and enhances the chocolate flavor. A small amount brings out the depth in the other ingredients.
Ingredients for the Cherry Filling
Skip this step if you’re using canned cherry filling
Cherries (fresh, frozen, or jarred, pitted and quartered): The star of the filling, cherries provide the signature flavor and texture of Black Forest Cake. When cooked down, they release their juices, soften, and create a sweet-tart base that pairs beautifully with chocolate and cream.
Cranberry Juice or Water: Acts as the liquid medium for simmering the cherries. Cranberry juice adds extra tartness and depth of flavor, while water is a neutral option that lets the cherries shine on their own.
Cane Sugar (or Castor Sugar): Sweetens the cherry mixture and helps balance the tartness of the fruit and any added juice. It also contributes to a glossy, syrupy consistency when heated.
Corn Starch: Serves as the thickening agent. When heated with liquid, it gels to create a smooth, spoonable consistency that holds the cherries together in the filling and keeps it from leaking into the cake layers.
Lemon Juice or Kirsch (Cherry Liqueur): Lemon juice brightens the flavor and enhances the natural acidity of the fruit, while Kirsch adds authenticity and a deeper cherry aroma. Either option adds complexity and balances the sweetness of the filling.
Ingredients for the Vanilla Whipped Cream
Whipped Cream: The base of the frosting and filling layer. It provides lightness, creaminess, and volume. When whipped, it traps air, creating a fluffy texture that balances the richness of the chocolate cake and the tartness of the cherry filling.
Powdered Sugar: Sweetens the whipped cream while maintaining a smooth texture. Because it dissolves easily, it helps stabilize the whipped cream slightly and keeps it from becoming grainy.
Vanilla Extract: It rounds out the taste and complements both the chocolate and cherry components of the cake.
Kirsch (optional): A cherry liqueur traditionally used in authentic Black Forest Cake. Optional but recommended for a more classic and complex taste.
Ingredients for the Toppings
Cherries: Used as a garnish, cherries visually tie the cake to its signature filling and add a fresh, vibrant pop of color. You can use fresh, maraschino, or jarred cherries depending on preference and availability.
Chocolate Shavings: Provide a rich, decorative finish that echoes the chocolate sponge. Shavings can be made from dark, semi-sweet, or even milk chocolate depending on how intense you want the flavor.
How to Make the Chocolate Sponge Cake
Preheat the oven to 350°F (175°C). Grease and line your cake tins with baking paper. You can use three 6-inch (15 cm) round pans or two 8-inch (20 cm) pans. This recipe uses three 6-inch pans for a taller, layered cake.
In a large mixing bowl, whisk together the milk, vinegar, and yogurt. Let the mixture sit for about 5 minutes to allow it to curdle slightly, creating a buttermilk-like texture.
Add the castor sugar, light brown sugar, oil, and vanilla extract. Mix well until the sugar is dissolved.
Sift the cocoa powder, baking powder, baking soda, all-purpose flour, and salt directly into the wet mixture. Gently fold everything together using a spatula or whisk, stirring just until a smooth, lump-free batter forms. Avoid overmixing.
Evenly divide the batter between the prepared cake tins. Bake for 20–22 minutes, or until the tops are set and a toothpick inserted into the center comes out clean.
Let the cakes cool in the tins for 5–10 minutes, then transfer them to a wire rack to cool completely.
Once cooled, trim a thin layer off the top of each cake to level them before assembling.
How to Make the Cherry Filling
In a medium saucepan, combine half of the chopped cherries with the cranberry juice (or water), sugar, and cornstarch. Place the pan over medium heat and stir as the mixture begins to simmer and thicken.
Once it reaches a gentle boil, reduce the heat to low and let it bubble for about 30 seconds. This step cooks out the raw taste of the starch and allows the mixture to thicken properly.
Remove the saucepan from the heat and stir in the remaining cherries along with the lemon juice or Kirsch. Mix well to evenly combine.
Transfer the cherry filling to a bowl and press a piece of plastic wrap directly onto the surface to prevent a skin from forming. Chill in the refrigerator for 4 to 5 hours, or until completely cold and thickened.
Before using, give the chilled filling a gentle stir with a spatula to ensure it’s smooth and evenly mixed.
How to Make the Vanilla Whipped Cream
In a chilled mixing bowl, pour in the whipped cream. Add the powdered sugar and vanilla extract. If you’re using Kirsch, add it at this stage as well.
Using a hand mixer or stand mixer, whip the mixture on medium-high speed until stiff peaks form.
Once whipped, use the cream immediately to frost the cake, or store it in the refrigerator until you’re ready to assemble.
How to Assemble the Black Forest Cake
Place the first layer of chocolate sponge cake on a serving plate or cake board. Lightly brush the top with cherry syrup, either from the homemade filling or canned cherries, to keep the cake moist.
Spread an even layer of vanilla whipped cream over the cake, then pipe a ring of whipped cream around the edge to help hold the filling in place. Spoon a generous amount of cherry filling inside the ring and gently spread it across the surface.
Carefully place the second cake layer on top and repeat the process: brush with syrup, spread whipped cream, and add the cherry filling.
Position the final cake layer on top. Cover the entire cake top and sides with whipped cream. Use an offset spatula to smooth the surface or create swirls and textures, depending on your desired finish.
Decorate the top with piped whipped cream, whole or halved cherries, chocolate shavings or curls, and a light dusting of cocoa powder for a classic Black Forest look.
Chill the assembled cake in the refrigerator for at least 2 to 4 hours before slicing. This allows the layers to set and the flavors to meld beautifully
Absolutely. This recipe has been tested with dairy-free alternatives. Use plant-based milk such as almond or oat milk, and choose a non-dairy whipping cream for the frosting.
Whipped cream is traditional and provides a light, airy texture that complements the cherries and chocolate. Buttercream is richer but can overpower the delicate balance of flavors.
Yes. Canned cherries work well. Just be sure to drain them before use and reserve the syrup to brush over the cake layers for added moisture and flavor.
Yes. You can bake the sponge layers and prepare the cherry filling up to a day in advance. For best results, assemble the cake a few hours before serving to maintain freshness and texture.
Lightly brush the cake layers with cherry syrup—just enough to add moisture without soaking them. Avoid over-saturating, which can make the sponge too wet and unstable.
Watch this Video for Making Chocolate Black Forest Cheesecake
Whether you baked this Eggless Black Forest Cake to celebrate something special, surprise someone you love, or simply satisfy a chocolate-cherry craving, I hope it brought a little delight to your day. There’s something timeless and comforting about this classic dessert — rich chocolate layers, tart cherries, and cloud-like whipped cream, all made without eggs.
If you gave this recipe a try, I’d love to see your beautiful cake! Tag me @pastrybysaloni on social media and share how it turned out — whether it’s your first attempt or a new family favorite, your baking inspires others more than you know.
Craving more eggless desserts that don’t skimp on flavor? Here are a few you might love next:
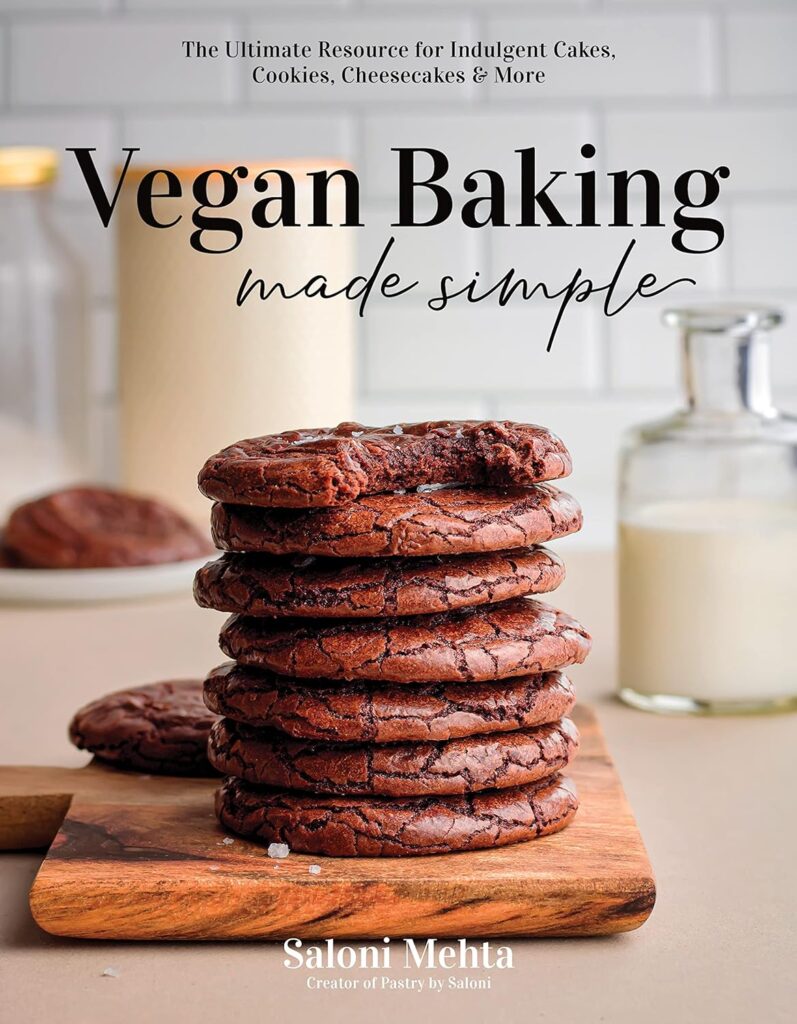
Want even more fuss-free, eggless baking ideas? Grab a copy of my cookbook Vegan Baking Made Simple — filled with approachable, decadent recipes you can make anytime, no matter your skill level. Find it on Amazon HERE.
Meet Saloni
I’m a former pastry chef with a love for breads, cakes and everything in between! My recipes are easy to follow, egg free and are designed to be shared with others!
Indulge in a slice of nostalgia with this Eggless Black Forest Cake! It is vegan-friendly, and irresistibly delicious. Rich, moist chocolate layers meet sweet cherries and fluffy whipped cream for a classic treat everyone can enjoy!
Cherry Filling Ingredients (skip this step if using canned cherry filling!)
220gCherries, fresh, frozen or jarred, pitted and cut in quarters
80mlCranberry Juice or Water
100gCane Sugar (or Castor Sugar)
20gCorn Starch
30mlLemon Juice or Kirsch(cherry liqueur)
Vanilla Whipped Cream Ingredients
300mlWhipped Cream*
90gPowdered Sugar
2tspVanilla Extract
1tbspKirsch, optional
Topping
Cherries
Chocolate Shavings
Instructions
How to Make the Chocolate Sponge Cake
Preheat the oven to 350°F (175°C). Grease and line your cake tins with baking paper. You can use three 6-inch (15 cm) round pans or two 8-inch (20 cm) pans. This recipe uses three 6-inch pans for a taller, layered cake.
In a large mixing bowl, whisk together the milk, vinegar, and yogurt. Let the mixture sit for about 5 minutes to curdle slightly, creating a buttermilk-like texture.
Add castor sugar, light brown sugar, oil, and vanilla extract. Mix until sugars dissolve and the mixture is smooth.
Sift cocoa powder, baking powder, baking soda, flour, and salt into the wet mixture. Gently fold until smooth and lump-free, without overmixing.
Evenly divide the batter between the prepared cake tins. Bake for 20–22 minutes, or until the tops are set and a toothpick inserted into the center comes out clean.
Let the cakes cool in the tins for 5–10 minutes, then transfer them to a wire rack to cool completely.
Once cooled, trim a thin layer off the top of each cake to level them before assembling.
How to Make the Cherry Filling
In a medium saucepan, combine half of the chopped cherries with the cranberry juice (or water), sugar, and cornstarch. Place the pan over medium heat and stir as the mixture begins to simmer and thicken.
Once it boils gently, reduce heat to low and let it bubble for 30 seconds to cook out the starch taste and thicken.
Remove the saucepan from the heat and stir in the remaining cherries along with the lemon juice or Kirsch. Mix well to evenly combine.
Transfer the cherry filling to a bowl, cover with plastic wrap pressed directly on the surface, and chill for 4–5 hours until cold and thickened.
Before using, give the chilled filling a gentle stir with a spatula to ensure it’s smooth and evenly mixed.
How to Make the Vanilla Whipped Cream
In a chilled mixing bowl, pour in the whipped cream. Add the powdered sugar and vanilla extract. If you're using Kirsch, add it at this stage as well.
Using a hand mixer or stand mixer, whip the mixture on medium-high speed until stiff peaks form. This means the cream should hold its shape when you lift the beaters.
Once whipped, use the cream immediately to frost the cake, or store it in the refrigerator until you're ready to assemble. For best texture, use within a few hours.
How to Assemble the Black Forest Cake
Place the first chocolate sponge layer on a serving plate and lightly brush the top with cherry syrup to keep it moist.
Spread an even layer of vanilla whipped cream over the cake, then pipe a ring of whipped cream around the edge to help hold the filling in place. Spoon a generous amount of cherry filling inside the ring and gently spread it across the surface.
Carefully place the second cake layer on top and repeat the process: brush with syrup, spread whipped cream, and add the cherry filling.
Place the final cake layer on top. Cover the top and sides with whipped cream, smoothing or swirling with an offset spatula as desired.
Decorate the top with piped whipped cream, whole or halved cherries, chocolate shavings or curls, and a light dusting of cocoa powder for a classic Black Forest look.
Chill the assembled cake in the refrigerator for at least 2 to 4 hours before slicing. This allows the layers to set and the flavors to meld beautifully
Notes
Cup vs. Gram Measurements: U.S. cup measurements are approximate and can vary depending on how ingredients are packed. For accuracy and consistency, especially in baking, it is recommended to use a digital kitchen scale and measure ingredients in grams.
Milk: Both dairy and non-dairy options work in this recipe. Use any unsweetened plant-based milk such as almond, soy, or oat milk, or opt for whole dairy milk based on your preference.
Dark Chocolate: Use semi-sweet baking chocolate chips or 60% couverture chocolate for best results. For a vegan version, ensure the chocolate is dairy-free—look for dark or semi-sweet chocolate labeled vegan.
Whipping Cream: For a vegan or dairy-free option, choose unsweetened plant-based whipping cream (such as Country Crock Plant Cream, Trader Joe’s, or Califia Farms). Alternatively, use any full-fat dairy whipping cream.
Sugar: Cane sugar may be substituted with granulated or castor sugar. If making a vegan dessert, ensure the sugar is vegan-friendly—some conventional sugars are processed using bone char. Organic cane sugar is a safe option.
hi saloni , may i know we need to use dark red cherries or red cherries for homemade compote?
also as its not the season of cherries im not able to find fresh cherries so was thinking of using fruit fillings . We get two type of compotes here one is dark red cherry filling and the other is red cherry filling . Which one to use dark cherries or red cherries ? thank you
Black Forest cake is a classic German dessert layered with rich chocolate sponge, whipped cream, and cherries, creating a perfect balance of sweetness and slight tartness.
Hi!
Made this today and tastes delicious! I wanted to ask if you ever made this with vegan cream and got it to be stiff enough to pipe?
I’m not super used to whipping vegan heavy cream, so might have underwhipped (although it did spend a lot of time in my KitchenAid…), but it was far from stable enough to decorate like you did!
Should I have gone longer? I was afraid I might overdo it (does vegan cream get lumpy and too far gone like regular heavy cream?)
Hi Glenda
Thanks so much, and I’m glad you liked it! Yes, I’ve made it with vegan cream a few times — some whip up better than others. For piping, I’ve had the best luck with Silk Heavy Whipping Cream Alternative, Aldi Brand, Country Crock Plant Cream. All get decently stiff, but you do have to whip them a bit longer than dairy cream, and they can be sensitive to temperature (chilled cream, chilled bowl and whisk help!).
And yep — vegan cream can split if overwhipped, though it’s a bit more forgiving. If yours was too soft, it was probably underwhipped. Try going a bit longer next time and maybe add more powdered sugar to help hold shape. Let me know how it goes!


5 Responses
hi saloni , may i know we need to use dark red cherries or red cherries for homemade compote?
also as its not the season of cherries im not able to find fresh cherries so was thinking of using fruit fillings . We get two type of compotes here one is dark red cherry filling and the other is red cherry filling . Which one to use dark cherries or red cherries ? thank you
اريد تجربتها اتمنى ان تنجح
Black Forest cake is a classic German dessert layered with rich chocolate sponge, whipped cream, and cherries, creating a perfect balance of sweetness and slight tartness.
Hi!
Made this today and tastes delicious! I wanted to ask if you ever made this with vegan cream and got it to be stiff enough to pipe?
I’m not super used to whipping vegan heavy cream, so might have underwhipped (although it did spend a lot of time in my KitchenAid…), but it was far from stable enough to decorate like you did!
Should I have gone longer? I was afraid I might overdo it (does vegan cream get lumpy and too far gone like regular heavy cream?)
Hi Glenda
Thanks so much, and I’m glad you liked it! Yes, I’ve made it with vegan cream a few times — some whip up better than others. For piping, I’ve had the best luck with Silk Heavy Whipping Cream Alternative, Aldi Brand, Country Crock Plant Cream. All get decently stiff, but you do have to whip them a bit longer than dairy cream, and they can be sensitive to temperature (chilled cream, chilled bowl and whisk help!).
And yep — vegan cream can split if overwhipped, though it’s a bit more forgiving. If yours was too soft, it was probably underwhipped. Try going a bit longer next time and maybe add more powdered sugar to help hold shape. Let me know how it goes!