prep time: 15 min | bake time: 30 min | total time: 45 min
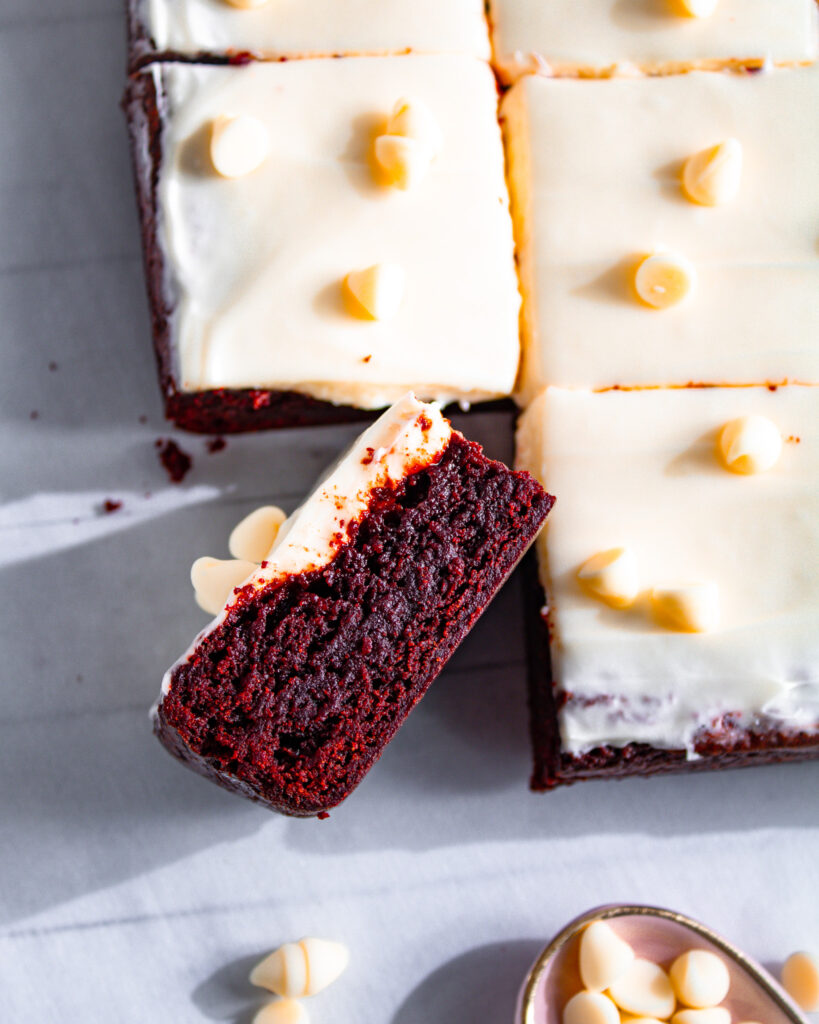
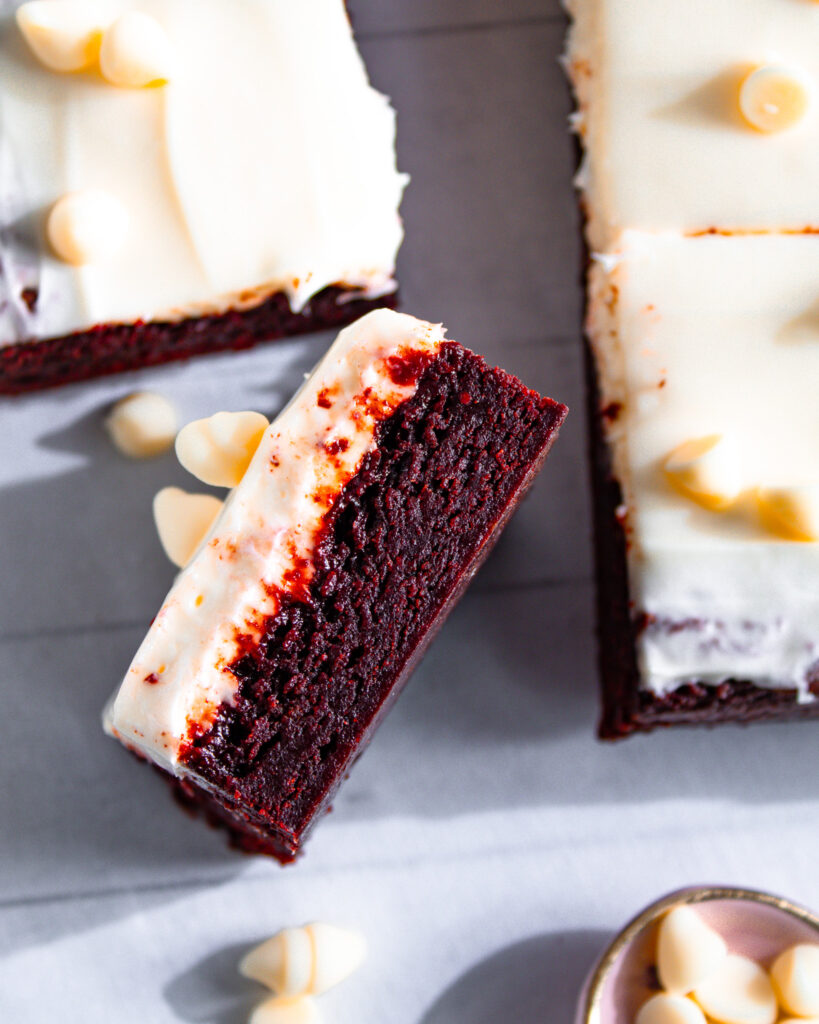
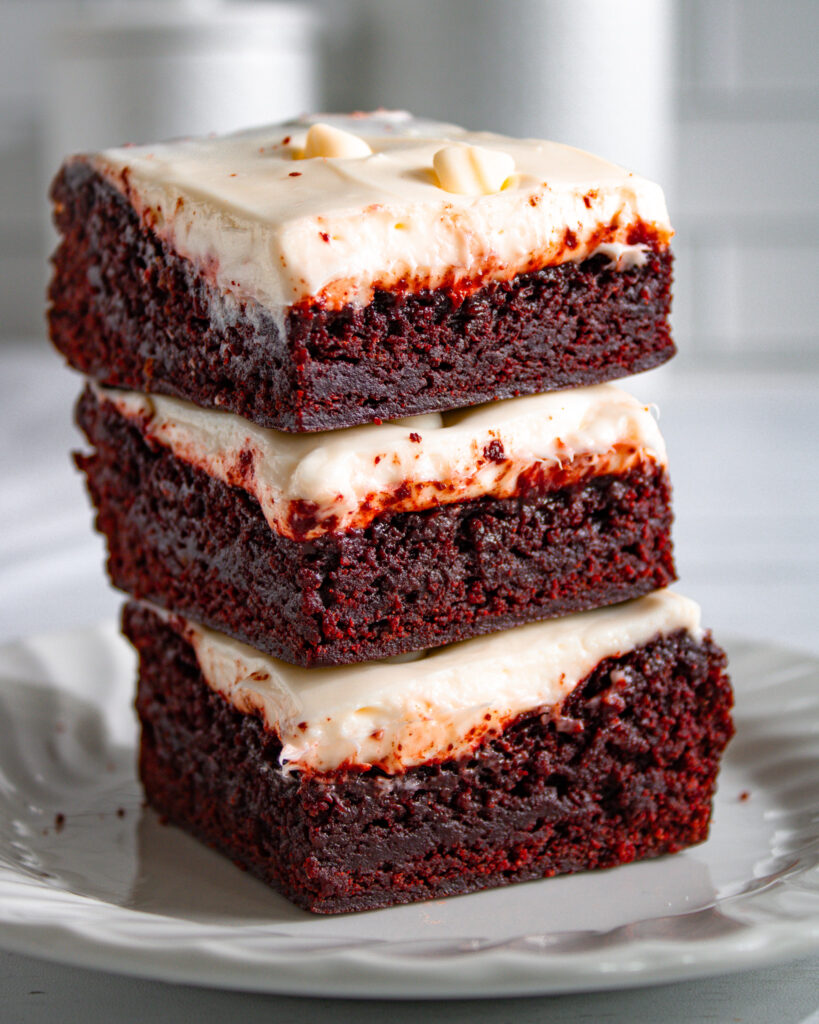
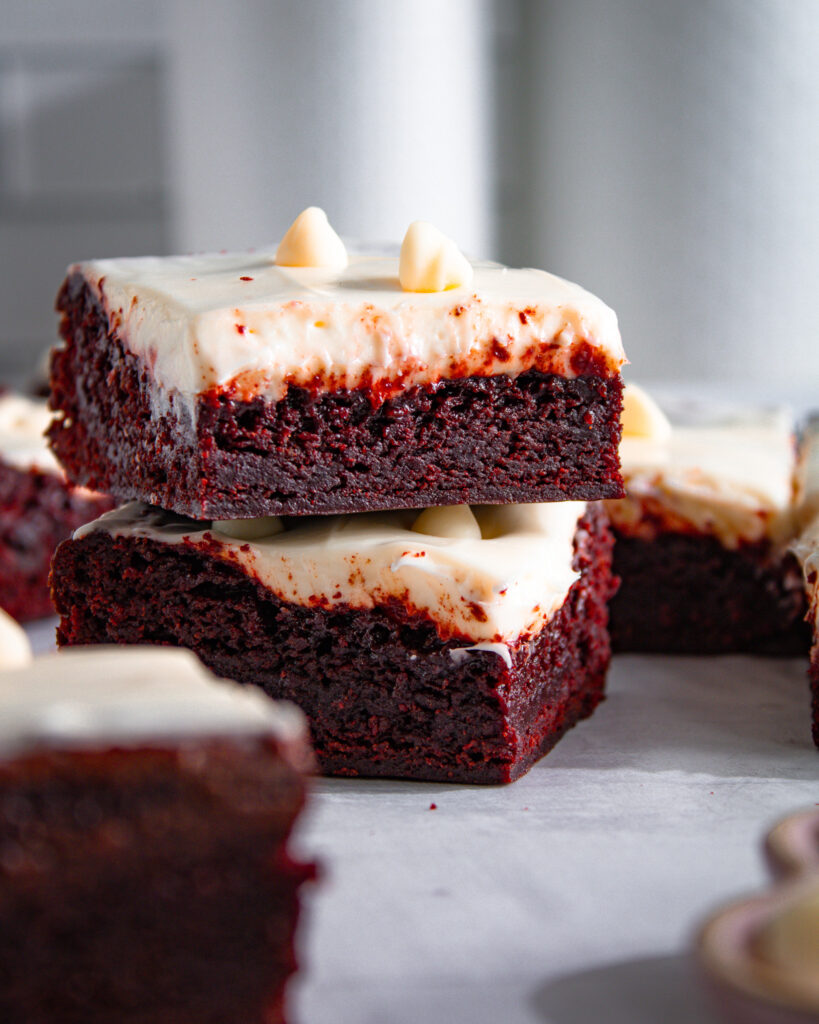
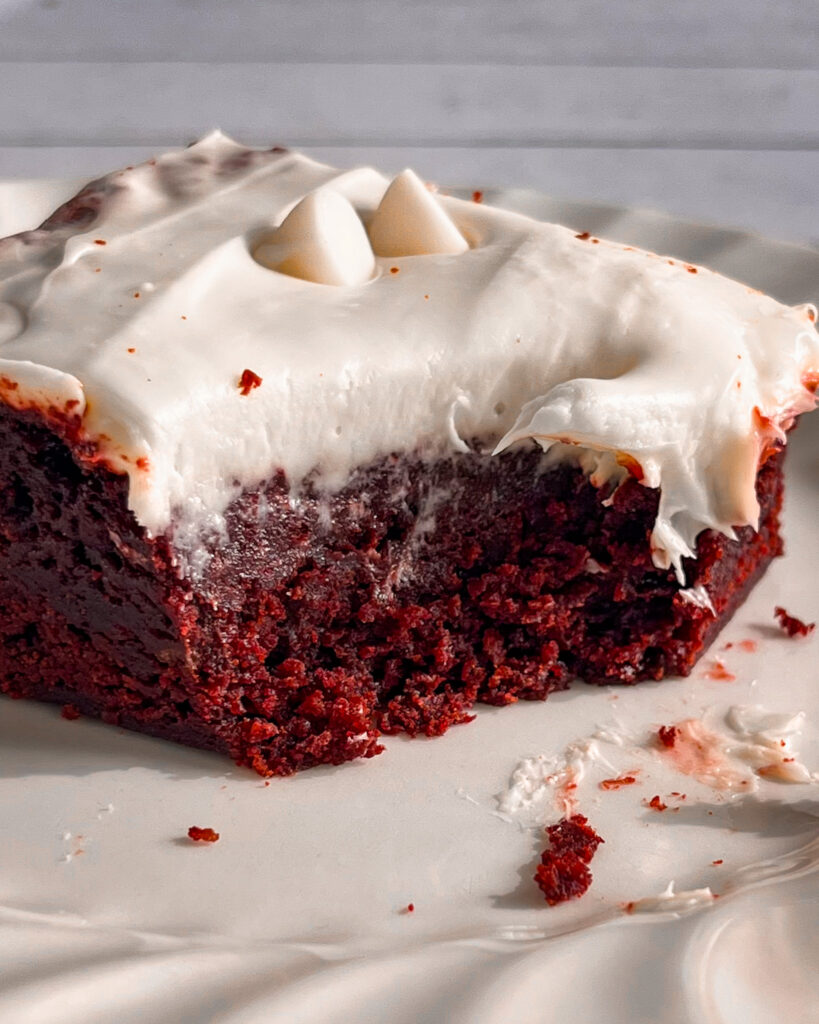
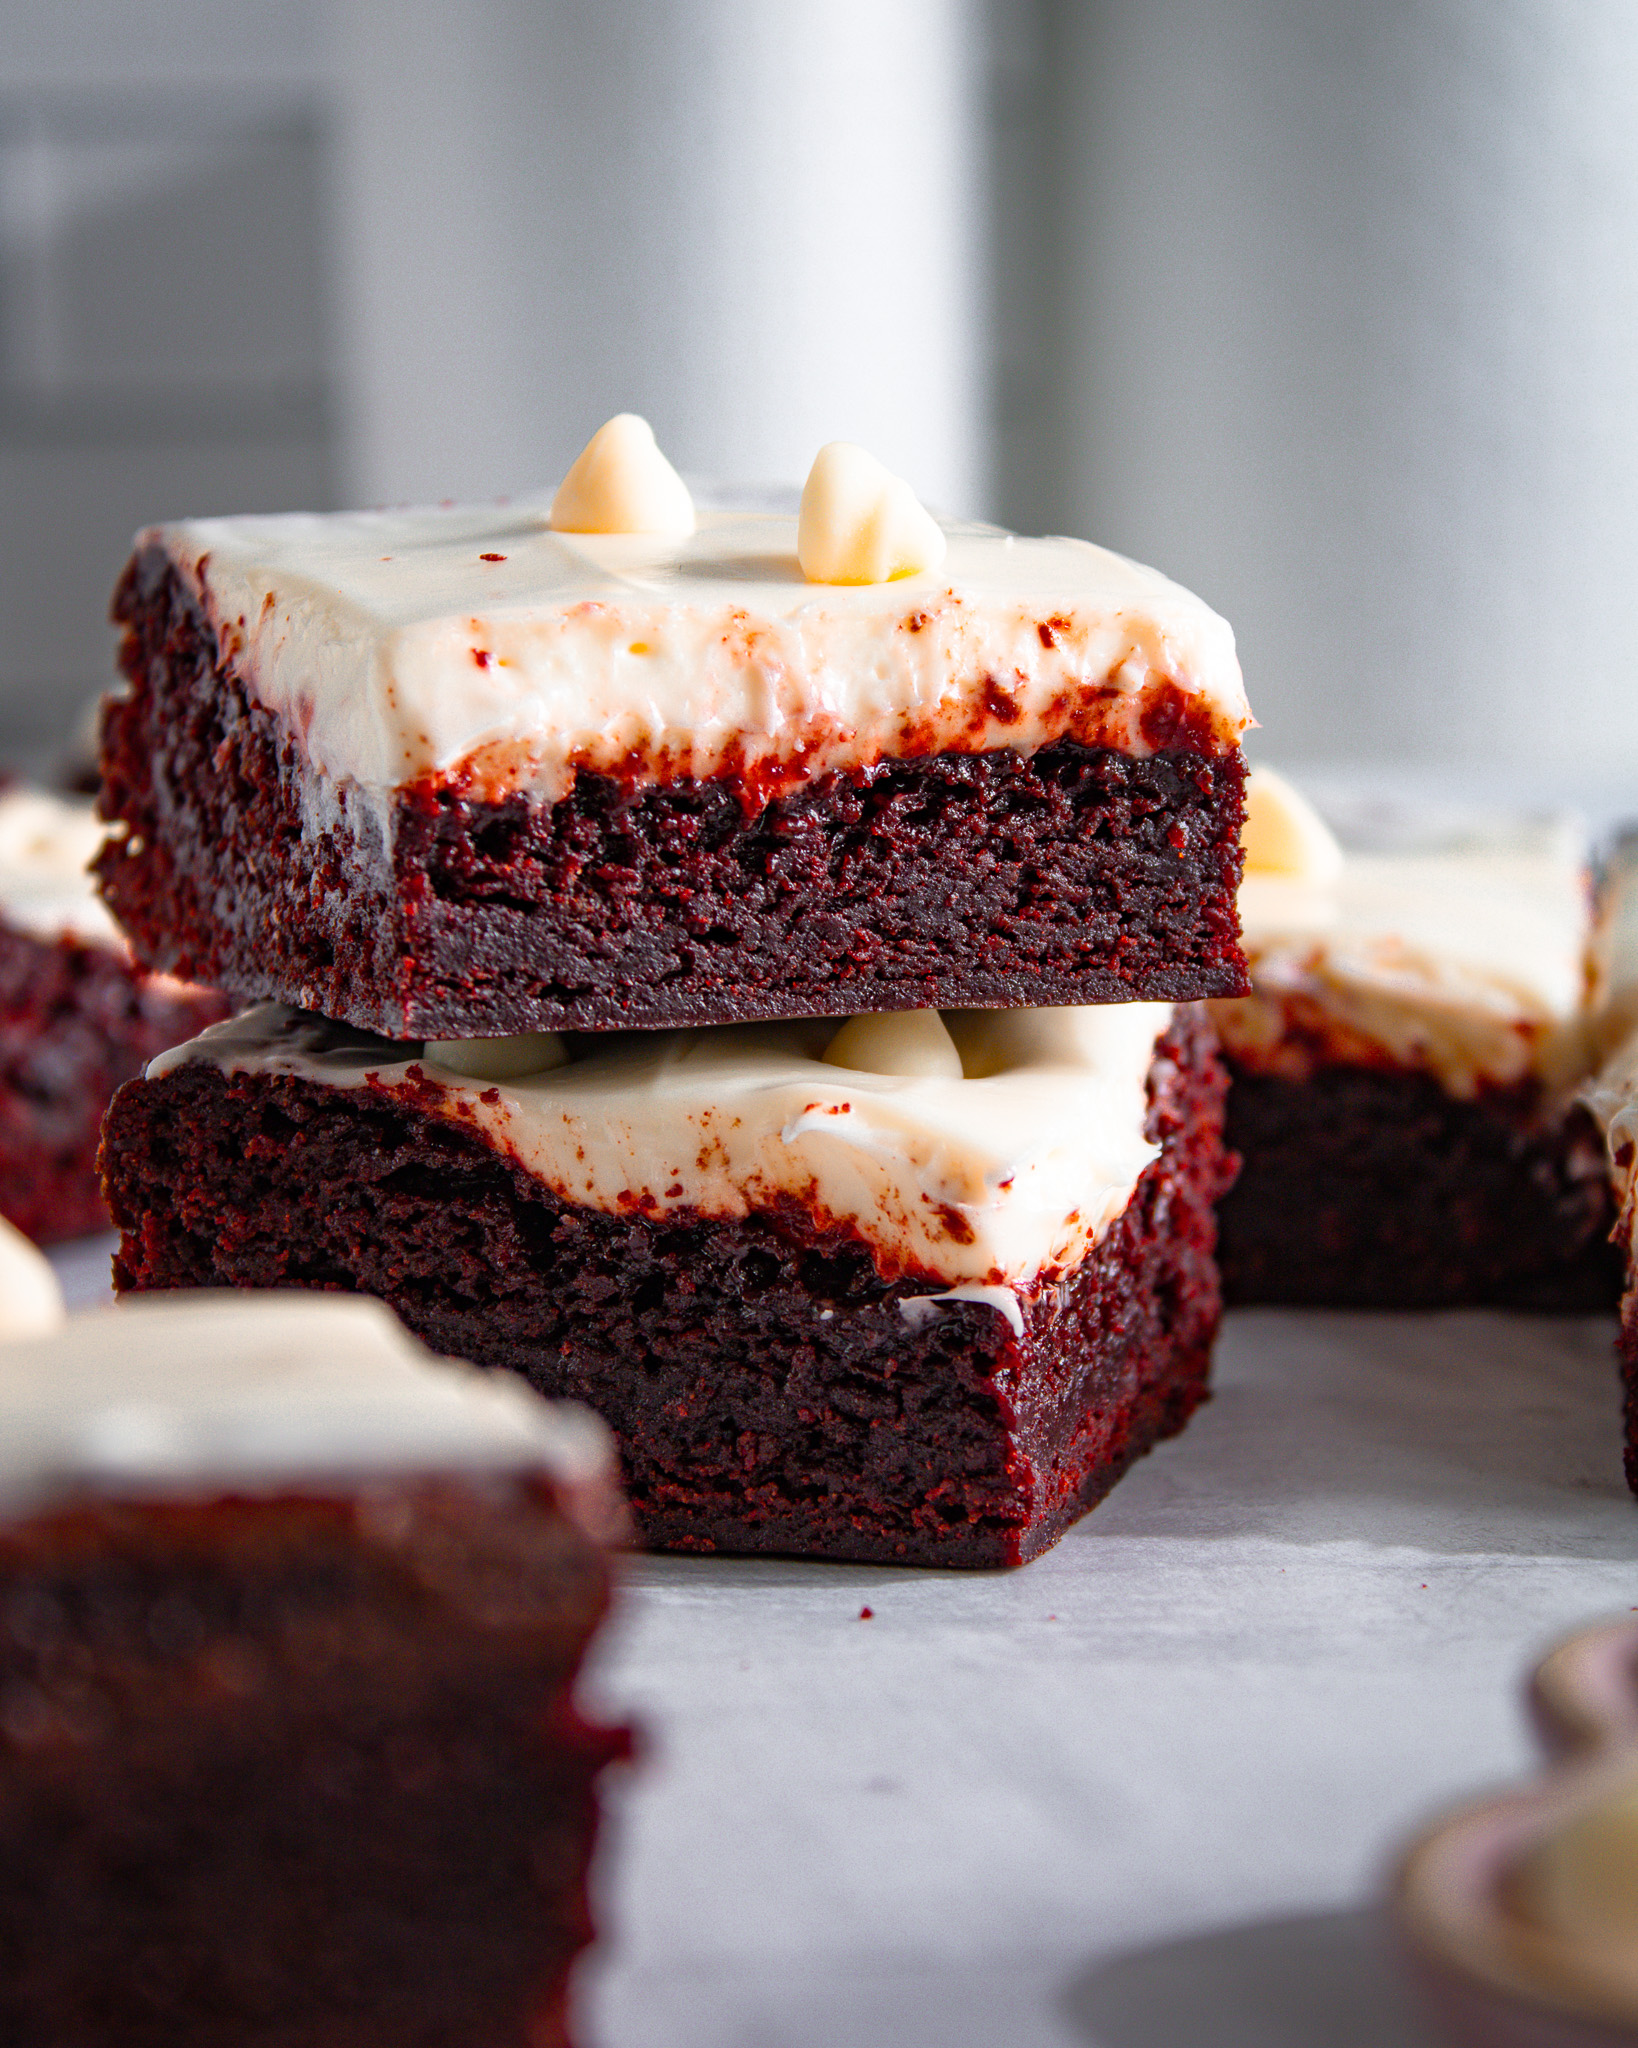
These Eggless Red Velvet Brownies will shake up your dessert game with their fudgy texture, bold color, and signature tang. Whether you're dairy-free, egg-free, or just in the mood for a fun twist on a classic, this recipe has you covered. Topped with luscious cream cheese icing, these brownies are love at first bite!
You Won’t Believe How Fudgy These Eggless Red Velvet Brownies Are!
Forget dry, cakey brownies—these eggless red velvet brownies are all about that rich, fudgy texture with a crackly, picture-perfect top. The deep red hue makes them an instant showstopper, while a touch of vinegar and baking soda brings out that signature red velvet tang. And let’s be honest, who can resist a brownie that’s both gorgeous and delicious?
But the magic doesn’t stop there! A generous layer of silky cream cheese icing takes these brownies to the next level, balancing the chocolatey richness with a hint of sweetness and tang. Whether you’re making them for a celebration, a midday treat, or just because you deserve something amazing, these brownies are guaranteed to impress. Grab your mixing bowl, and let’s bake up something unforgettable!
Tools You’ll Need to Make Eggless Red Velvet Brownies
Dark Chocolate: The heart of these brownies, adding deep, rich flavor and that irresistible fudgy texture.
Vegetable Oil: Keeps every bite moist and tender, ensuring these brownies stay soft for days.
Powdered Sugar: Dissolves effortlessly into the batter, helping to create that gorgeous crinkle-top finish.
Light Brown Sugar: Adds a touch of molasses sweetness and helps lock in moisture for the perfect chewy bite.
Milk: Brings everything together, adding creaminess and keeping the texture lusciously smooth.
Water: A simple but essential ingredient to keep the batter balanced and perfectly pourable.
Vanilla Extract: A splash of warmth and depth, enhancing the red velvet’s classic flavor.
All-Purpose Flour: The sturdy backbone that gives these brownies just enough structure while staying soft.
Cornstarch: The secret to extra tenderness, making these brownies melt in your mouth.
Baking Soda: Works its magic with vinegar to give the brownies a slight lift and that signature red velvet tang.
White Vinegar: A key ingredient for red velvet’s subtle tang while keeping the brownies light and tender.
Natural Red Food Coloring: The bold, beautiful hue that makes red velvet stand out and feel extra special!
Cream Cheese Icing Ingredients
Cream Cheese: Velvety smooth with a slight tang, balancing the sweetness of the brownies perfectly.
Butter: Adds richness and makes the icing luxuriously creamy.
Powdered Sugar: Sweetens the icing while keeping it silky and smooth.
Vanilla Extract: Enhances the cream cheese flavor with just the right hint of warmth.
Whipping Cream: Lightens up the icing, making it fluffy and extra luscious.
White Chocolate Chips (Optional): A little crunch and extra sweetness to make every bite even more indulgent!
How to Make Eggless Red Velvet Brownies
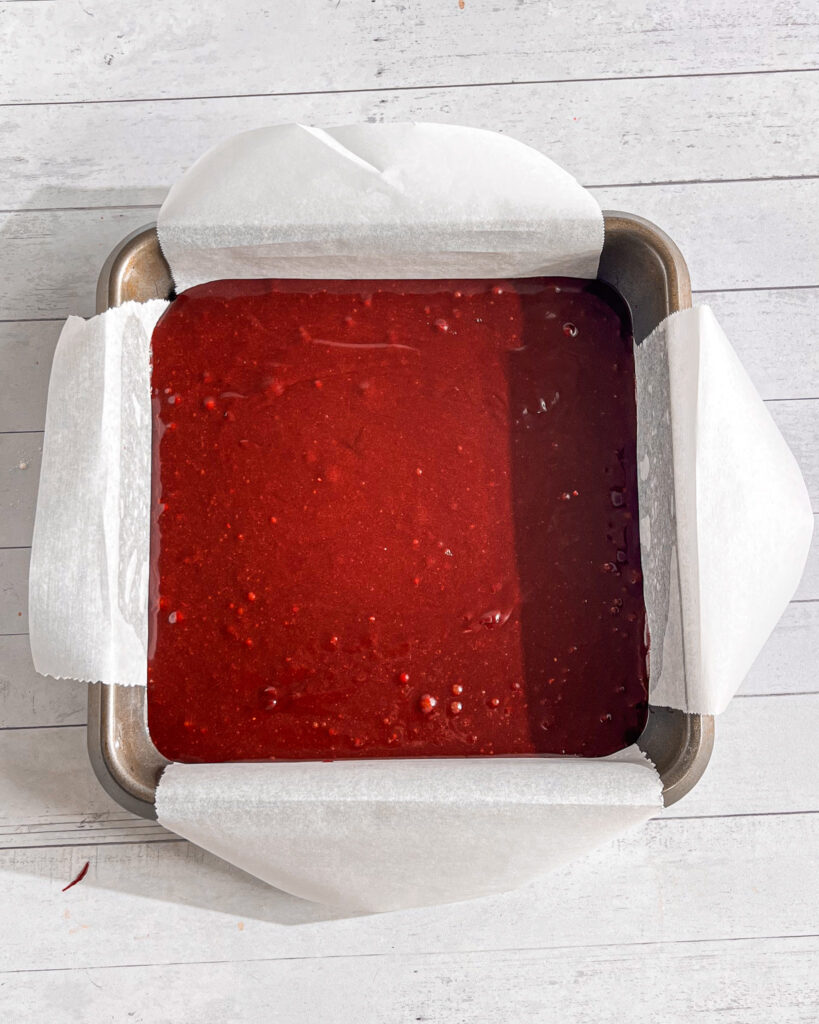
Preheat your oven to 340°F (171°C). Grease an 8×8-inch (20×20 cm) square baking pan and line it with parchment paper for easy removal.
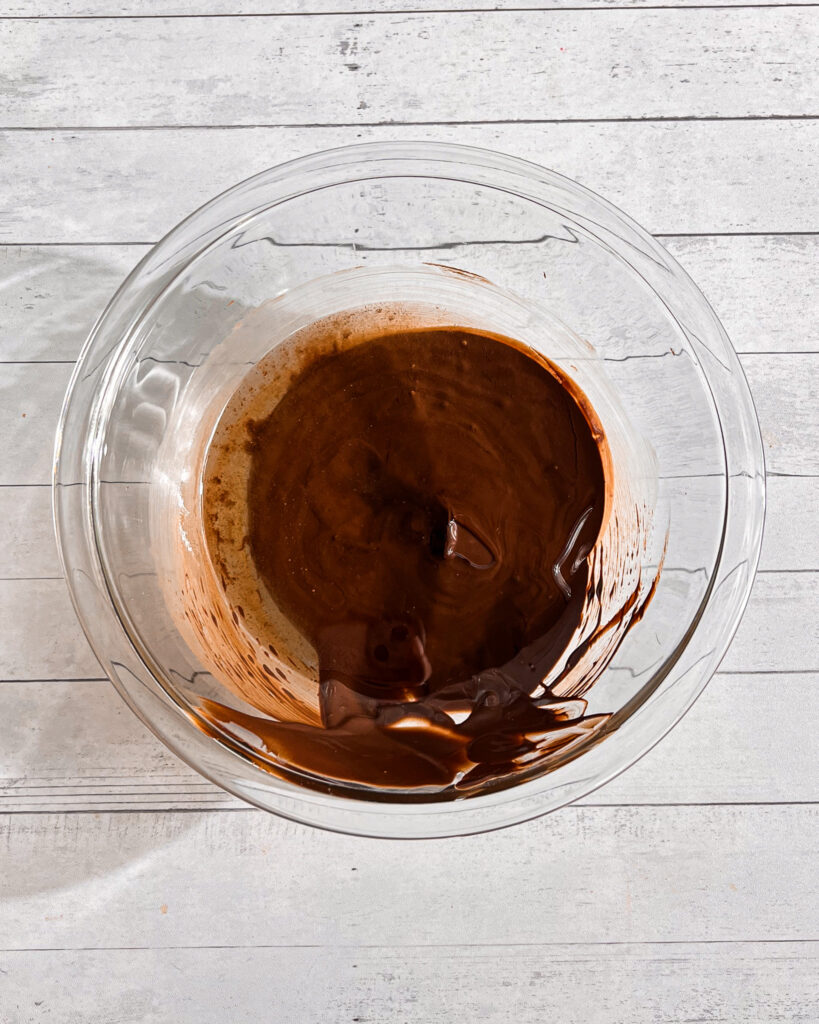
In a heatproof bowl, melt the dark chocolate and vegetable oil using a double boiler or microwave in short bursts, stirring in between.
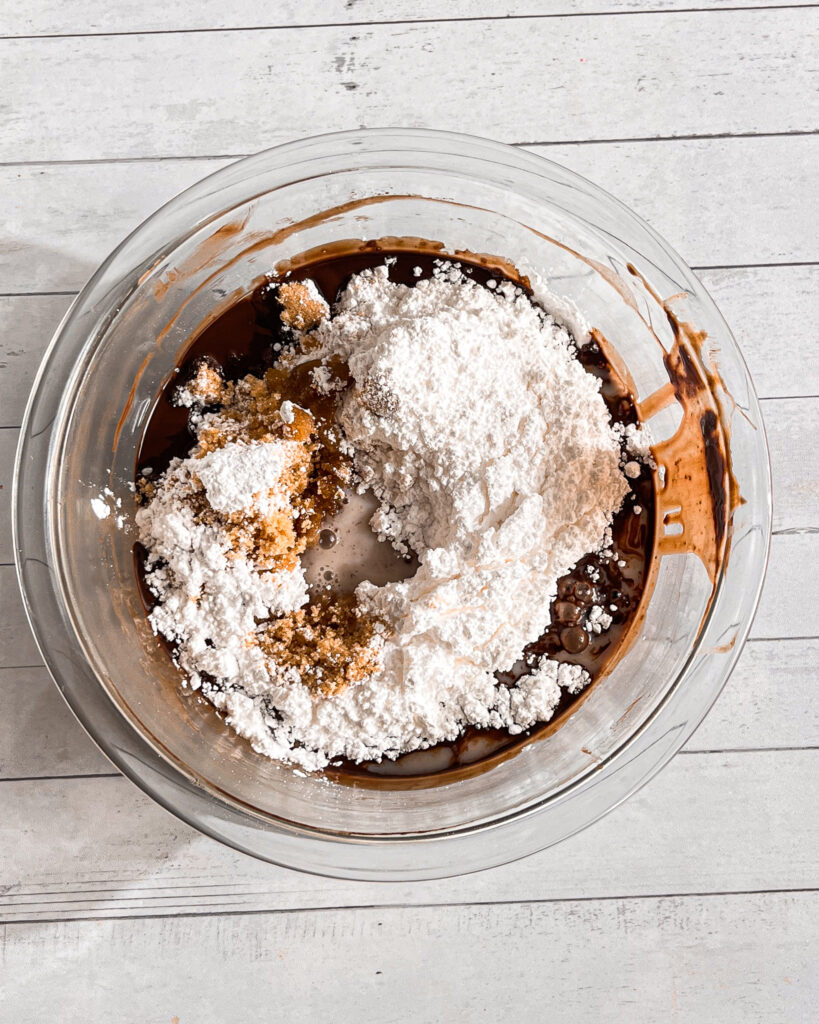
Mix the wet ingredients. Add brown sugar, powdered sugar, milk, water, and vanilla extract to the melted chocolate mixture. Whisk until smooth.
Combine the dry ingredients in a separate bowl. Whisk together the all-purpose flour and cornstarch, then gradually stir it into the wet mixture until the batter is smooth.
Time to add some color. Stir in the red food coloring until the batter turns a rich, vibrant red.
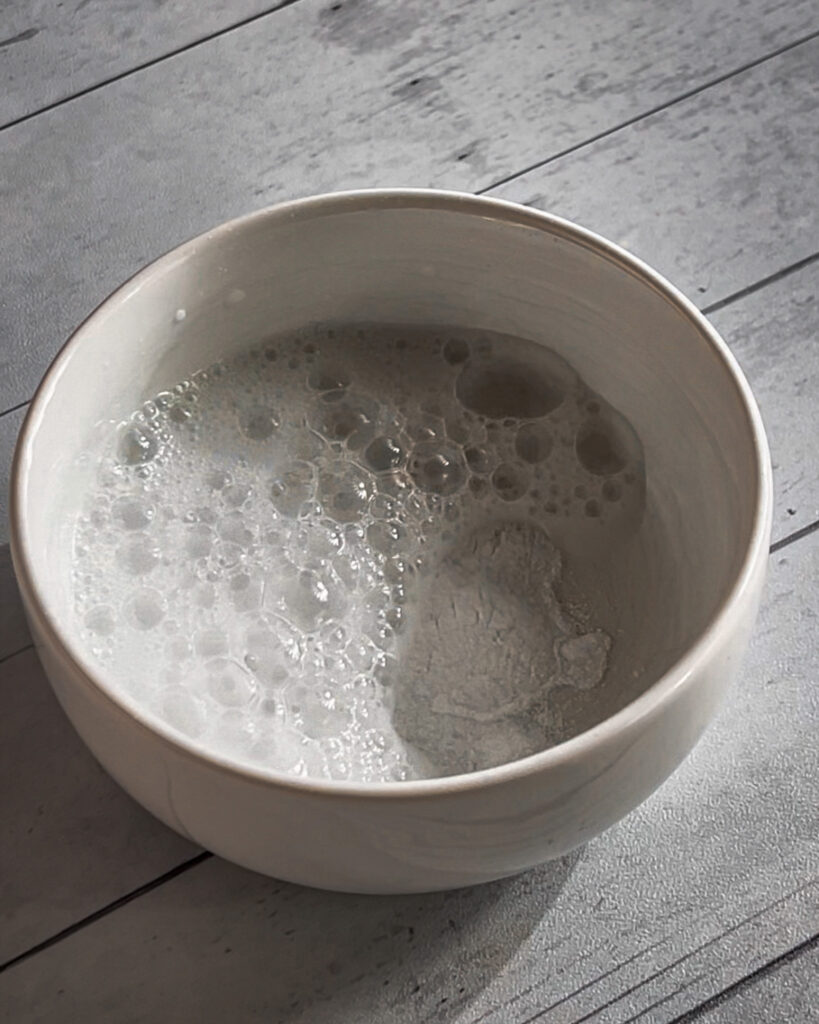
Now for the magic. In a small bowl, mix the white vinegar and baking soda. As soon as it starts to fizz, gently fold it into the brownie batter.
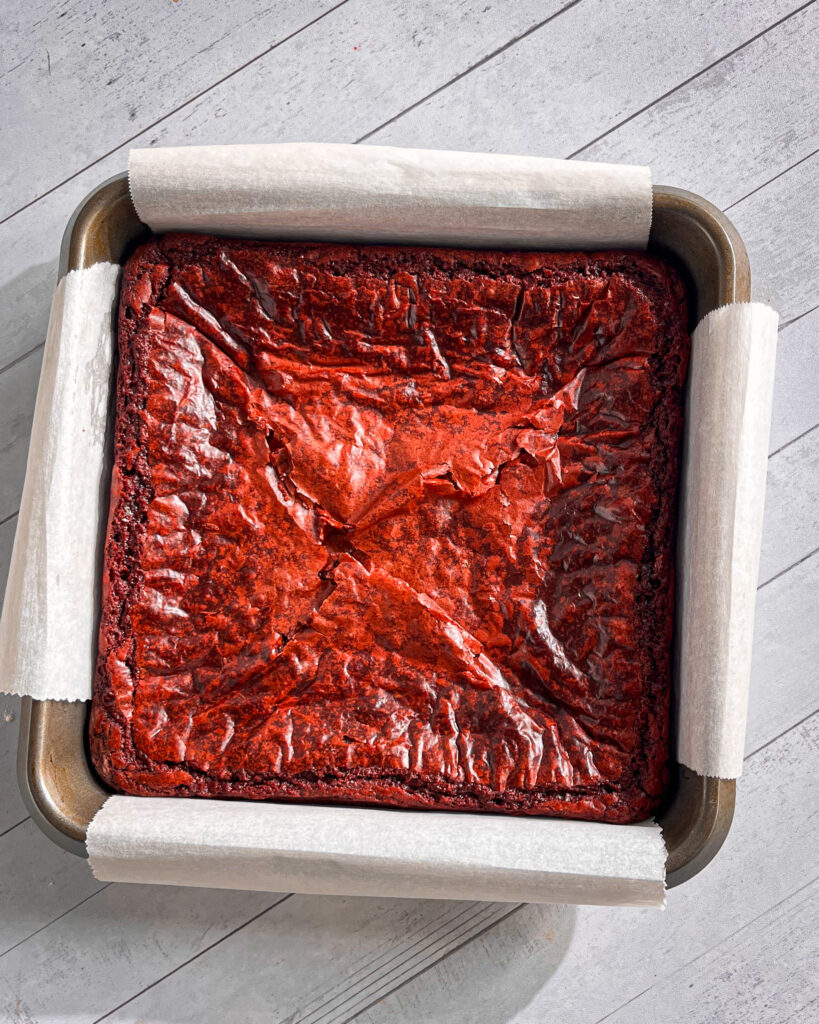
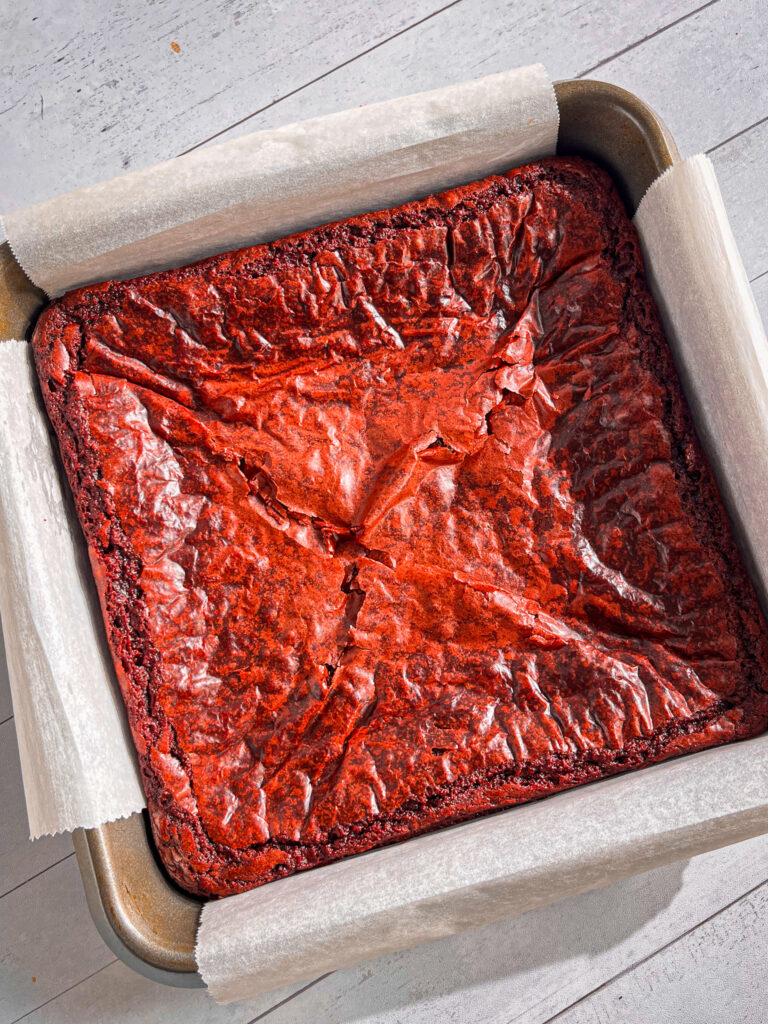
Bake until perfection. Pour the batter into the prepared pan and spread it evenly. Bake for 30-35 minutes, or until a toothpick inserted in the center comes out with a few moist crumbs.
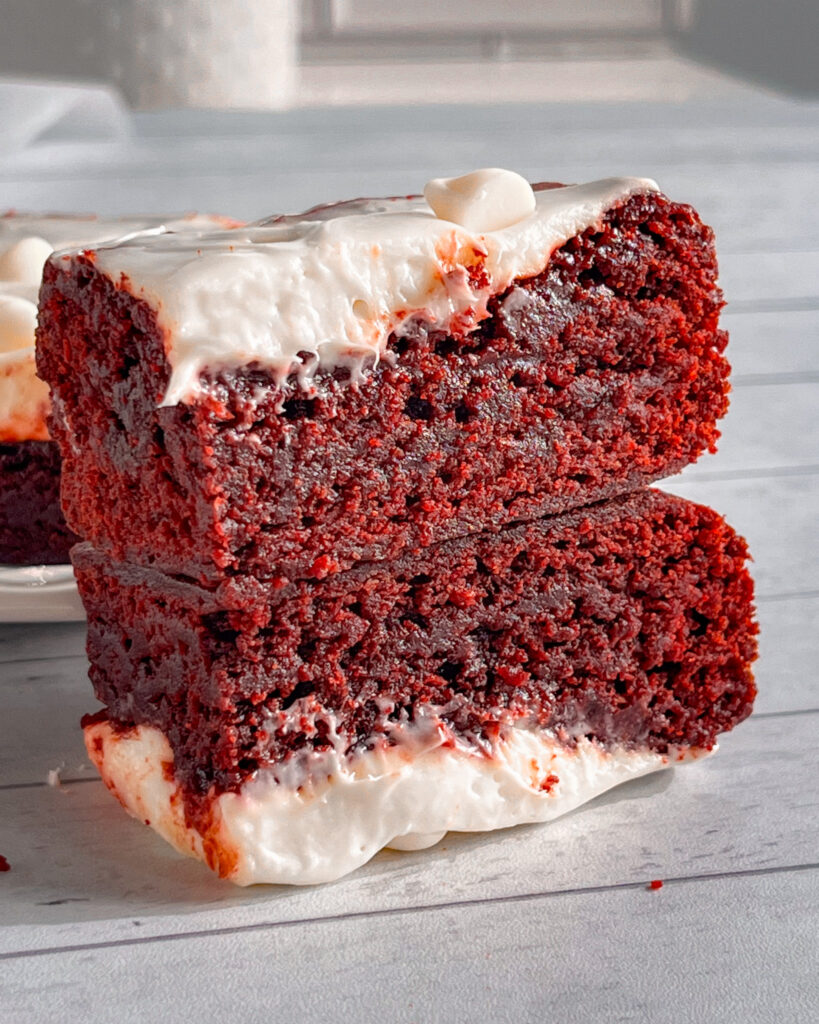
Patience is key. Let the brownies cool completely in the pan before adding the icing.
How to Make the Cream Cheese Icing
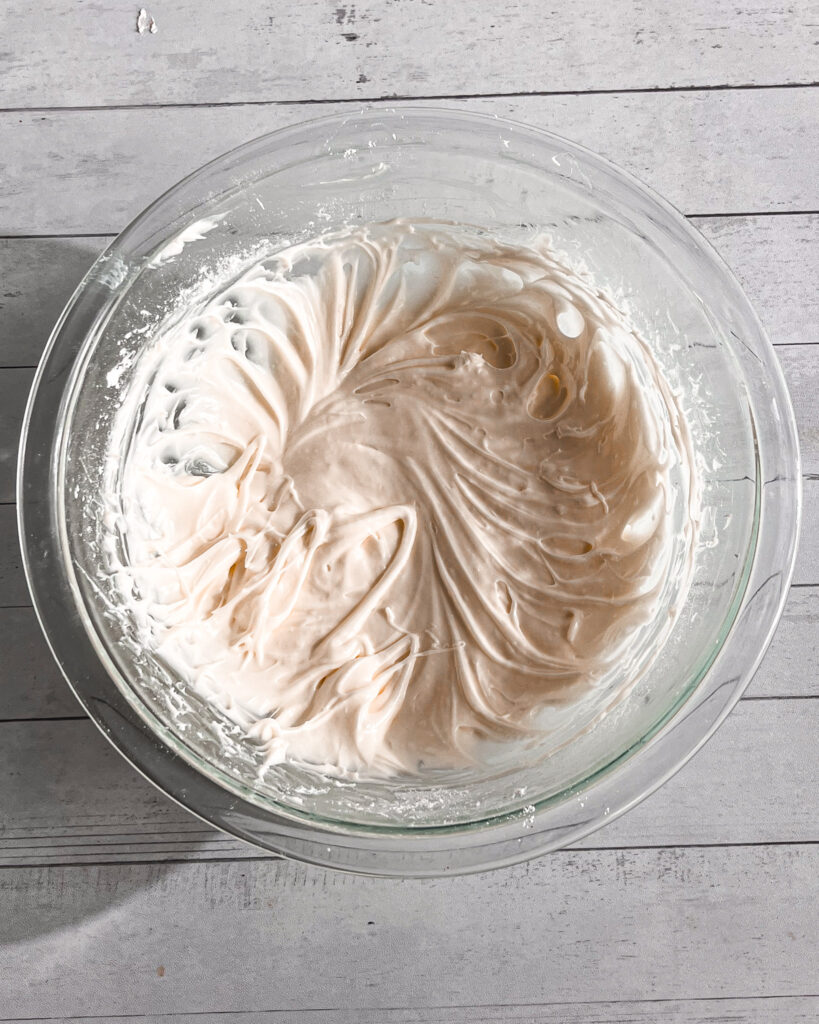
Beat softened butter, cream cheese, and vanilla until light and fluffy. Gradually add powdered sugar and whipping cream, mixing until smooth.
Now let’s frost and decorate. Spread the icing over the cooled brownies using an offset spatula or the back of a spoon. Sprinkle with white chocolate chips if desired.
Slice and enjoy! Store leftovers in an airtight container for up to 3 days at room temp, 7 days in the fridge, or freeze for up to 2 months.
Why You’ll Love These Brownies
No eggs? No problem! These brownies use a magical combo of vinegar and baking soda to create that perfect red velvet flavor.
Shiny crinkle top—because we all know that’s the best part of a brownie!
Rich, fudgy texture with a hint of chocolate, just like classic red velvet.
Easy to make in under an hour—no fancy techniques required.
Yes! These brownies are completely eggless. Their rich, fudgy texture comes from dark chocolate, and the tangy flavor is achieved with vinegar and baking soda, just like in a classic red velvet cake.
The signature tangy flavor comes from the combination of vinegar and baking soda, which mimics the classic red velvet cake taste. It’s subtle but adds that unmistakable red velvet touch.
That beautiful, glossy crust forms when the sugar and fat combine during baking, creating a crackly top. It’s part of the magic that makes these brownies so irresistible!
Yes! While dark chocolate (54% cocoa) provides the richest flavor, you can substitute semi-sweet chocolate. Just note that it may slightly alter the taste.
Once baked and frosted, they will stay fresh in an airtight container at room temperature for 3 to 4 days or in the fridge for up to 7 days. For longer storage, freeze them for up to 2 months.
Expert Baking Tips for Eggless Red Velvet Brownies
Use High-Quality Chocolate: Since chocolate is the star of the show, go for a good-quality dark or semi-sweet chocolate bar instead of chocolate chips for the best flavor and texture.
Don’t Skip the Vinegar and Baking Soda: This classic red velvet combo is what gives these brownies their signature tang and helps create a tender crumb.
Mix the Batter Gently: Overmixing can lead to dense or tough brownies, so fold in the dry ingredients just until combined for a perfectly fudgy texture.
Line Your Pan with Parchment Paper: For easy removal, leave an overhang on all sides so you can lift the brownies right out after baking.
Check for Doneness Early: These brownies are best when slightly underbaked, so insert a toothpick around 30 minutes; a few moist crumbs mean they’re just right!
Let Them Cool Completely: Resist the urge to cut into them too soon! Cooling allows them to set properly, making slicing cleaner and neater.
Chill Before Frosting: If the brownies are still warm, the cream cheese icing will melt, so give them time to cool for a flawless finish.
Adjust the Red Food Coloring: Natural food colorings can vary in intensity, so start with less and add more as needed to get that perfect red velvet hue.
For Extra Fudginess, Refrigerate Overnight: Letting the brownies chill in the fridge makes them even denser and richer—totally worth the wait!
How to Store: Keep them in an airtight container at room temp for a couple of days or refrigerate for up to a week. Want to save some for later?They freeze beautifully!
Did you make this Eggless Red Velvet Brownies recipe?
Make these eggless red velvet brownies the star of your celebrations, and watch the compliments pour in! Snap a photo and tag me— @pastrybysaloni I’d love to see your delicious creations.
If you’re obsessed with this recipe, you’ll love my other indulgent eggless and dairy-free treats. From rich, fudgy bakes to perfectly sweet pastries, there’s something for everyone to enjoy.
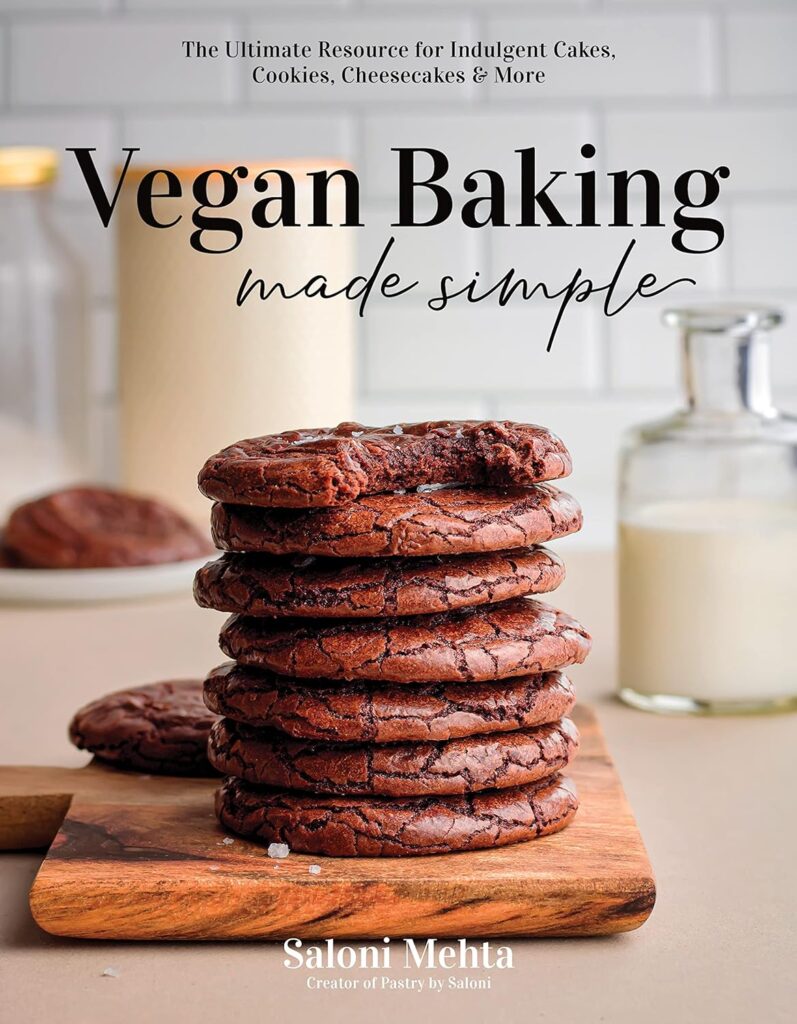
And finally… grab a copy of my cookbook Vegan Baking Made Simple – this is perfect for anyone looking to learn more about baking traditional recipes without dairy or eggs! Available on Amazon HERE
Meet Saloni
I’m a former pastry chef with a love for breads, cakes and everything in between! My recipes are easy to follow, egg free and are designed to be shared with others!
Red velvet lovers, rejoice! These Eggless Red Velvet Brownies are here to shake up your dessert game with their fudgy texture, bold color, and signature tang. Whether you're dairy-free, egg-free, or just in the mood for a fun twist on a classic, this recipe has you covered. Topped with luscious cream cheese icing, these brownies are love at first bite!
Start by preheating your oven to 340°F (171°C). Grease an 8x8-inch (20x20 cm) square baking pan and line it with parchment paper, ensuring the paper hangs over the edges for easy removal once the brownies are baked.
In a heatproof bowl, place the dark chocolate and vegetable oil. Using a double boiler or the microwave in short bursts (stirring between each burst), melt the chocolate and oil until smooth and fully combined.
Once the chocolate mixture is melted, add the brown sugar, powdered sugar, milk, water, and vanilla extract. Whisk everything together until the mixture is smooth and well incorporated.
In a separate bowl, whisk together the all-purpose flour and cornstarch until fully combined. Gradually add this dry mixture to the wet ingredients, stirring constantly until the batter is smooth and free of lumps.
Stir in the red food coloring, mixing until the batter achieves a vibrant red hue. Make sure the color is evenly distributed throughout.
In a small bowl, combine the white vinegar and baking soda. Once it starts to fizz, quickly fold this mixture into the brownie batter, ensuring it is fully incorporated.
Pour the batter into the prepared pan and use a spatula to smooth the top. Bake in the preheated oven for 30-35 minutes, or until a toothpick inserted into the center comes out with a few moist crumbs attached.
Allow the brownies to cool completely in the pan before attempting to ice them.
How to Make the Cream Cheese Icing
In a mixing bowl, beat together softened butter, cream cheese, and vanilla extract until the mixture is light and fluffy. Gradually add the powdered sugar and whipping cream, mixing until the icing is smooth and fully combined.
Once the brownies are completely cooled, spread the cream cheese icing evenly over the top using an offset spatula or the back of a spoon. Allow the frosting to set in the fridge or at room temperature. If desired, sprinkle white chocolate chips on top for decorating.
Slice the brownies into squares and enjoy! Store any leftovers in an airtight container at room temperature for up to 3 days, in the fridge for up to 7 days, or freeze them for up to 2 months.
Notes
Cup vs. Weighing Scale: US customary cup measurements provide a rough estimate and can vary, leading to inconsistencies. For the most accurate results, use a digital scale to weigh ingredients in grams.
Preparation: Before starting the recipe, measure and prepare all ingredients to ensure a smooth and easy process.
Measuring Spoons: For teaspoon (tsp) and tablespoon (tbsp) measurements, always use proper measuring spoons rather than regular eating spoons for accuracy.
Milk: You can use any unsweetened dairy-free milk, such as almond, soy, or oat milk, or opt for whole dairy milk if preferred.
Butter: Choose dairy-free butter sticks or any butter of your choice.
Chocolate: Use dark or semi-sweet chocolate chunks or a high-quality chocolate bar chopped into chunks. For a vegan version, select dark chocolate from a dairy-free brand, ensuring it contains no milk solids or butter. Cocoa butter is completely fine.
Cream Cheese: Use dairy-free cream cheese or any plain, full-fat cream cheese of your choice.
Hi Bella
I use valrhona chocolate / and when i am using inexpensive brand or local brands i always make sure that chocolate has high quality ingredients including cocoa butter or cocoa mass.


11 Responses
Your recipe is amazing
Thank you Prakash. Appreciate your feedback!
💗
Hi, I was wondering what brand of chocolate you use? 🙂
Hi Bella
I use valrhona chocolate / and when i am using inexpensive brand or local brands i always make sure that chocolate has high quality ingredients including cocoa butter or cocoa mass.
Thank for the recipe, and thank for your kind to give that. God always bless you 😇🙏
Hi Andi
I appreciate your kind words.
How much butter should I use ? I can’t wait to bake them!
Hi Laura
In addition to the quantity of oil, you can add 1-2 tablespoons more of melted butter.
If I wanted to replace the oil for butter, how much butter. I baking them with oil right now, but next time I want to try with only butter. Thank you
Hi Laura
You can increase the quantity of melted butter by 2-3 tablespoons.