share this recipe

Black Forest Cheesecake

prep time: 1 hr | bake time: 45 min | rest time: 5-7 hrs

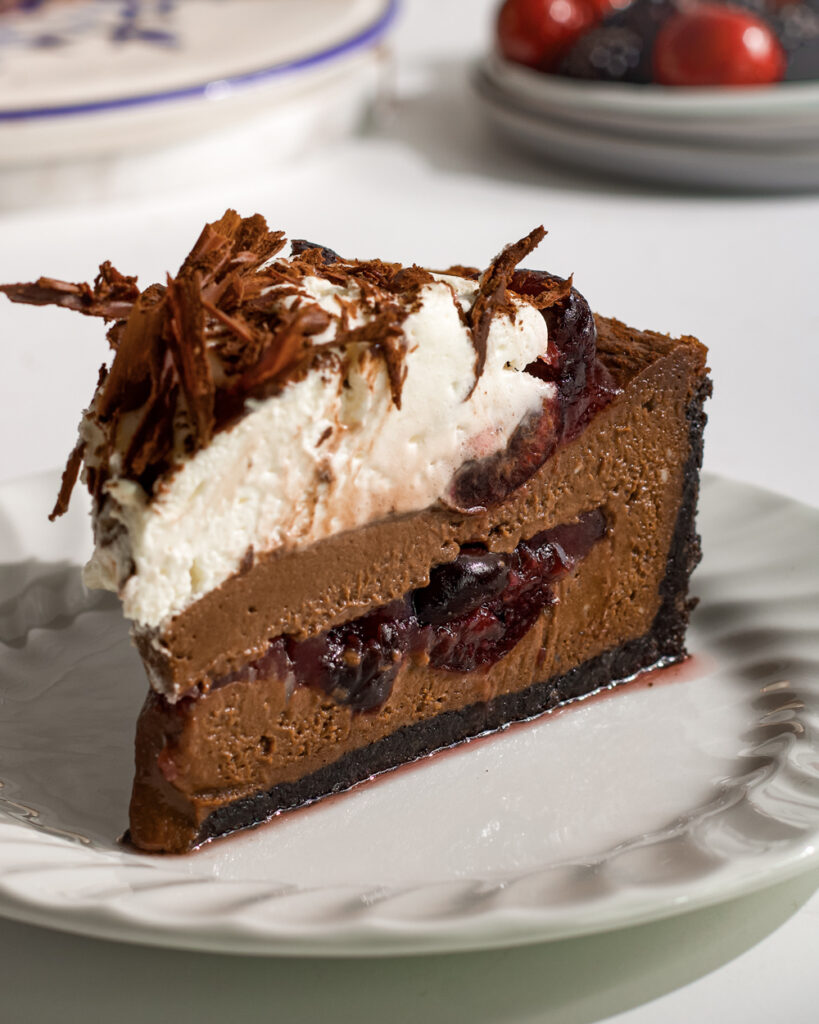
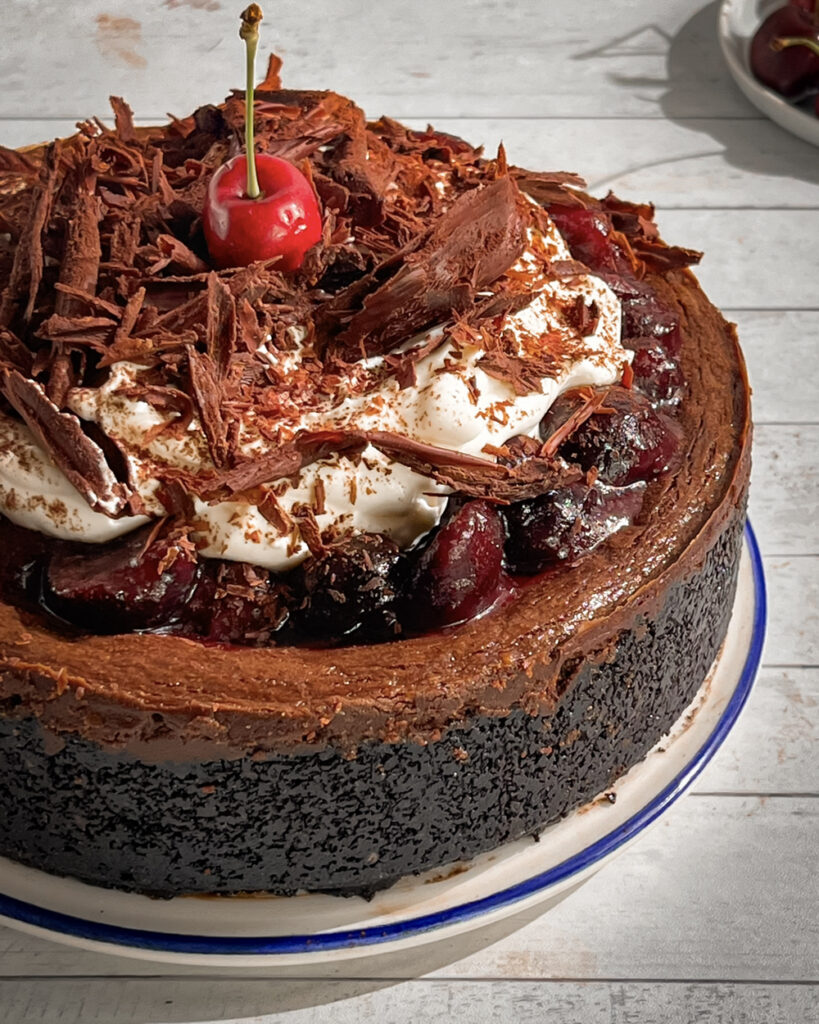
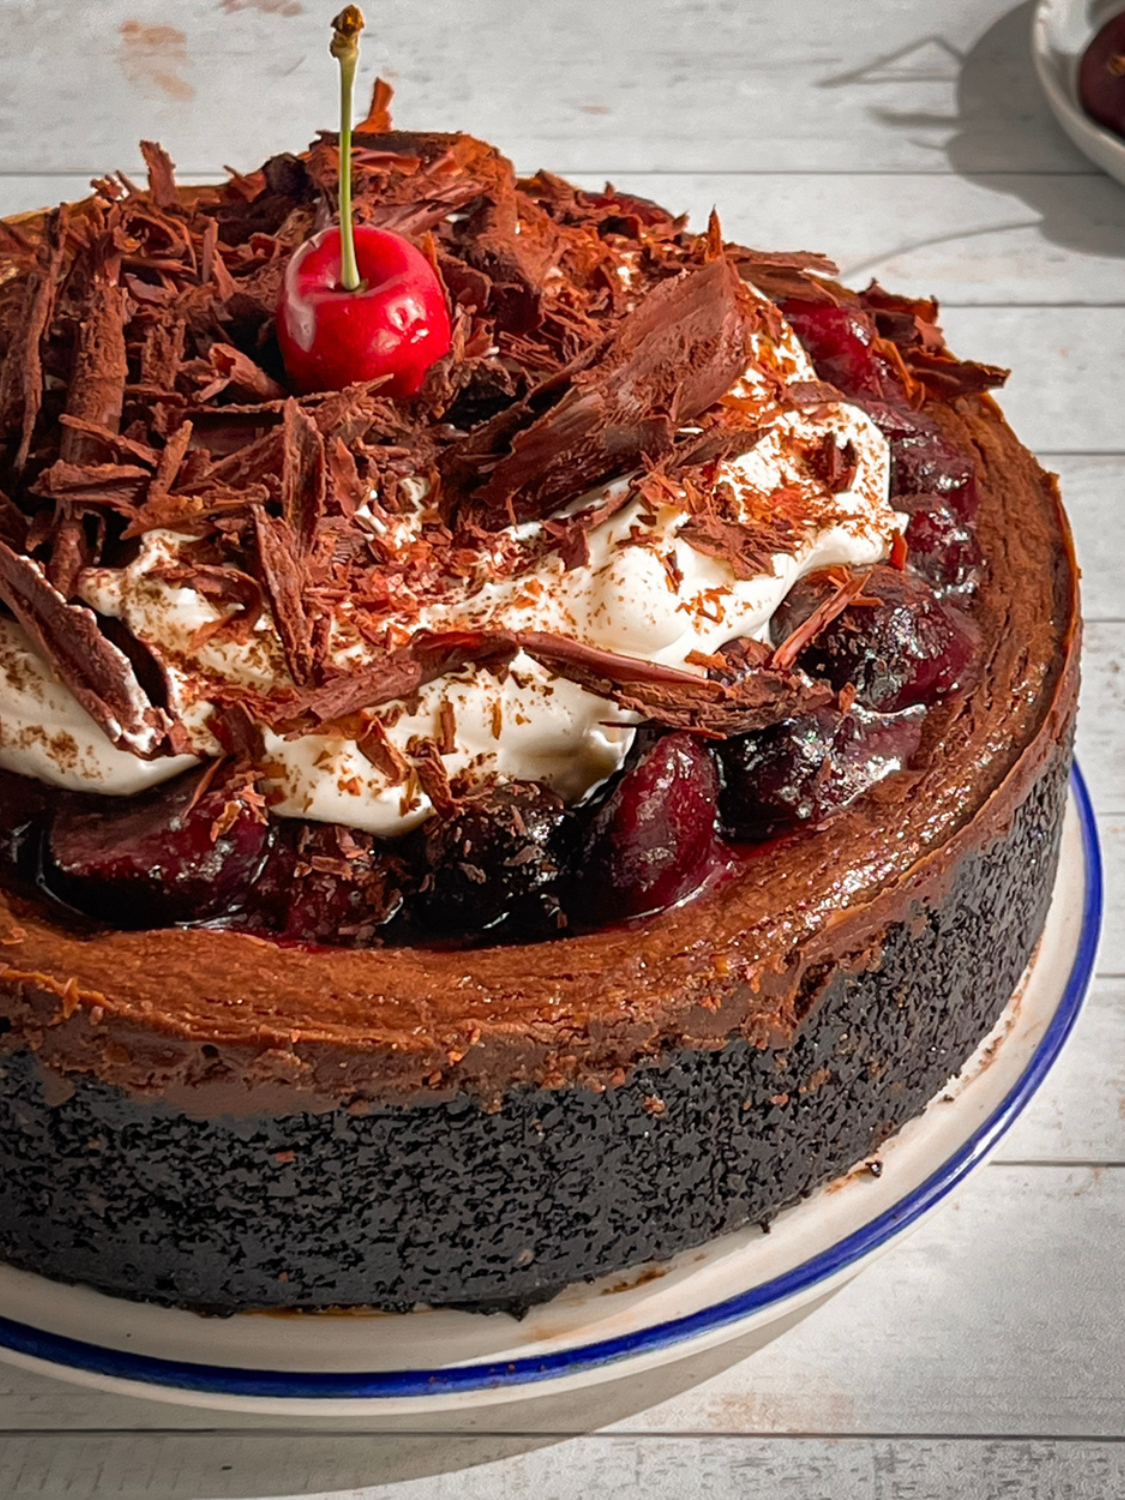
This Black Forest Cheesecake combines the classic flavors of Black Forest cake with the richness of cheesecake. Featuring a crunchy Oreo cookie crust, a smooth chocolate cheesecake layer, and a homemade cherry filling, it’s topped with fresh whipped cream and chocolate shavings. This eggless dessert is surprisingly easy to make and can be adapted to suit dairy-free and gluten-free diets. Perfect for a decadent dessert that’s sure to impress!

Black Forest Cheesecake

This cake goes down in history as one of the best! It is so unique, delicious and beautiful that everyone will instantly fall in love with it and be asking for it all the time! My eggless Black Forest Cheesecake is inspired by the classic black forest cake. This is where childhood nostalgia meets a decadent dessert as it features an Oreo cookie crust, a rich baked cheesecake layer with homemade cherry filling, and is topped with whipped cream and chocolate shavings.

I wanted to make a recipe that was inclusive which is why it can easily be made vegan, gluten free, dairy free and it’s already naturally nut free. While the recipe may seem intimidating at first, fear not because my step by step instructions will guide you through the cheesecake process simply! Your cake will turn out beautifully and you’ll want to make another cheesecake in no time. This Black Forest Cheesecake is a decadent dessert that brings together the rich flavors of chocolate and cherries with the smoothness of cheesecake. Whether you’re making it for a special occasion or simply because you crave a little indulgence, this recipe is sure to be a hit!
What is Black Forest Cheesecake?

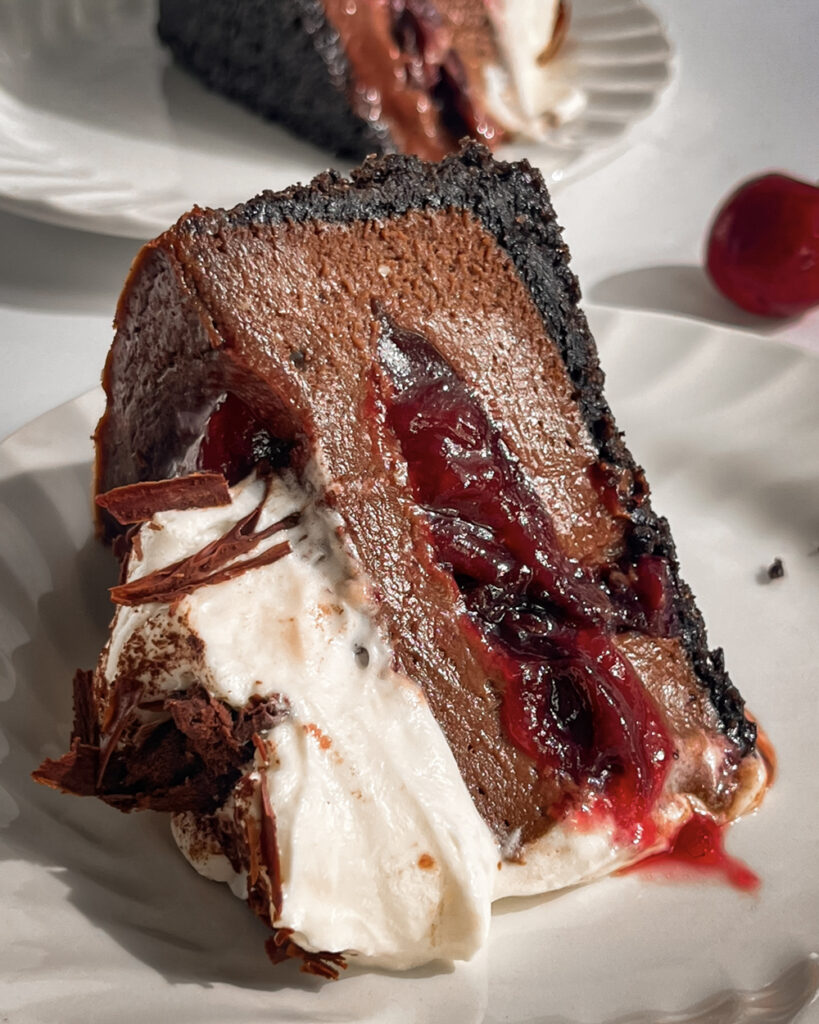
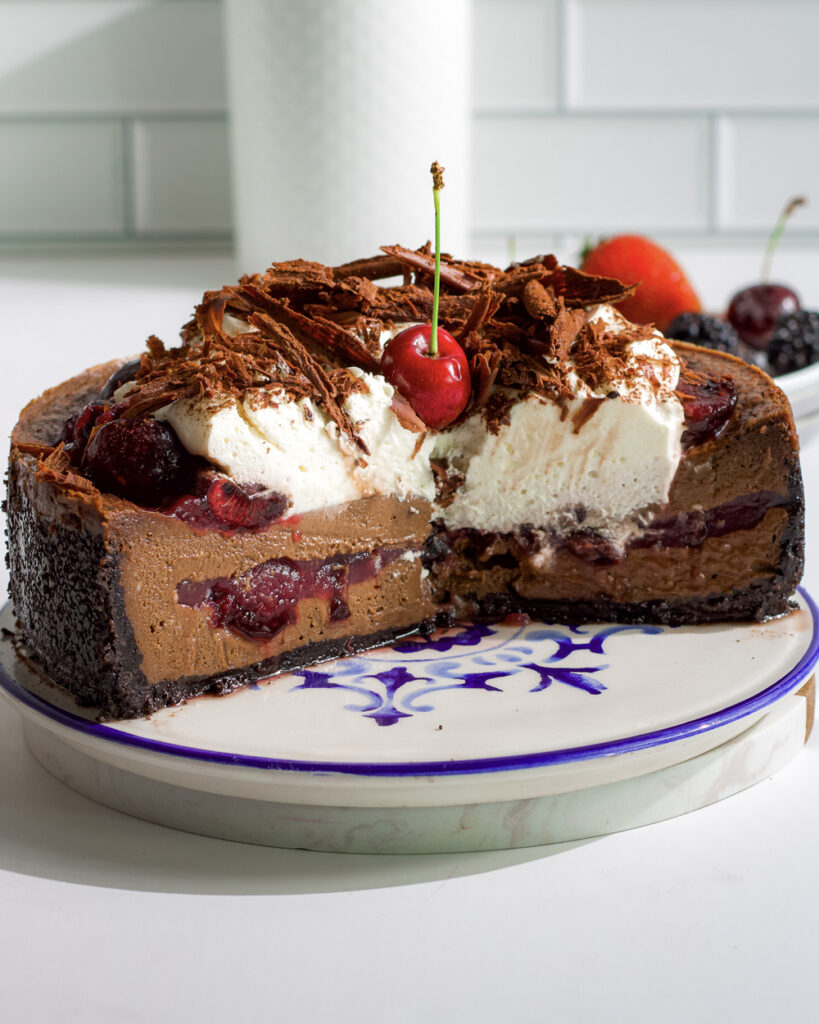
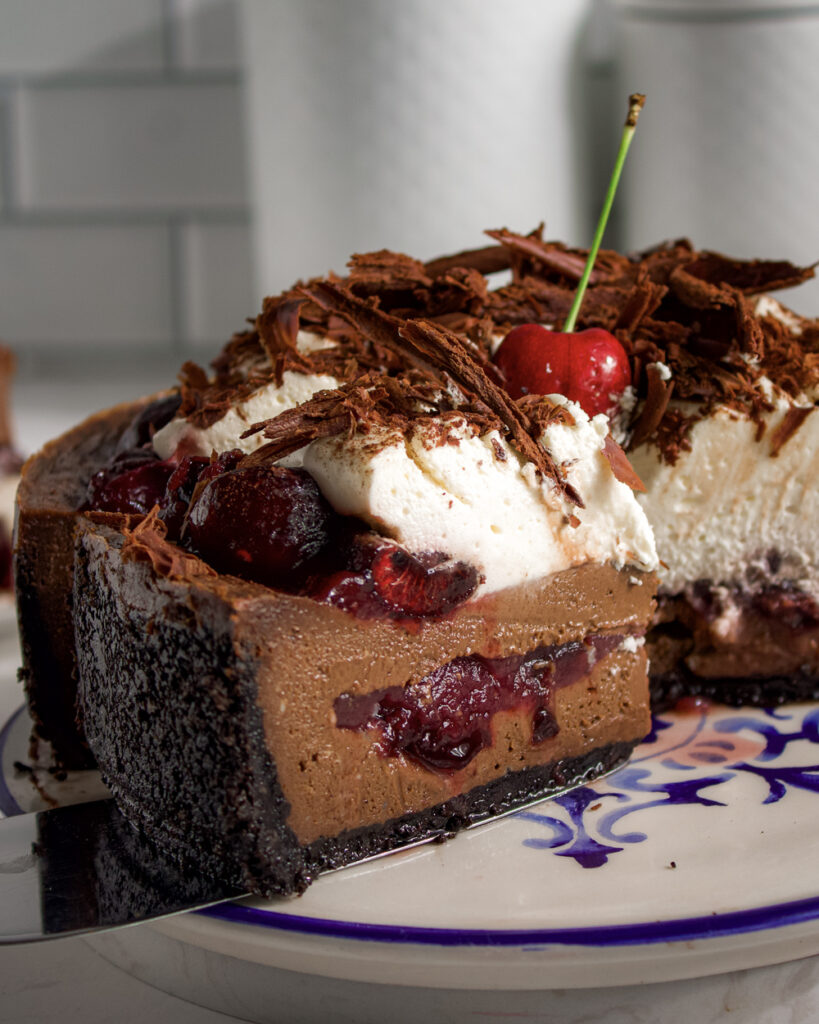
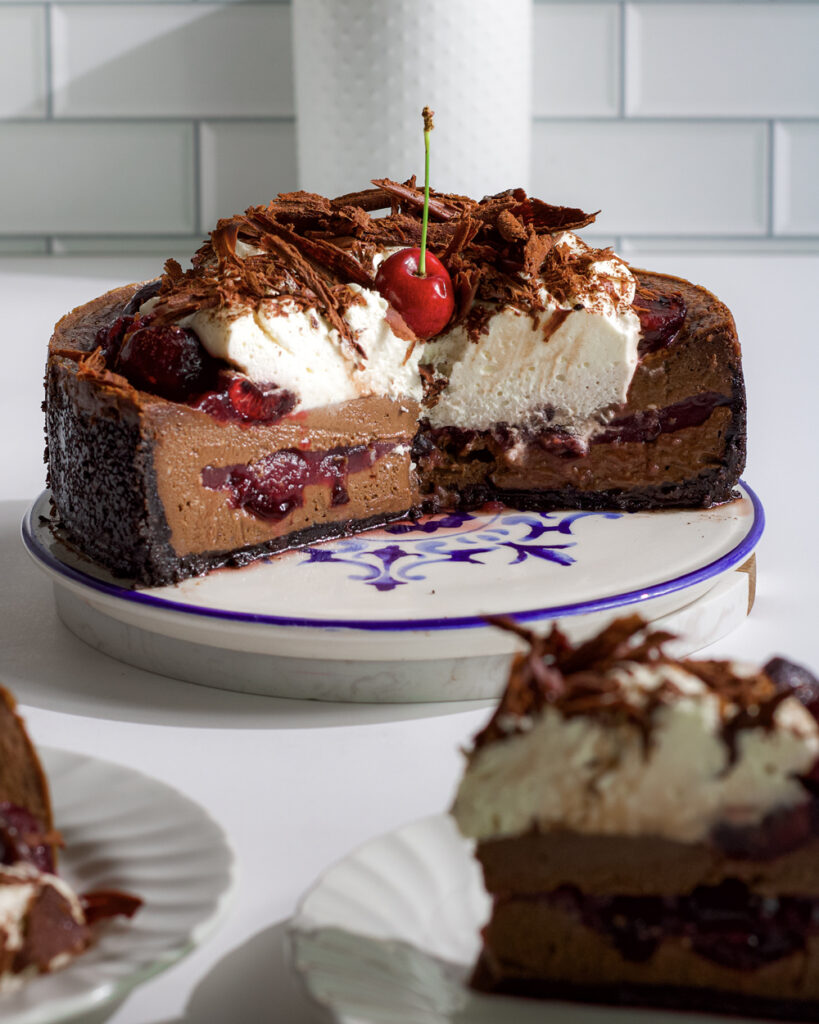
Black Forest Cheesecake is inspired by the classic Black Forest cake. Black Forest cake typically combines the rich flavors of chocolate, cherries, and cream. This cheesecake version takes things up a notch and features an Oreo cookie crust; along with a chocolate cheesecake filling, and layers of homemade cherry filling! It’s topped with whipped cream and chocolate shavings, making it a luxurious dessert with a blend of textures and flavors.
Black Forest Cheesecake Ingredients

Biscuit Base Ingredients

  • Chocolate Oreo Cookies: Oreos provide a crunchy, chocolatey base for the cheesecake, if you want to make a gluten free version use gluten free digestive biscuits or graham crackers.
  • Butter: Helps bind the cookie crumbs together and adds a rich flavor to the crust.

Homemade Cherry Filling Ingredients

  • Cherries: Fresh or frozen cherries give the cheesecake its signature fruity layer.
  • Juice or Water: Used to cook the cherries; cherry juice or cranberry juice adds extra flavor.
  • Cane Sugar: Sweetens the cherry filling while keeping it naturally tart.
  • Cornstarch: Thickens the cherry filling to give it a smooth consistency that doesn’t become runny and can hold up between layers.
  • Lemon Juice or Kirsch: Adds a bit of tang and brightens the cherry flavor.

Chocolate Cheesecake Filling Ingredients

  • Dark Chocolate: The rich base for the cheesecake, giving it a decadent chocolate flavor. I like to use 60% or higher good quality chocolate. To make vegan, use dark chocolate that is marketed as dairy free.
  • Whipping Cream: Helps smooth out the chocolate and create a creamy texture.
  • Cream Cheese: The base of the cheesecake provides richness and tang. Use dairy-free cream cheese for a vegan version.
  • Cane Sugar and Brown Sugar: A mix of sugars add sweetness and depth of flavor.
  • Cornstarch and Cocoa Powder: These thicken the cheesecake and enhance the chocolate flavor.
  • Vanilla Extract and Salt: Enhance the overall flavor and balance the sweetness.

Whipped Cream Ingredients

  • Whipping Cream: The topping that adds lightness and creaminess. Use dairy-free whipping cream if needed.
  • Powdered Sugar: Sweetens the whipped cream without weighing it down.
  • Vanilla Extract: Adds a hint of warmth to the whipped cream.

How to Preheat Your Oven When Baking a Cheesecake

Preheating an oven for baking a cheesecake is important to ensure that it is even baking and has the right texture. Depending on the type of oven you have, here’s how you can preheat for each:
Convection Ovens & Built-in Wall Ovens

  • Convection Oven: Set the oven to a temperature of 300°F (150°C). Since convection ovens circulate hot air, they can bake more efficiently, so it’s recommended to reduce the temperature by 25°F (14°C) compared to a conventional oven. Preheat until the oven reaches this temperature, which usually takes 10-15 minutes.
  • Built-in Wall Oven (Electric or Gas): Set the temperature to 325°F (160°C) for an even and slow bake. Preheat for around 15 minutes until the oven reaches the desired temperature.

Electric Fan Ovens 

  • Electric Fan Oven: Fan ovens cook faster, so you should reduce the temperature by about 20°C. Set it to 140°C (285°F) and preheat for 10 minutes.

OTGs & Convection Microwaves

  • OTG (Oven Toaster Griller): Preheat to 160°C (320°F) for around 15 minutes. OTGs often take a bit longer to heat evenly, so give it sufficient time to stabilize the temperature.
  • Convection Microwave: Preheat to 150°C (300°F). Since convection microwaves tend to be faster, preheat for about 10 minutes.

How to Make Black Forest Cheesecake

Prepare the Biscuit Base

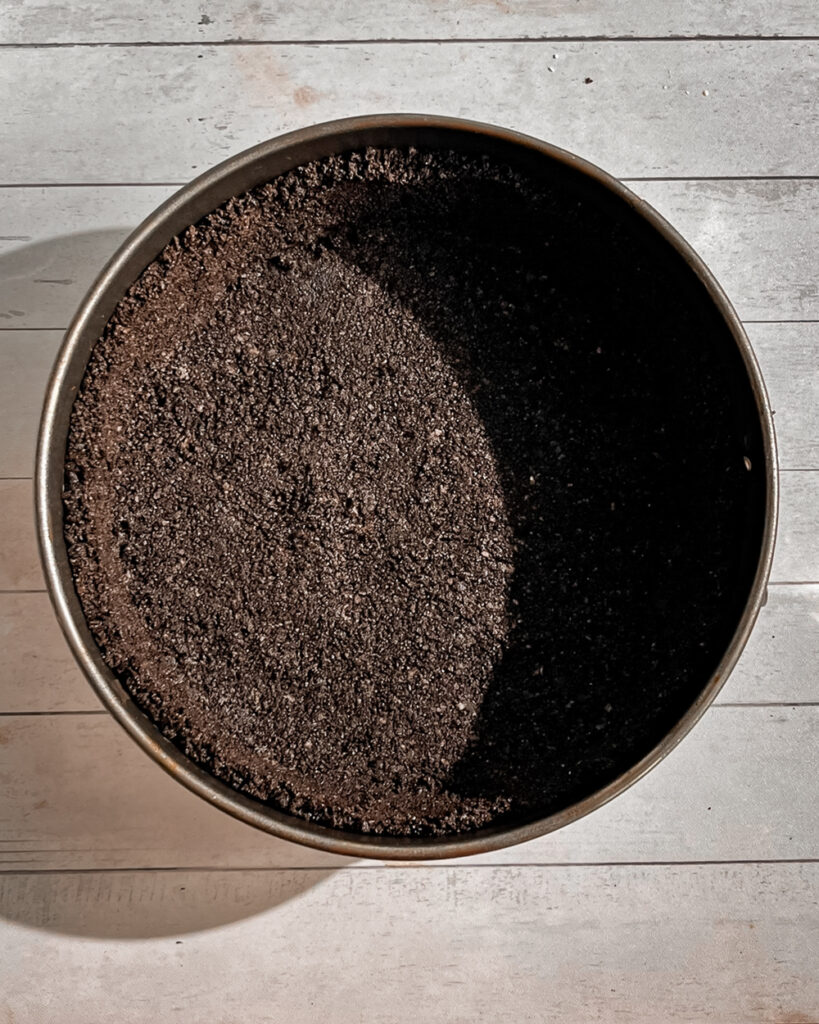
Preheat your oven to 325°F (160°C) and wrap the outside of an 8-inch springform pan in aluminum foil to prevent leaks. Finely crush the Oreo cookies (or digestive biscuits) using a food processor, then mix the crumbs with melted butter until the mixture resembles wet sand. Press the mixture into the bottom and sides of the springform pan, creating an even layer about 1/4-inch thick. Chill the base in the fridge while you prepare the filling.
Methods for Baking Your Cheesecake

  • Using the Water Bath Baking Method: Place the wrapped springform pan into a larger roasting pan or baking tray. Carefully pour hot water into the larger pan until it reaches halfway up the sides of the springform pan. Place the setup in the oven and bake. The cheesecake is done when the edges are set, but the center still has a slight jiggle. Let the cheesecake cool in the water bath to avoid sudden temperature changes that could cause cracking.
  • Using the Steam Tray Baking Method: Place a large, oven-safe baking dish or roasting pan on the lower rack of your oven. This will be your steam tray. Fill the steam tray with hot water, ensuring it’s deep enough to create steam. Place the cheesecake pan on a middle rack in the oven above the steam tray. Once the cheesecake is baked, turn off the oven and crack the oven door slightly. Let the cheesecake cool in the oven for about an hour. This gradual cooling helps prevent cracking due to sudden temperature changes.

Make the Cherry Filling

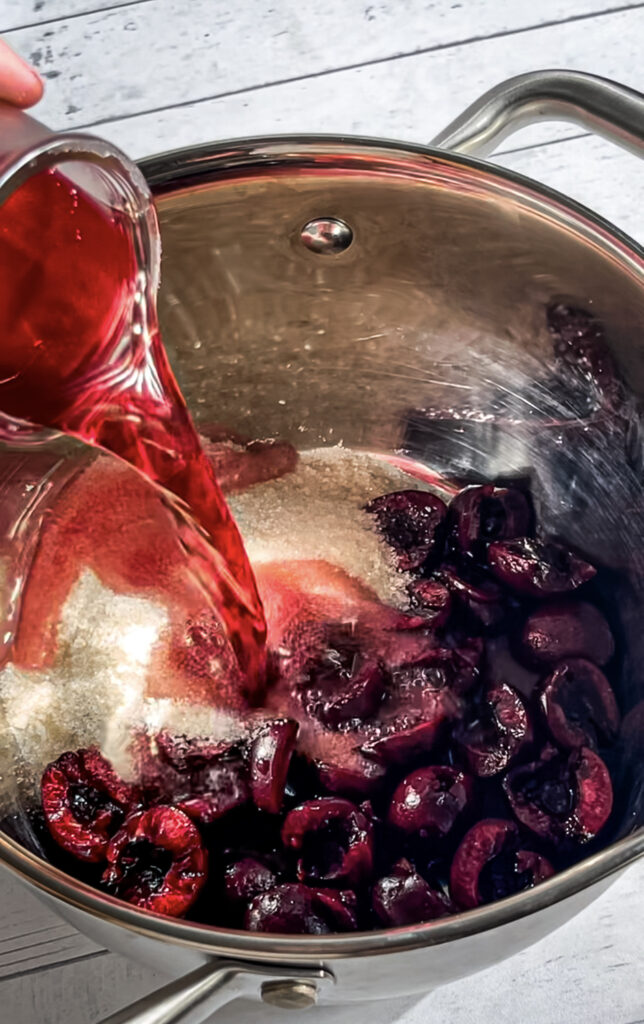
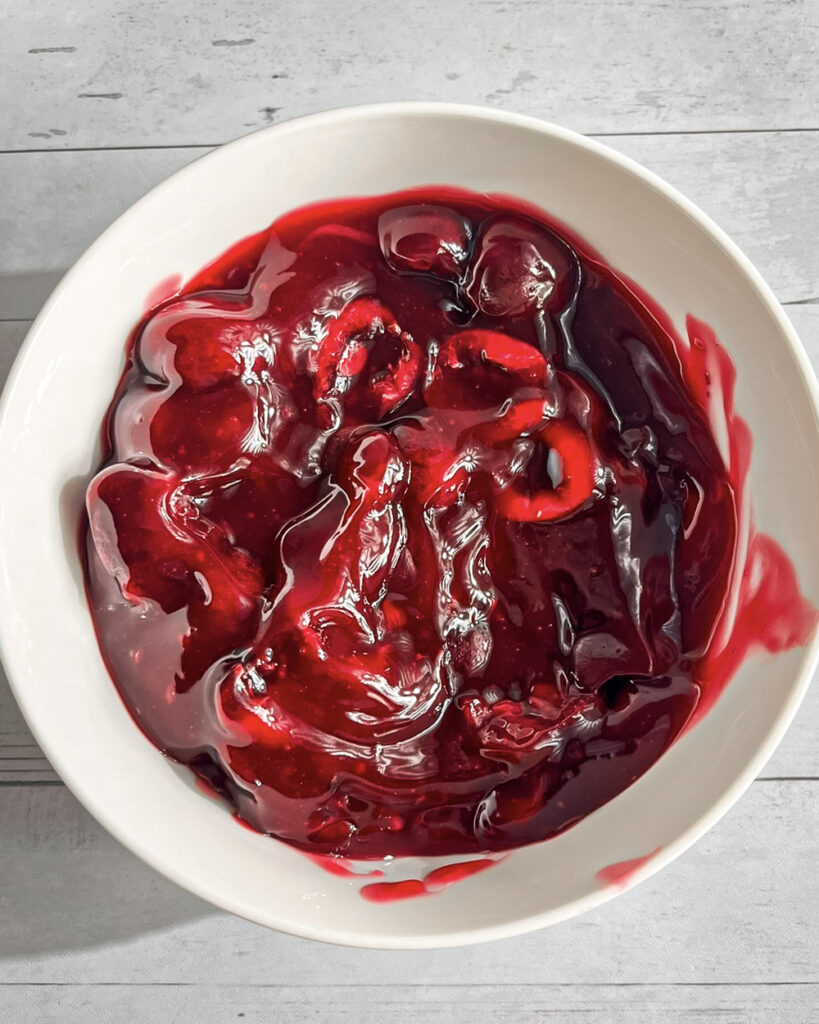
In a pot, combine half of the cherries, cranberry juice, sugar, and cornstarch. Bring the mixture to a boil over medium heat, stirring constantly. Let it bubble for about 30 seconds to cook the cornstarch, then remove from heat. Add the kirsch and stir. Transfer the filling to a bowl, cover with plastic wrap touching the surface, and chill in the fridge until ready to use.
Make the Chocolate Cheesecake Filling

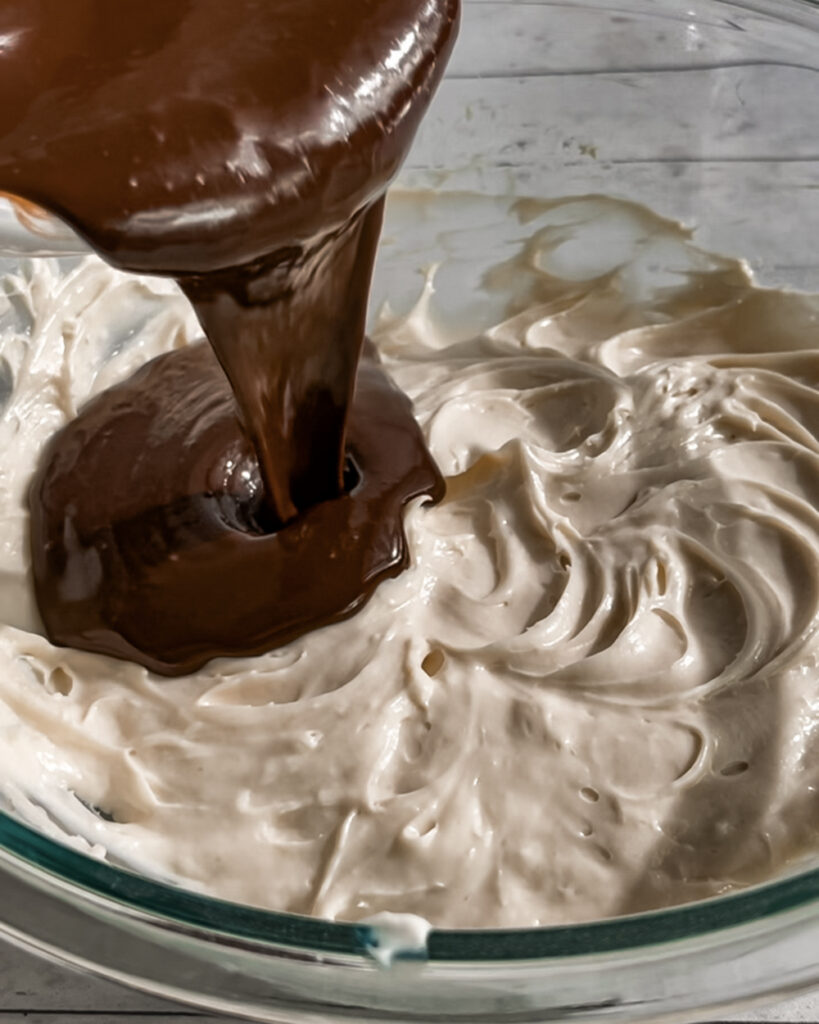
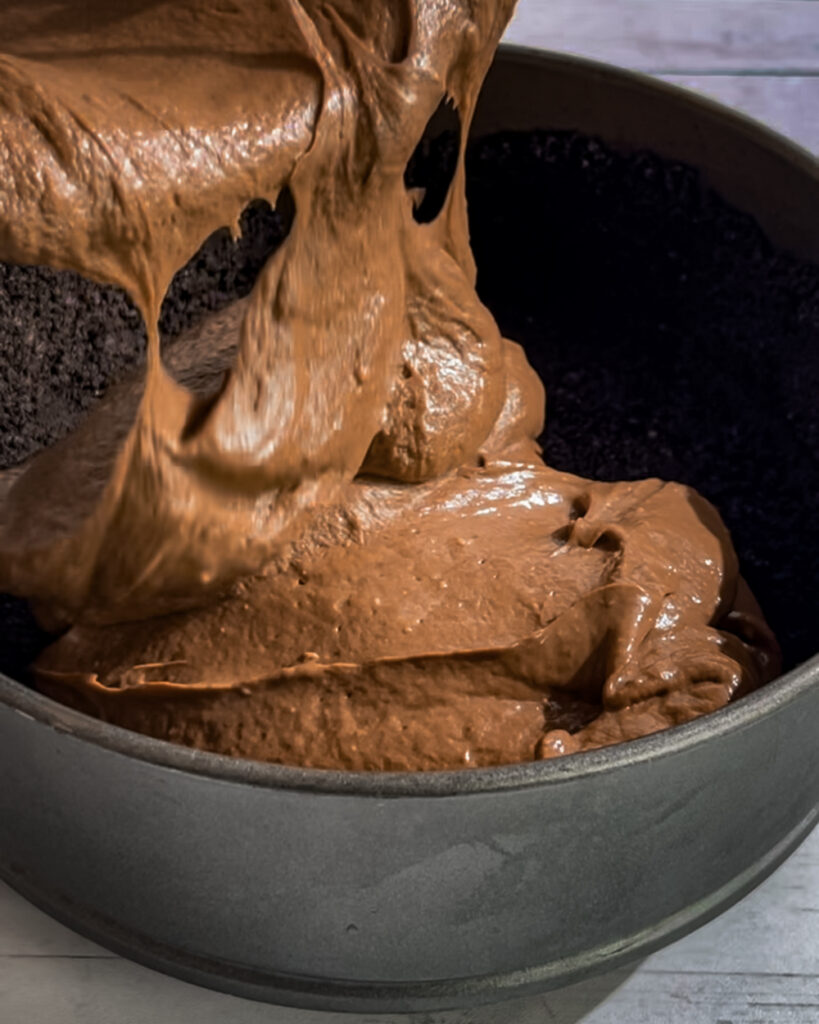
Place a tray with boiling water on the bottom rack of the oven to create steam, which helps the cheesecake bake evenly. Heat the whipping cream until simmering, then pour it over chopped dark chocolate. Stir until smooth. In a separate bowl, beat the cream cheese until soft and creamy, then add the sugars, cornstarch, cocoa powder, vanilla, and salt. Mix until well combined, then slowly fold in the chocolate-cream mixture.
Assemble the Cheesecake

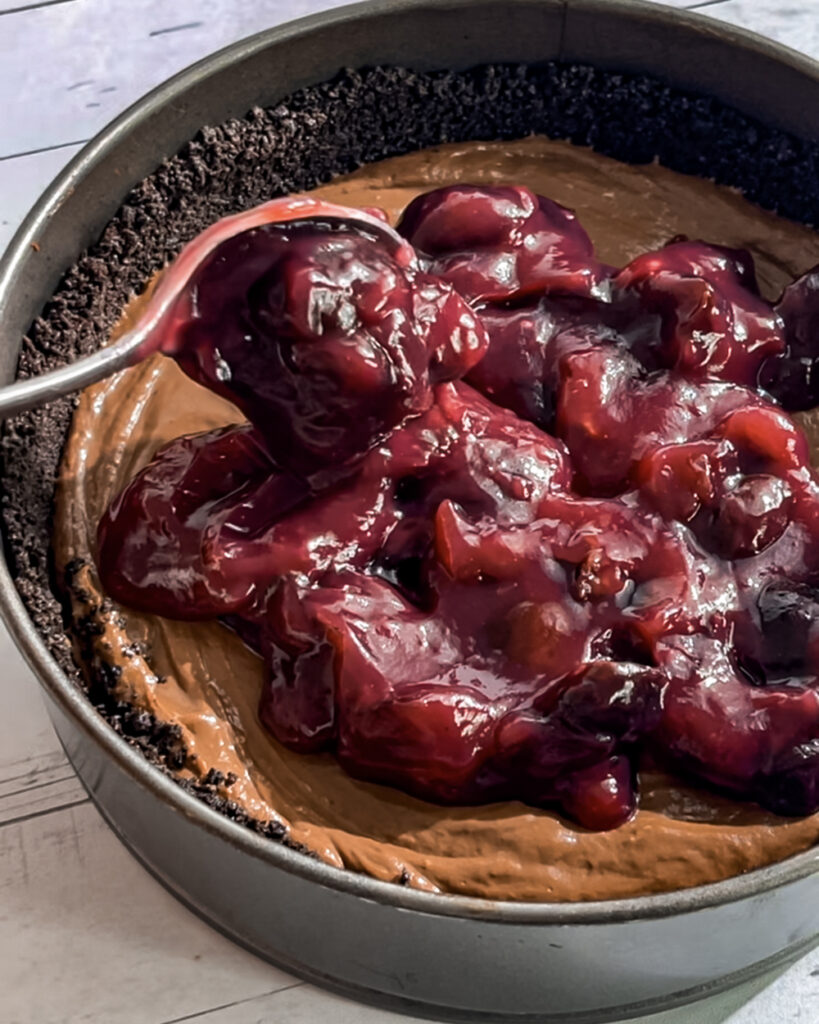
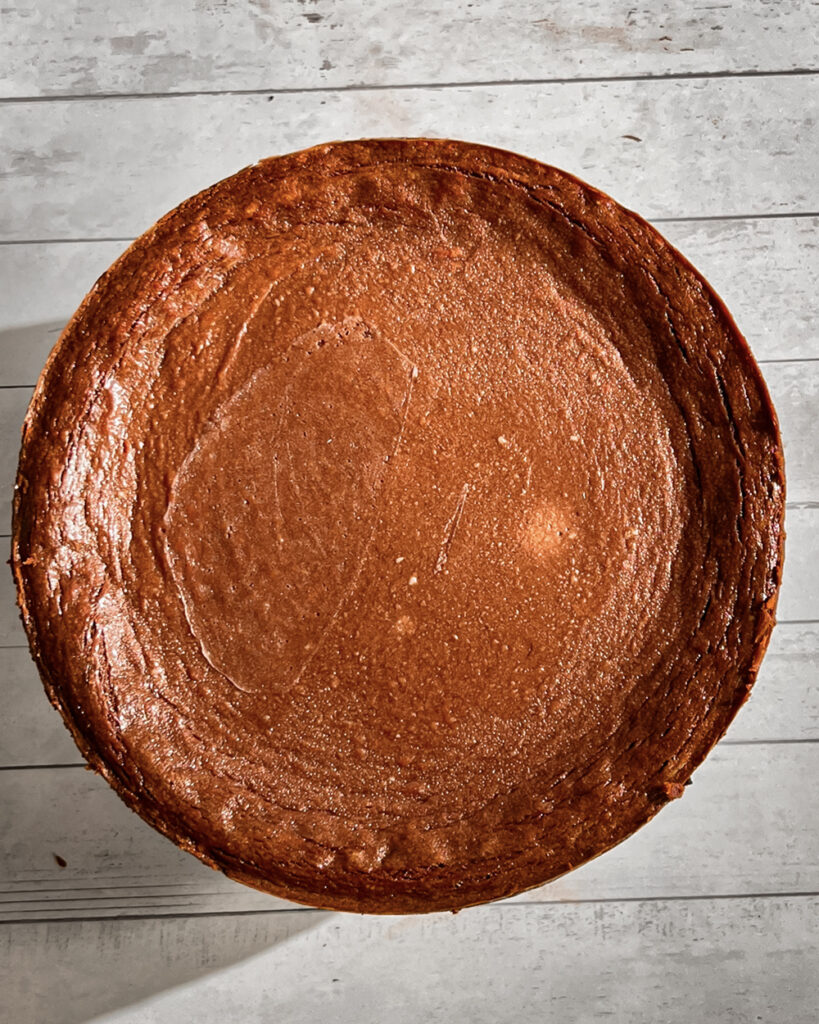
Pour half of the chocolate cheesecake filling into the prepared crust. Spread an even layer of the chilled cherry filling on top, reserving ¼ cup for decoration. Pour the remaining cheesecake filling over the cherries and smooth the surface. Place the pan on a baking tray and bake in the water bath for 40-45 minutes, or until the edges are set and slightly risen. Let the cheesecake cool in the oven with the door slightly open, then transfer to the fridge to chill for 5-6 hours.
How To Tell When Cheesecake Is Done Baking

Your cheesecake is done when the edges are set, but the center still has a slight wobble. Overbaking can cause cracks. Once done, allow it to cool gradually by leaving the oven door slightly open to prevent sudden temperature changes.

Reasons Why Cheesecakes Crack

Cheesecakes often crack due to overbaking, rapid temperature changes, or insufficient moisture during baking. Cracks can also form if the cheesecake batter is overmixed, incorporating too much air.

How to Prevent Cracks in Cheesecake

To avoid cracks, always bake your cheesecake in a water bath or with steam in the oven to create a humid environment. Cool the cheesecake slowly by leaving it in the oven with the door slightly open, and avoid overmixing the batter.
How to Store Black Forest Cheesecake

Store the cheesecake in an airtight container in the fridge for 3-4 days. The flavors actually improve as the cheesecake sits, making it a great make-ahead dessert.

Can I Freeze Cheesecake?

To freeze the cheesecake, let it cool completely and then wrap it tightly in plastic wrap and aluminum foil. Store it in an airtight container or freezer bag. It can be frozen for up to 2 months. To thaw, place it in the refrigerator overnight before serving.
Black Forest Cheesecake Frequently Asked Questions

Watch This Video For Black Forest Cheesecake

Why You’ll Love This Black Forest Cheesecake

This Black Forest Cheesecake combines the nostalgic flavors of Black Forest cake with the rich, creamy texture of a classic cheesecake. The tart cherry filling perfectly complements the decadent chocolate layers, while the whipped cream topping adds a light, airy finish. Being eggless, it’s ideal for those with dietary restrictions, and it can easily be adapted to be dairy-free or gluten-free. With its creamy texture and impressive presentation of whipped cream and chocolate shavings, this cheesecake is perfect for any occasion!

Expert Cheesecake Baking Tips

  • Room Temperature Ingredients: Always use room temperature ingredients to ensure a smooth, creamy filling.
  • Water Bath or Steam: This creates a humid environment that helps prevent cracks.
  • Cool Gradually: Let the cheesecake cool slowly in the oven to avoid sudden temperature changes, which can cause cracks.
  • Chill for Best Flavor: Let your cheesecake chill for at least 5-6 hours before serving to allow the flavors to develop fully.

Did you make this recipe?

Leave a rating and review below and try these cakes next!
Meet Saloni

I’m a former pastry chef with a love for breads, cakes and everything in between! My recipes are easy to follow, egg free and are designed to be shared with others!

popular recipes

Get new recipes first!

Check out my Cookbook

Get tips from a pro!

5 from 1 vote

Black Forest Cheesecake

This Black Forest Cheesecake combines the classic flavors of Black Forest cake with the richness of cheesecake. Featuring a crunchy Oreo cookie crust, a smooth chocolate cheesecake layer, and a homemade cherry filling, it’s topped with fresh whipped cream and chocolate shavings. This eggless dessert is surprisingly easy to make and can be adapted to suit dairy-free and gluten-free diets. Perfect for a decadent dessert that’s sure to impress!
Author: Saloni Mehta
Rate
Yield: 10 servings
Prep: 1 hour
Cook: 45 minutes
Total: 7 hours

Equipment

Ingredients

Biscuit Base Ingredients

  • 20-22 Chocolate Oreo Cookies or digestive biscuits / gluten-free chocolate Oreos
  • 60 g Butter* melted

Homemade Cherry Filling Ingredients

  • 220 g Cherries pitted and cut halves or quarters, fresh or frozen (do not thaw)
  • 125 ml Juice or Water I have used cranberry juice, but you can use cherry juice
  • 70 g Cane Sugar*
  • 20 g Cornstarch
  • 1 tbsp Lemon Juice or Kirsch cherry liqueur

Chocolate Cheesecake Filling Ingredients

  • 170 g Dark Chocolate*
  • 160 ml Whipping Cream*
  • 450 g Cream Cheese* at room temperature
  • 65 g Cane Sugar*
  • 55 g Light Brown Sugar
  • 25 g Cornstarch
  • 11 g Cocoa Powder
  • 2 tsp Vanilla extract
  • ½ tsp Salt

Whipped Cream Ingredients

  • 120 ml Whipping Cream* cold
  • 30 g Powdered Sugar sifted
  • 2 tsp Vanilla Extract
Shop Ingredients on Jupiter

Instructions

Base Instructions

  • Preheat the oven to 325 f (160C).
  • Prepare an 8-inch springform pan. Wrap the outside of the springform pan with aluminum foil. Make sure it’s well-sealed.
  • Finely crush the cookies in a food processor.
  • In a bowl combine and mix the finely crushed cookies and melted butter, until you get a mixture resembling wet sand.
  • Transfer the mixture to the springform pan and use the flat bottom of a glass or a spoon. Press them into an even layer with an approximately 1/4-inch thickness of the biscuit base and around sides of the pan as shown.
  • Place it in the fridge for 30 minutes to set. Prepare chocolate cheesecake filling.

Homemade Cherry Filling Instructions

  • (You can make cherry filling a day ahead)
  • In a pot combine half of the cut cherries, cranberry juice, sugar, and cornstarch. bring it to a boil.
  • Stir on medium heat as it comes to a boil.
  • When it boils, give it 30 seconds to bubble on low heat for starch to cook.
  • Remove from heat.
  • Add remaining cherries and kirsch or lemon juice. Stir until combined.
  • Transfer to a bowl, Cover the surface of the cherry filling with plastic wrap.
  • Chill it completely in the fridge for 2-3 hours.
  • Stir the cherry filling to get a smooth consistency with a spoon.
  • Reserve ¼ cup of this filling for topping and use the remaining for the cheesecake layer.

Chocolate Cheesecake Filling Instructions

  • Place a tray with boiling water on the bottom rack to create steam for baking the cheesecake.
  • Add whipping cream in a small pot and bring it to a simmer. Pour it on chocolate in a bowl and mix with a spatula until smooth. Keep it on the side.
  • In a separate bowl mix cream cheese with an electric whisk or paddle attachment fitted to a stand mixer until it is soft and creamy.
  • Add cane sugar, light brown sugar, corn starch, cocoa powder, vanilla, salt, mix until combined.
  • Add chocolate-cream mixture and mix until smooth. Use a spatula to scrape the bottom of the bowl to make sure there are no lumps of cream cheese.
  • Pour half of the cheesecake filling on top of the set cookie crust followed by a layer of the cherry filling and spread it evenly.
  • Add the remaining cheesecake mixture on top of the cherry layer. Spread it in an even layer to cover the cherry filling.
  • Place the pan on a baking tray & bake it with steam or in a water bath for 40-45 minutes.
  • When the edges of the cheesecake have slightly risen and appear set. Turn the oven off, allow the cheesecake to cool in the oven and crack the oven door slightly.
  • Later remove the cheesecake from the oven and Let it cool completely at room temperature for 1 hour and then in the fridge for 5-6 hours
  • Carefully release the springform ring and place it on a serving plate using a spatula.

Whipped Cream Instructions

  • Combine all the ingredients – whipping cream, powdered sugar and vanilla in a mixing bowl.
  • Use a whisk attachment in a stand mixer or a handheld electric whisk to whip until stiff peaks form. Keep it cold.

Decorate Instructions

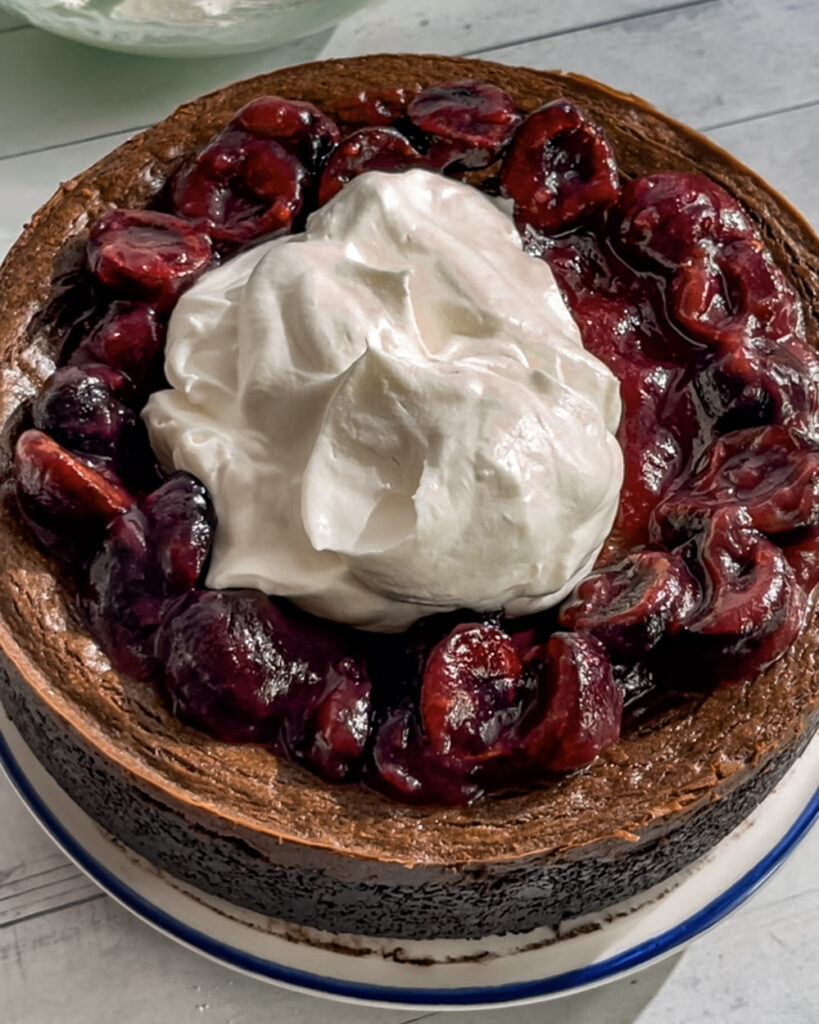
  • Spread the reserved ¼ cup of cherry filling on the cheesecake.
  • Add a thick layer of whipped cream on top of the cherry filling.
  • Decorate with chocolate shavings and fresh cherries.
  • Store in the fridge for 3-4 days.

Notes

  • Cup vs weighing scale: The US customary cup measurement serves as a rough estimate, as it can have uncertainties, so for precise results, it's recommended to weigh your ingredients using a digital scale in grams.
  • Butter: Dairy-free butter sticks or any butter of your choice
  • Whipping cream: Use Dairy-free unsweetened whipping cream for vegan and dairy-free or any full-fat whipping cream of choice)
  • Cream cheese: Dairy-free cream cheese or any plain full-fat cream cheese of your choice
  • Sugar: Cane sugar can be substituted with granulated sugar or castor sugar. Ensure the sugar is vegan-friendly (some sugars are processed with bone char) or use organic cane sugar.
  • Dark Chocolate: Use 60% or higher good quality chocolate bars. To make this recipe vegan, use dark chocolate of any dairy-free chocolate brand (make sure it doesn't contain milk solids or butter) but cocoa butter is totally fine.

Did you try this recipe? Leave a review!

4 Responses

  1. 5 stars
    Excellent! The taste reminds me something between a brownie and a cheesecake actually. So easy and soooo delicious!

5 from 1 vote

Leave a Reply

Your email address will not be published. Required fields are marked *

Recipe Rating


Try these recipes next!

get new recipes right to your inbox!