prep time: 30 min | bake time: 30 min | total time: 2 hrs
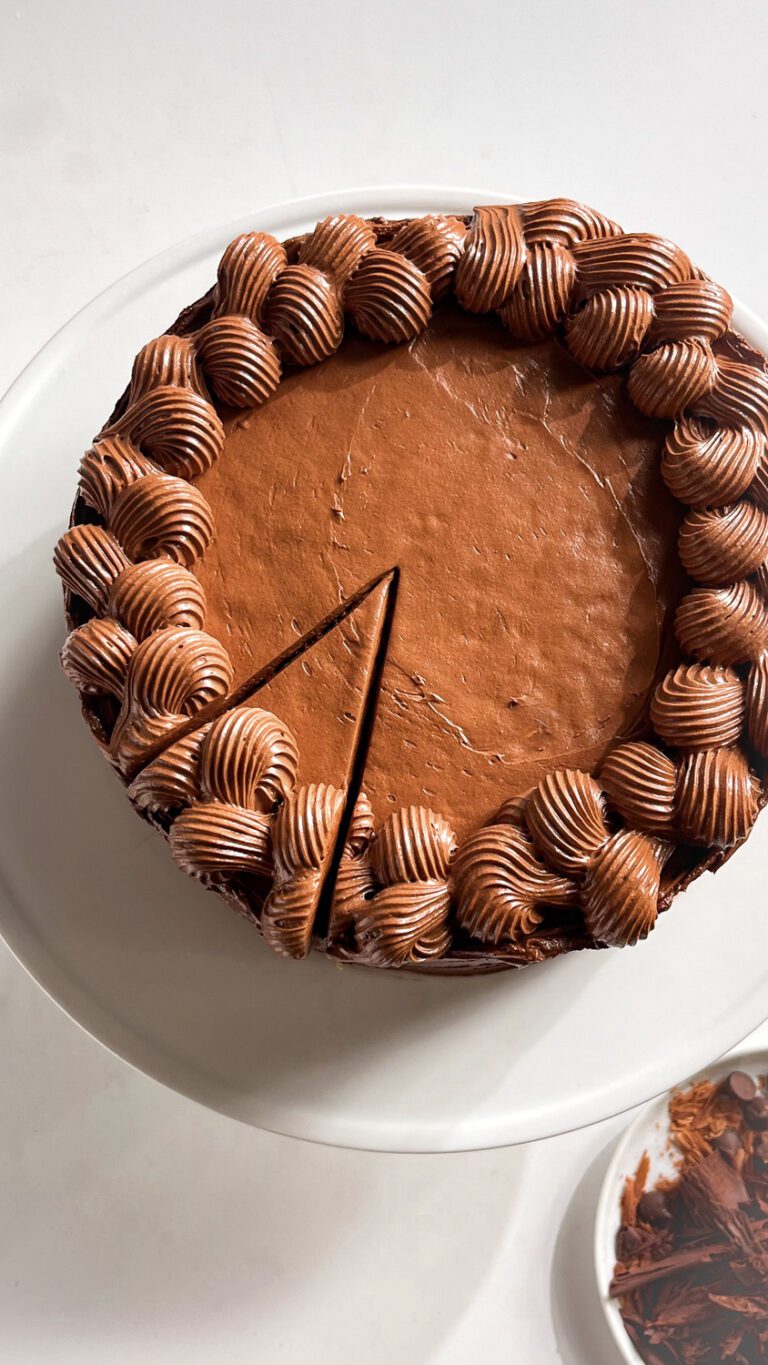
This eggless chocolate and vanilla marble cake has soft swirled cake layers and creamy chocolate buttercream. A beautiful layer cake for birthdays and celebrations.
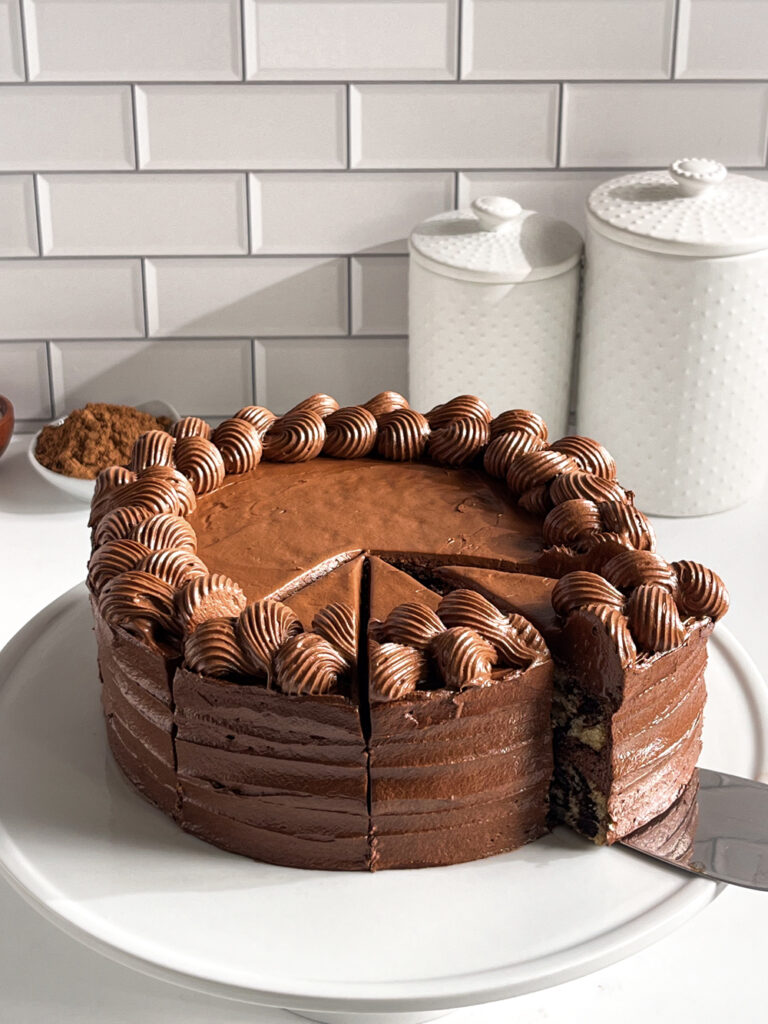
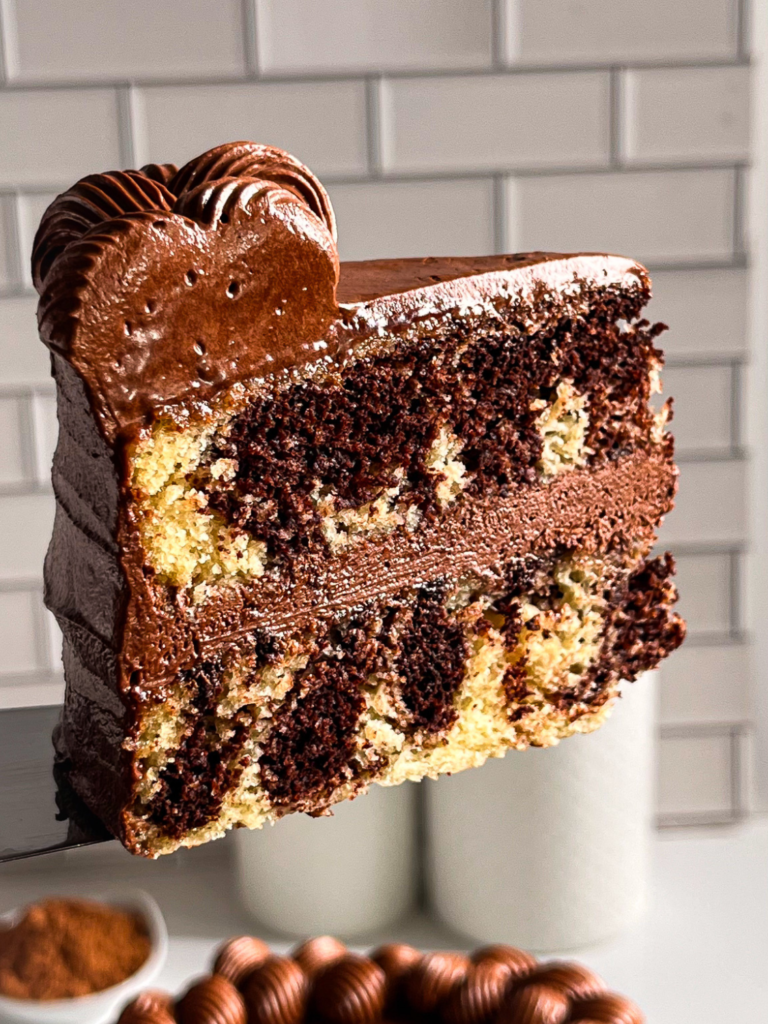
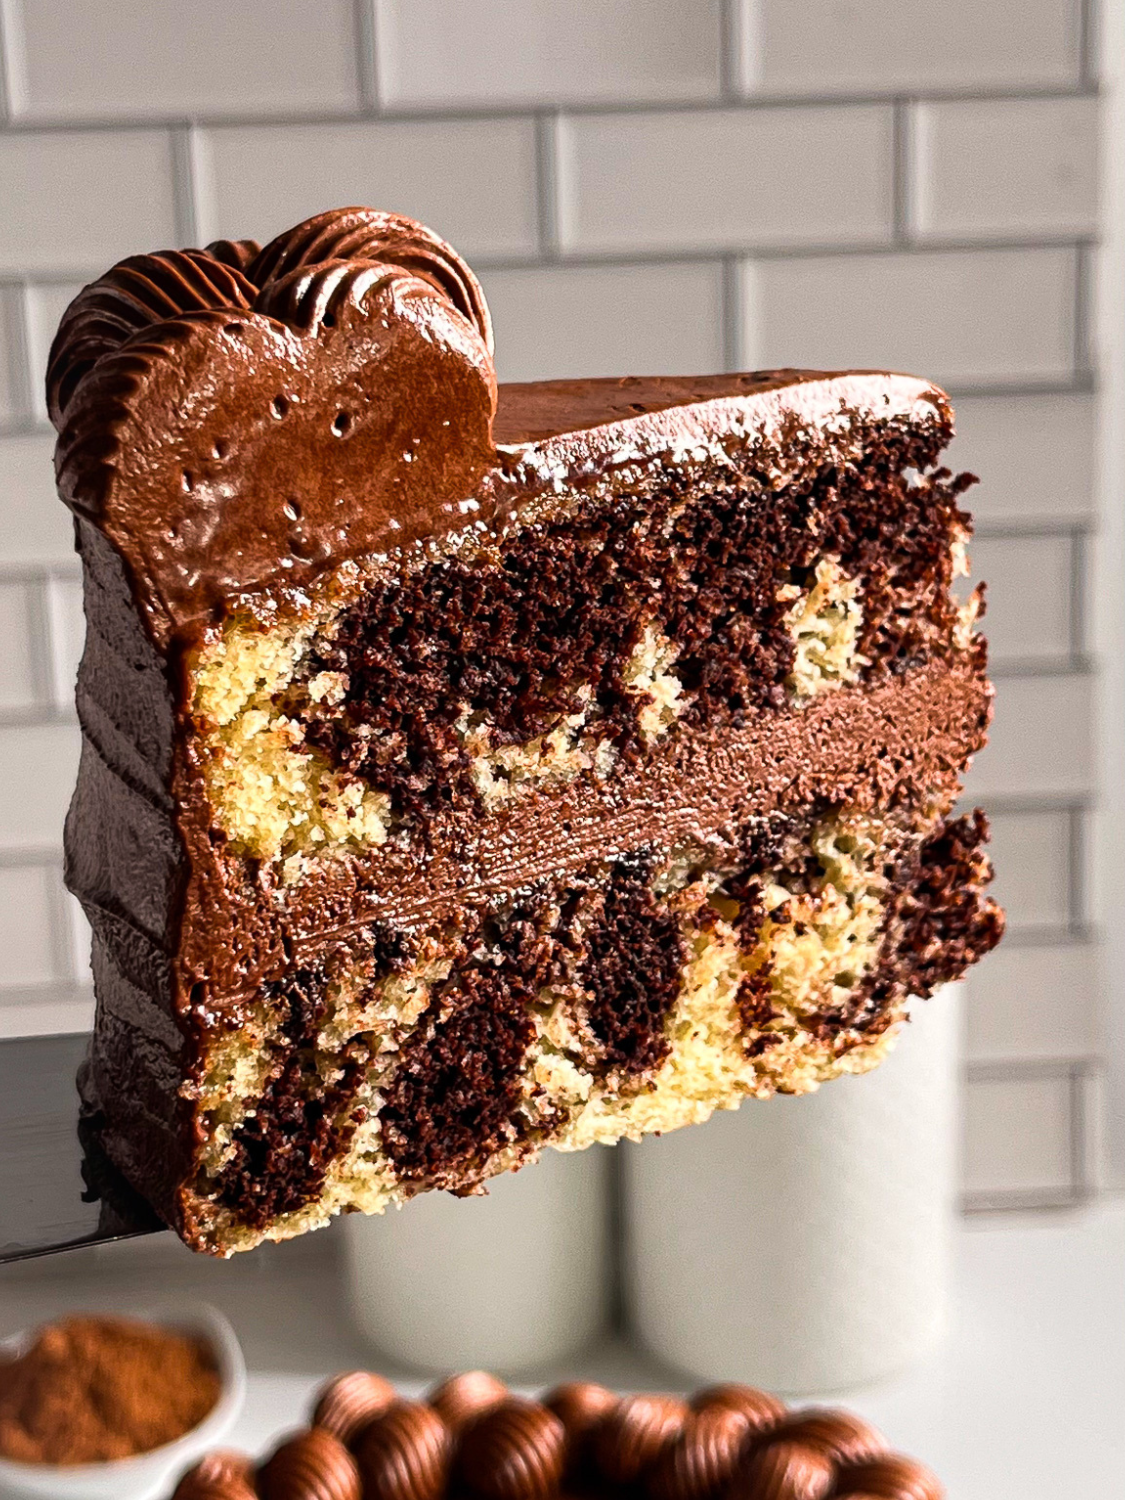
This Eggless Chocolate and Vanilla Marble Cake brings together two classic flavors in one beautiful layer cake. Soft vanilla cake and rich chocolate cake are swirled together to create a marble pattern in every slice, then layered and finished with creamy chocolate buttercream.
The combination is simple, familiar, and perfect for birthdays, family gatherings, or whenever you want a homemade cake that feels a little special. The recipe is made without eggs, and you can use suitable dairy-free alternatives to make the cake and frosting dairy-free.
Two classic flavors: Vanilla and chocolate come together in one cake, so you get a little of both in every slice.
Beautiful marble effect: The swirled batter creates a unique pattern without needing separate cake recipes.
Eggless cake layers: The sponge is made without eggs using simple baking ingredients.
Perfect for celebrations: Two layers and chocolate buttercream make this a lovely cake for birthdays and special occasions.
Dairy-free option: With suitable plant-based milk, butter, and whipping cream, you can adapt the recipe for a dairy-free version.
Ingredients You’ll Need
For the Marble Cake
Milk: Adds moisture and helps create a soft cake crumb. Use dairy or unsweetened plant-based milk.
Lemon juice or white vinegar: Combine with the milk to create a buttermilk-style mixture that helps tenderize the cake.
Vanilla extract: Adds warmth and flavor to the vanilla portion of the cake.
Cane sugar: Sweetens the cake. Caster sugar also works if that is what you have on hand.
Butter: Melted butter adds richness and helps keep the cake moist. Use plant-based butter for a dairy-free version.
All-purpose flour: Provides structure for the cake layers. For a gluten-free version, use a suitable gluten-free baking blend, ideally one designed for cakes.
Cornstarch: Helps create a more tender crumb.
Baking powder and baking soda: Help the cake rise and give the layers a light texture.
Salt: Balances the sweetness and brings out the vanilla and chocolate flavors.
For the Chocolate Batter
Natural cocoa powder: Gives the chocolate portion its flavor and color. Use the type specified in the recipe.
Hot water: Helps dissolve the cocoa powder into a smooth paste that can be mixed evenly into the reserved batter.
For the Chocolate Buttercream
Butter: Creates the base of the frosting. Use softened butter so it whips smoothly.
Powdered sugar: Sweetens and thickens the buttercream. Sift it first to help prevent lumps.
Cocoa powder: Adds the chocolate flavor and color.
Whipping cream: Helps adjust the frosting to a smooth, spreadable consistency. Use plant-based whipping cream for a dairy-free version.
Vanilla extract and salt: Round out the chocolate flavor and balance the sweetness.
How to Make a Chocolate and Vanilla Marble Cake
Make the Cake Layers
Preheat the oven to 350°F (175°C). Grease two 8-inch round cake pans and line the bottoms with parchment paper. In a bowl, combine the milk and lemon juice or white vinegar. Let it sit for 10–15 minutes until slightly curdled. This helps create a tender cake crumb.
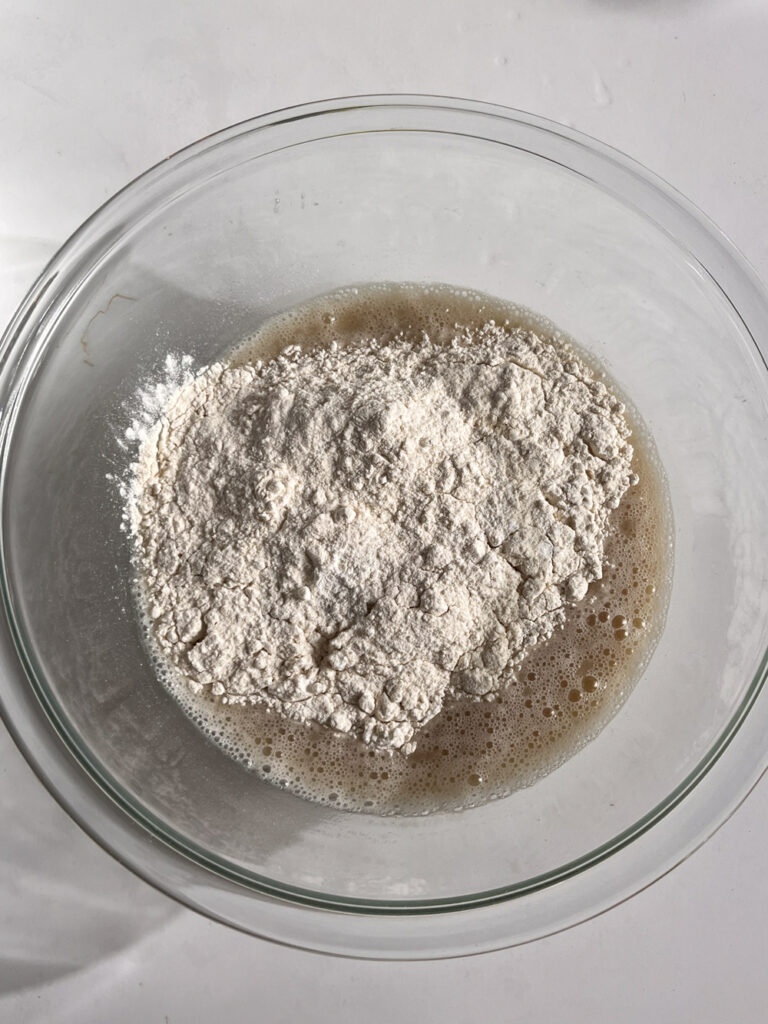
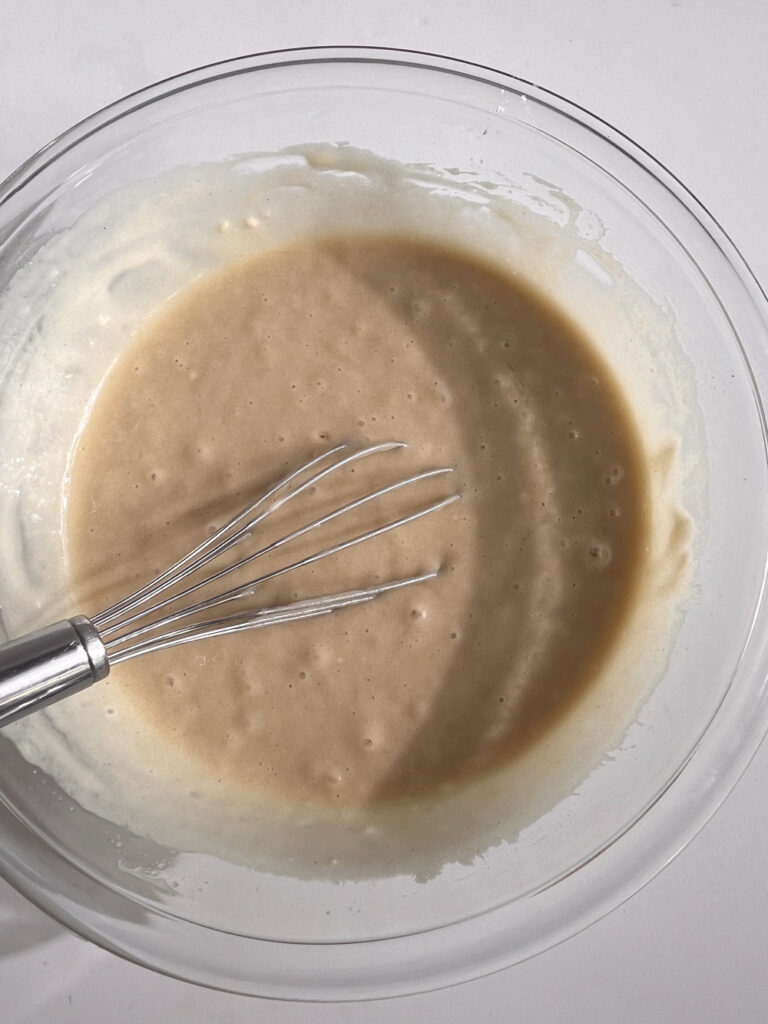
Add sugar and vanilla to the milk mixture and whisk to combine. In a separate bowl, sift together the all-purpose flour, cornstarch, baking powder, baking soda, and salt. Add the dry ingredients to the wet ingredients and whisk until just combined. Add the melted butter and mix until the batter is smooth, taking care not to overmix.
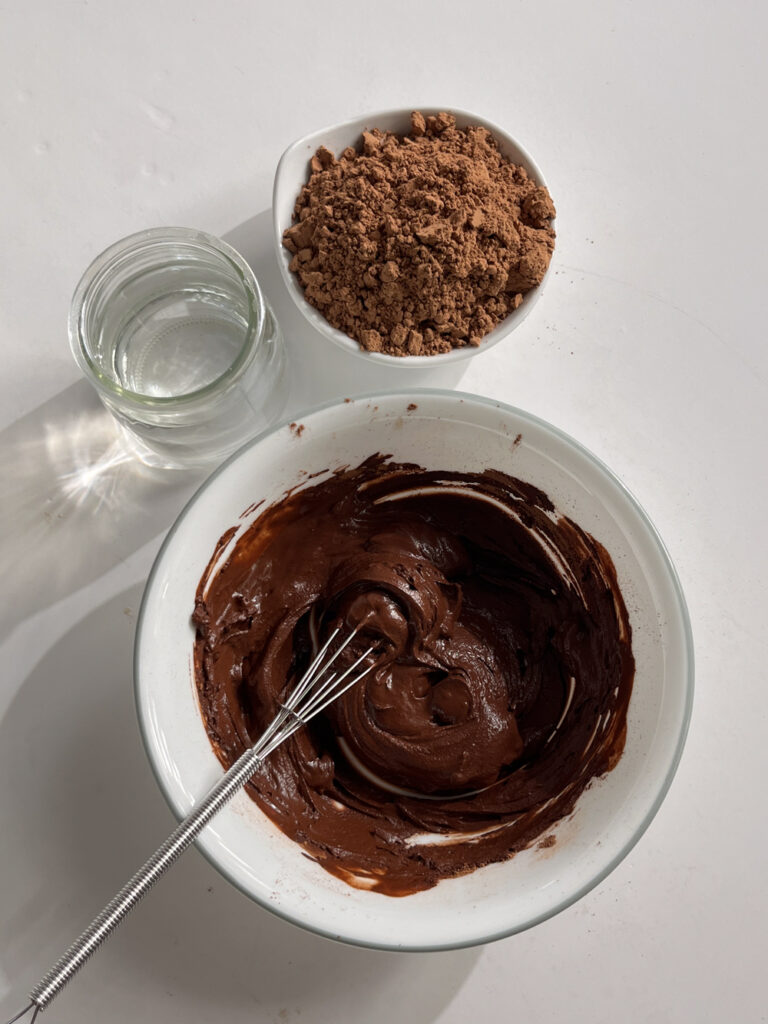
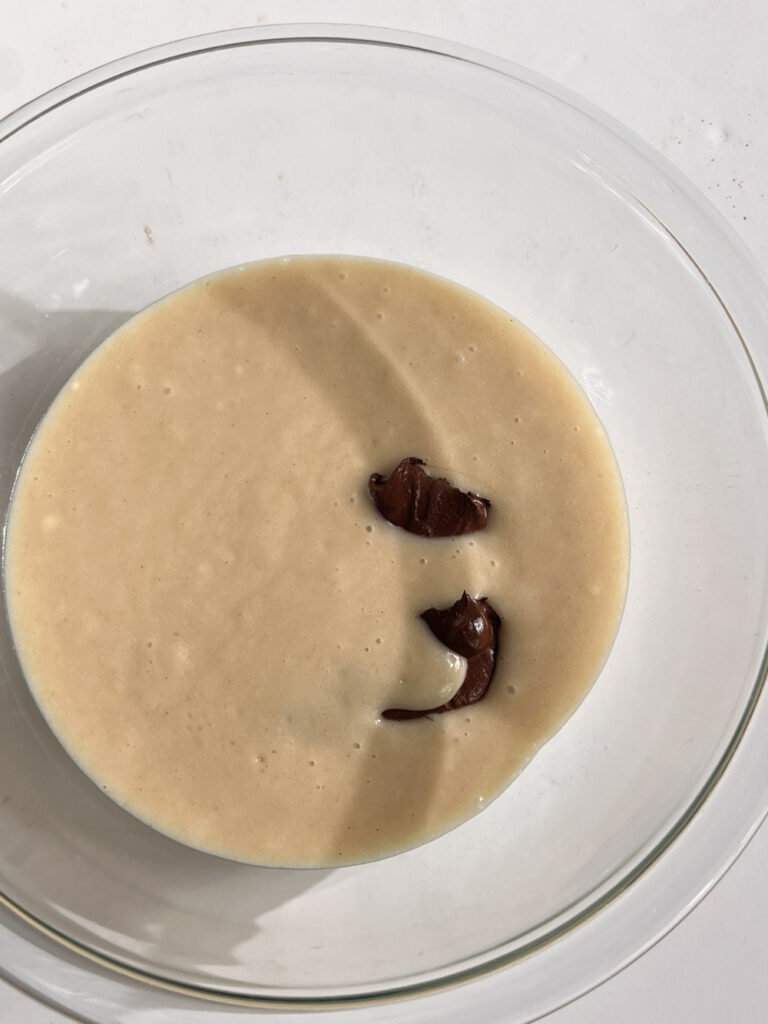
In a small bowl, whisk the cocoa powder and hot water together until smooth, with no lumps remaining. Transfer about one-third of the vanilla batter to a separate bowl and stir in the cocoa mixture until evenly combined.
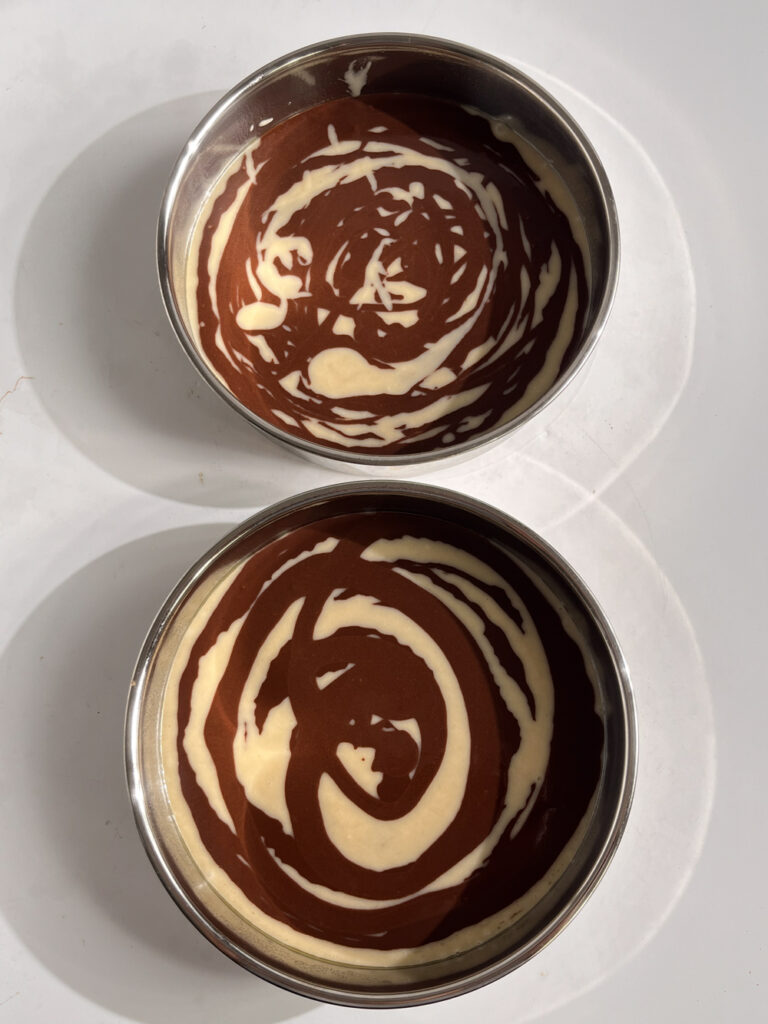
Divide the vanilla batter evenly between the prepared cake pans. Spoon portions of the chocolate batter over the vanilla batter. Use a skewer or knife to gently swirl the two batters together a few times. Avoid over-swirling, as this can blend the colors instead of creating a distinct marble pattern.
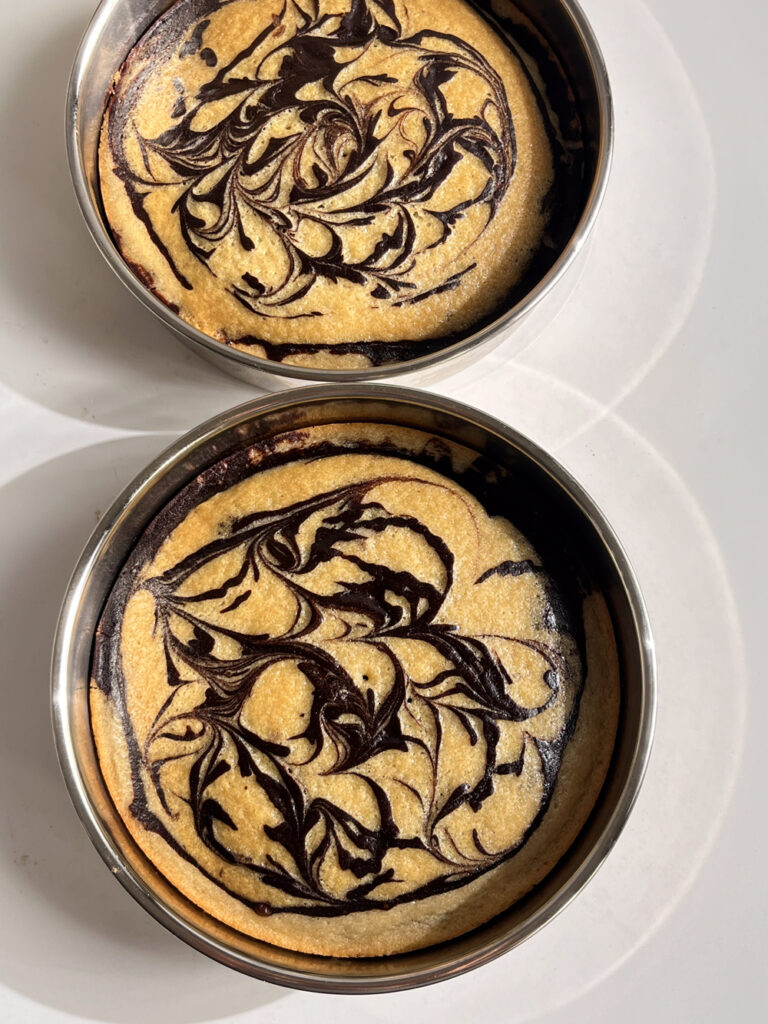
Bake for 25–30 minutes, or until a toothpick inserted into the center comes out clean or with a few moist crumbs. Let the cakes cool in their pans before turning them out onto a wire rack to cool completely.
Make the Chocolate Frosting
Beat the softened butter until smooth and creamy. Gradually add the powdered sugar, mixing well after each addition. Add the cocoa powder, whipping cream, vanilla extract, and salt. Beat until the buttercream is smooth, fluffy, and spreadable.
Assemble the Cake
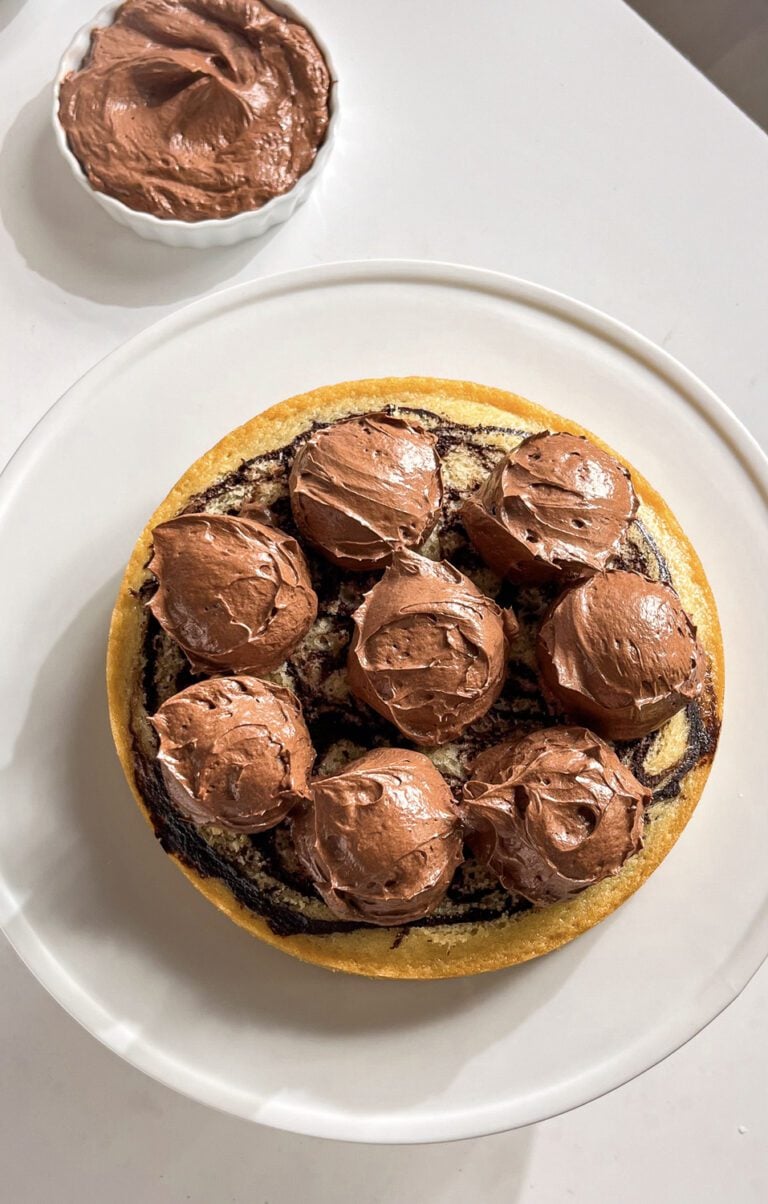
Place one completely cooled cake layer on a serving plate or cake board. Spread an even layer of chocolate buttercream over the top, then place the second cake layer on top.
Apply a thin crumb coat of buttercream over the top and sides of the cake. Refrigerate for about 30 minutes to set the crumb coat, then apply the remaining buttercream for the final finish. Refrigerate briefly if needed before slicing.
If desired, use a piping bag to add rosettes or borders along the top and sides. Chill the assembled cake for at least 30 minutes to set the frosting. Before serving, allow the cake to come to room temperature for 10-15 minutes to enhance the flavors. Enjoy your beautifully marbled vanilla and chocolate cake!
Alternate spoonfuls of vanilla and chocolate batter in the cake pans. Gently swirl a skewer or thin knife through the batter a few times. Avoid over-swirling, as the two batters can blend together instead of creating a distinct marble pattern.
Overbaking is one possible reason. Start checking the cake at the lower end of the recommended baking time. Also, measure the flour accurately and follow the ingredient quantities closely to avoid a dry or dense crumb.
Yes. Use unsweetened plant-based milk, dairy-free butter, and plant-based whipping cream. Check the labels on all ingredients to ensure they are suitable for your dietary needs.
This recipe is designed for two 8-inch round pans. Using one deeper pan will change the baking time and may affect how evenly the cake bakes. I recommend following the specified pan size unless you test the adjustment.
The chocolate and vanilla batter can be used to create a marbled cupcake, but the baking time will differ from the layer cake. Test a small batch and begin checking for doneness earlier than you would for the full-size cake.
This recipe is developed for two 8-inch round cake pans, so I wouldn’t recommend pouring the full batter into a loaf pan without testing. For a loaf-style version, use my dedicated Eggless Marble Loaf Cake recipe instead.
Tips for the Best Marble Cake
Measure accurately: Weigh the ingredients in grams for the most consistent results.
Don’t overmix: Once the flour is added, mix only until the batter is smooth and the ingredients are combined.
Make the cocoa paste smooth: Mix the cocoa powder and hot water thoroughly before adding it to the reserved batter.
Don’t over-swirl: A few gentle passes with a skewer are enough to create the marble effect.
Cool completely before frosting: Warm cake layers can soften the buttercream and make the cake difficult to assemble.
Chill between frosting steps: A short chill after the crumb coat helps make the final layer easier to apply.
Did you make this cake?
Make sure you leave a rating and review below! Try these recipes next:
I’m a former pastry chef with a love for breads, cakes and everything in between! My recipes are easy to follow, egg free and are designed to be shared with others!
A soft eggless chocolate and vanilla marble layer cake with beautiful swirls of two classic flavors, finished with creamy chocolate buttercream. Includes a dairy-free option.
60mlWhipping Creamat room temp; see notes for options
2tspVanilla Extract
Pinch of Salt
Instructions
Marble Cake Instructions
Preheat the oven to 350°F (175°C). Grease two 8-inch round cake pans and line the bottoms with parchment paper.
In a bowl, combine the milk and lemon juice or white vinegar. Let it sit for 10–15 minutes until slightly curdled. This helps create a tender cake crumb.
Add the cane sugar and vanilla extract to the milk mixture and whisk to combine.
In a separate bowl, sift together the all-purpose flour, cornstarch, baking powder, baking soda, and salt. Add the dry ingredients to the wet ingredients and whisk until just combined.
Add the melted butter and mix until the batter is smooth, taking care not to overmix.
Make the Chocolate Batter - In a small bowl, whisk the cocoa powder and hot water together until smooth, with no lumps remaining to from a paste. Transfer about one-third of the vanilla batter to a separate bowl and stir in the cocoa paste until evenly combined.
Divide the vanilla batter evenly between the prepared cake pans. Spoon portions of the chocolate batter over the vanilla batter. Use a skewer or knife to gently swirl the two batters together a few times. Avoid over-swirling, as this can blend the colors instead of creating a distinct marble pattern.
Bake for 25–30 minutes, or until a toothpick inserted into the center comes out clean or with a few moist crumbs. Let the cakes cool in their pans before turning them out onto a wire rack to cool completely.
Chocolate Frosting Instructions
Use a mixing bowl fitted with the paddle attachment or a handheld electric whisk.
Whip the softened butter until it is light and fluffy on medium speed with an electric whisk. Add sifted powdered sugar in 2 parts.
Mix on medium speed until it is light-smooth for 4-5 minutes. Add sifted cocoa powder and mix until combined. Pour cream, vanilla, salt and mix until fluffy and smooth.
Cake Assembly Instructions
Trim a thin layer of both cakes to level them with a serrated knife to ensure they stack evenly.
Place a small amount of frosting on the center of your cake stand or serving plate.Place one layer of the cake on the prepared cake stands or plate.
Using an offset spatula or butter knife, spread a generous layer of frosting (at least 5-6 scoops) evenly over the top of the first cake layer. Smooth it out to ensure an even surface.
Carefully place the second cake layer on top of the frosted first layer. Align it as evenly as possible.
Apply a crumb coat by spreading a thin layer of frosting over the entire cake. This layer seals in any crumbs and creates a smooth surface for the final coat. Chill the cake in the refrigerator for about 30 minutes.
Apply the final layer of frosting, smooth it out with the offset spatula.
For a clean finish, you can use a bench scraper to smooth the sides. If desired, use a piping bag to pipe rosettes or borders, to the top and sides of the cake.
Refrigerate the assembled cake for at least 30 minutes to allow the frosting to set and make slicing easier.
Before serving, allow the cake to come to room temperature for 10-15 minutes to enhance the flavors. Enjoy your beautifully marbled vanilla and chocolate cake!
Notes
Cup vs weighing scale: The US customary cup measurement serves as a rough estimate, as it can have uncertainties, so for precise results, it's recommended to weigh your ingredients using a digital scale in grams
Before you start to make any recipe, measure and prepare your ingredients so the process will go smoothly and easily.
For teaspoon (tsp) and tablespoon (tbsp) measurements, please use measuring spoons and not the type of spoons you eat with for accuracy.
Milk: You can use any dairy-free unsweetened milk (like almond, soy, oat) or dairy-based whole milk.
Butter: Dairy-free butter sticks or any butter of your choice.
Lemon Juice: You can substitute with Apple Cider Vinegar / White Vinegar and vice-versa.
Whipping Cream: Use Dairy-free unsweetened whipping cream for a vegan version or any full-fat whipping cream of your choice.
Sugar: Cane sugar can be substituted with granulated sugar or castor sugar. Ensure the sugar is vegan-friendly (some sugars are processed with bone char) or use organic cane sugar.
Hi
You can use either salted or unsalted butter, depending on the brand, as the amount of salt can vary. Unsalted butter is the safer option, as you can then add salt separately and adjust it to your taste. For cocoa powder, I recommend a good-quality natural cocoa powder.
Hi Geetika
My cookbook focuses on vegan desserts, but they can be very easily adapted to eggless (with dairy). You can simply use your preferred dairy options like regular milk, butter, and cream in place of the plant-based ingredients.
Hi saloni ,i always try ur recipes n it always comes out amazing ,dis one came out a bit dense ,can u tell me why ,what mistake i must hav been done,ok one more thing is i hav an 80 lit inbuilt faber otg so what temp shuld i keep ? Plz let me knw
Hi Jyoti
Thank you so much for trying my recipes – I’m so happy they’ve been working well for you!
If this one turned out a bit dense, it could be due to overmixing, slightly extra flour, or even oven temperature. All of these can affect the final texture.
Substituting butter with oil can help – oil gives a softer, more moist crumb, while butter can make the cake slightly firmer. You can use the same amount of a neutral oil.
For your OTG, follow the recipe temperature, make sure to preheat well and bake on the middle rack. If your oven runs hot, you can reduce the temperature slightly by 5–10°C. Hope this helps!
Hi George
This recipe was tested using melted butter, as it contributes to the richness and texture of the crumb. For best results, I’d recommend using a mix of half oil and half melted butter rather than oil alone.
As for the yogurt, if it’s used in a small quantity (around 30g or less), it can be omitted without significantly affecting the final result.
Hope this helps. let me know if you have any other questions!
Hi,
Yes it should work, you have may a bit too much cake batter for one pan. I will suggest to fill the pan of 3/4 full and use the remaining batter (if any) to make cupcakes or muffins.





21 Responses
which butter to use- salted or unsalted and which cacao powder would you recommend?
Hi
You can use either salted or unsalted butter, depending on the brand, as the amount of salt can vary. Unsalted butter is the safer option, as you can then add salt separately and adjust it to your taste. For cocoa powder, I recommend a good-quality natural cocoa powder.
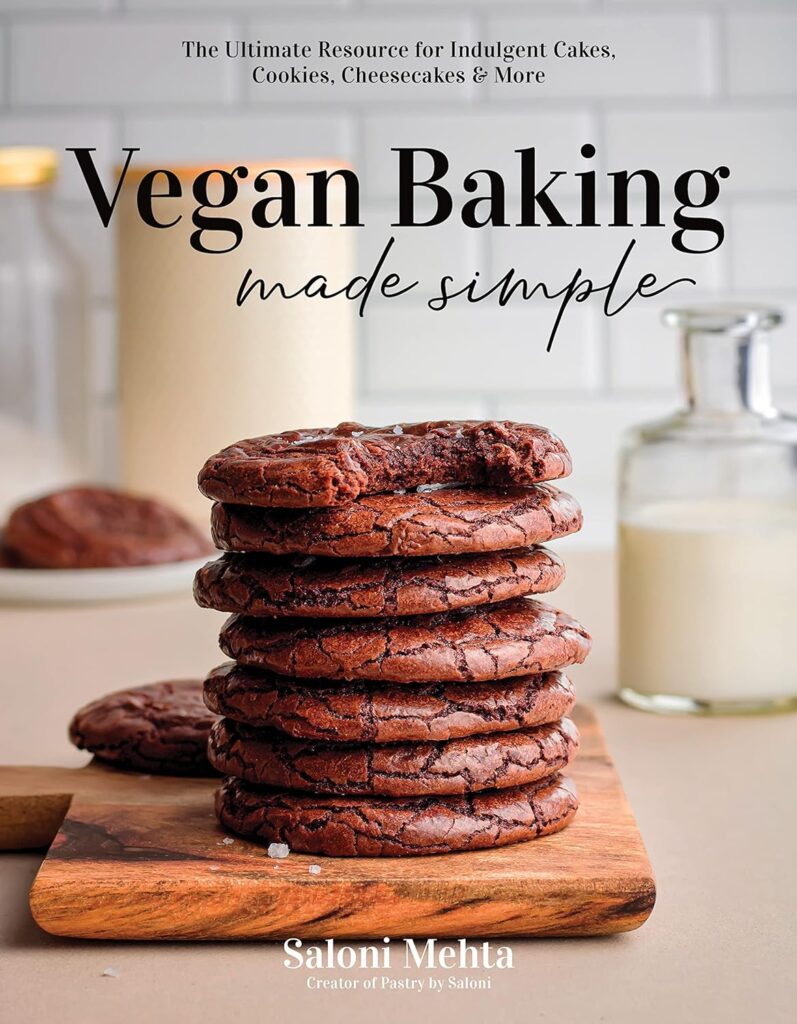
Hi Saloni is your book gives option of we want to use diary like on your website
I am looking for eggless but not dairy free recipes
Hi Geetika
My cookbook focuses on vegan desserts, but they can be very easily adapted to eggless (with dairy). You can simply use your preferred dairy options like regular milk, butter, and cream in place of the plant-based ingredients.
Hi saloni ,i always try ur recipes n it always comes out amazing ,dis one came out a bit dense ,can u tell me why ,what mistake i must hav been done,ok one more thing is i hav an 80 lit inbuilt faber otg so what temp shuld i keep ? Plz let me knw
Hi Jyoti
Thank you so much for trying my recipes – I’m so happy they’ve been working well for you!
If this one turned out a bit dense, it could be due to overmixing, slightly extra flour, or even oven temperature. All of these can affect the final texture.
Substituting butter with oil can help – oil gives a softer, more moist crumb, while butter can make the cake slightly firmer. You can use the same amount of a neutral oil.
For your OTG, follow the recipe temperature, make sure to preheat well and bake on the middle rack. If your oven runs hot, you can reduce the temperature slightly by 5–10°C. Hope this helps!
Best recipe
Zam Zam,
Thank you so much!
Hey,
Can we use oil instead of butter?
Also in most of your recipes, you have yoghurt, can we omit it completely or use something else instead?
Thanks
Hi George
This recipe was tested using melted butter, as it contributes to the richness and texture of the crumb. For best results, I’d recommend using a mix of half oil and half melted butter rather than oil alone.
As for the yogurt, if it’s used in a small quantity (around 30g or less), it can be omitted without significantly affecting the final result.
Hope this helps. let me know if you have any other questions!
Greeeeaaat
Thank you 🙂
Hi can i make this receipe in 1 – 9″ square pan.. (no 2 layers)
thanks
Hi,
Yes it should work, you have may a bit too much cake batter for one pan. I will suggest to fill the pan of 3/4 full and use the remaining batter (if any) to make cupcakes or muffins.
hi, doesn’t the recipe include eggs??i have that question
Hi Sol
All of my recipes are eggless so they don’t contain eggs!
Wait… there is no eggs? Is it correct?
Hi Lola
Correct. All the recipes on my website are eggless!
This was absolutely delicious! The recipe was pretty easy, the icing was also a hit.
Thank you so much Tamara
Thankyou..I will do the recipe soon….