Moist Chocolate Cake
This eggless chocolate cake is rich, moist, and fluffy, made with pantry staples and no eggs. Layered with a silky, no-powdered-sugar chocolate buttercream, it’s the perfect dessert for birthdays or everyday indulgence. Eggless and Vegan Friendly!
Yield: 10 servings
Equipment
- 2 x 8-inch (20cm) Round Cake Pans
Ingredients
Moist Chocolate Cake Ingredients
- 240 ml Milk*, at room temperature
- 1 tbsp White Vinegar or Lemon Juice
- 150 g Cane Sugar* or Castor Sugar
- 150 g Light Brown Sugar
- 120 ml Vegetable or Sunflower Oil
- 2 tsp Vanilla Extract
- 225 g All-Purpose Flour
- 60 g Cocoa Powder, sifted
- ¾ tsp Baking Soda
- 1½ tsp Baking Powder
- ¼ tsp Salt
- 195 ml Freshly Brewed Coffee or Boiling Water
Chocolate Buttercream Frosting
- 120 g Cane Sugar or Castor Sugar
- 100 ml Water
- 60–70 g Cocoa Powder, preferably Dutch-processed
- 350 g Butter*, cubed and at room temperature
- 2–3 tsp Vanilla Extract
- 20 ml Whipping Cream*
- Pinch of Salt
- ¼ cup Funfetti or Sprinkles of your choice
Instructions
How to Make Moist Chocolate Cake
- Begin by preheating your oven to 350°F (175°C). Prepare two 8-inch (20 cm) round or three 6-inch (15cm)round cake pans by greasing & lining with baking paper.
- In a medium bowl, mix milk and vinegar, then let it sit for 5 minutes. It’ll curdle slightly, creating a buttermilk substitute that adds tenderness and a slight tang to your cake.
- Whisk cane sugar, brown sugar, oil, and vanilla into the curdled milk until smooth. In a separate bowl, sift flour, cocoa, baking soda, baking powder, and salt to combine evenly and avoid lumps.
- Gradually whisk the dry ingredients into the wet mixture until smooth. Then add hot coffee or boiling water and mix well this enhances the chocolate flavor and makes the cake extra moist.
- Divide the batter evenly into prepared pans, smooth the tops, and bake for 25–30 minutes. The cakes are done when a toothpick comes out clean and the tops spring back gently.
- Let the cakes cool in the pans for 10 minutes, then transfer to a wire rack to cool completely. This ensures a smooth finish and prevents the frosting from melting.
How to Make Chocolate Buttercream Frosting
- In a small saucepan, combine sugar, water, and cocoa powder. Heat over low, stirring occasionally, until the sugar dissolves, creating a smooth chocolate syrup. Remove from heat and let it cool to room temperature.
- Beat the butter in a separate bowl with an electric mixer for 2-3 minutes until light and fluffy. Gradually add the cooled chocolate syrup in 2-3 portions, mixing for about a minute after each addition to fully incorporate.
- Add the vanilla extract, whipping cream, and a pinch of salt. Mix until smooth and glossy. If needed, fold with a spatula to smooth out the texture and release air bubbles, creating a silky, spreadable frosting.
How to Assemble the Moist Chocolate Cake
- Place the first cake layer on a cake stand or plate, ensuring it's flat and stable. Add 5-6 generous scoops of frosting on top and spread it evenly.
- Place the second cake layer on top, aligning it with the first. Then, apply a thin layer of frosting, called the crumb coat, over the entire cake to seal in any loose crumbs and create a smooth surface for the final layer of frosting.
- Chill the cake in the refrigerator for about 30 minutes to set the crumb coat. Once chilled, spread the remaining frosting generously over the cake, smoothing it with a spatula or cake scraper for a polished finish.
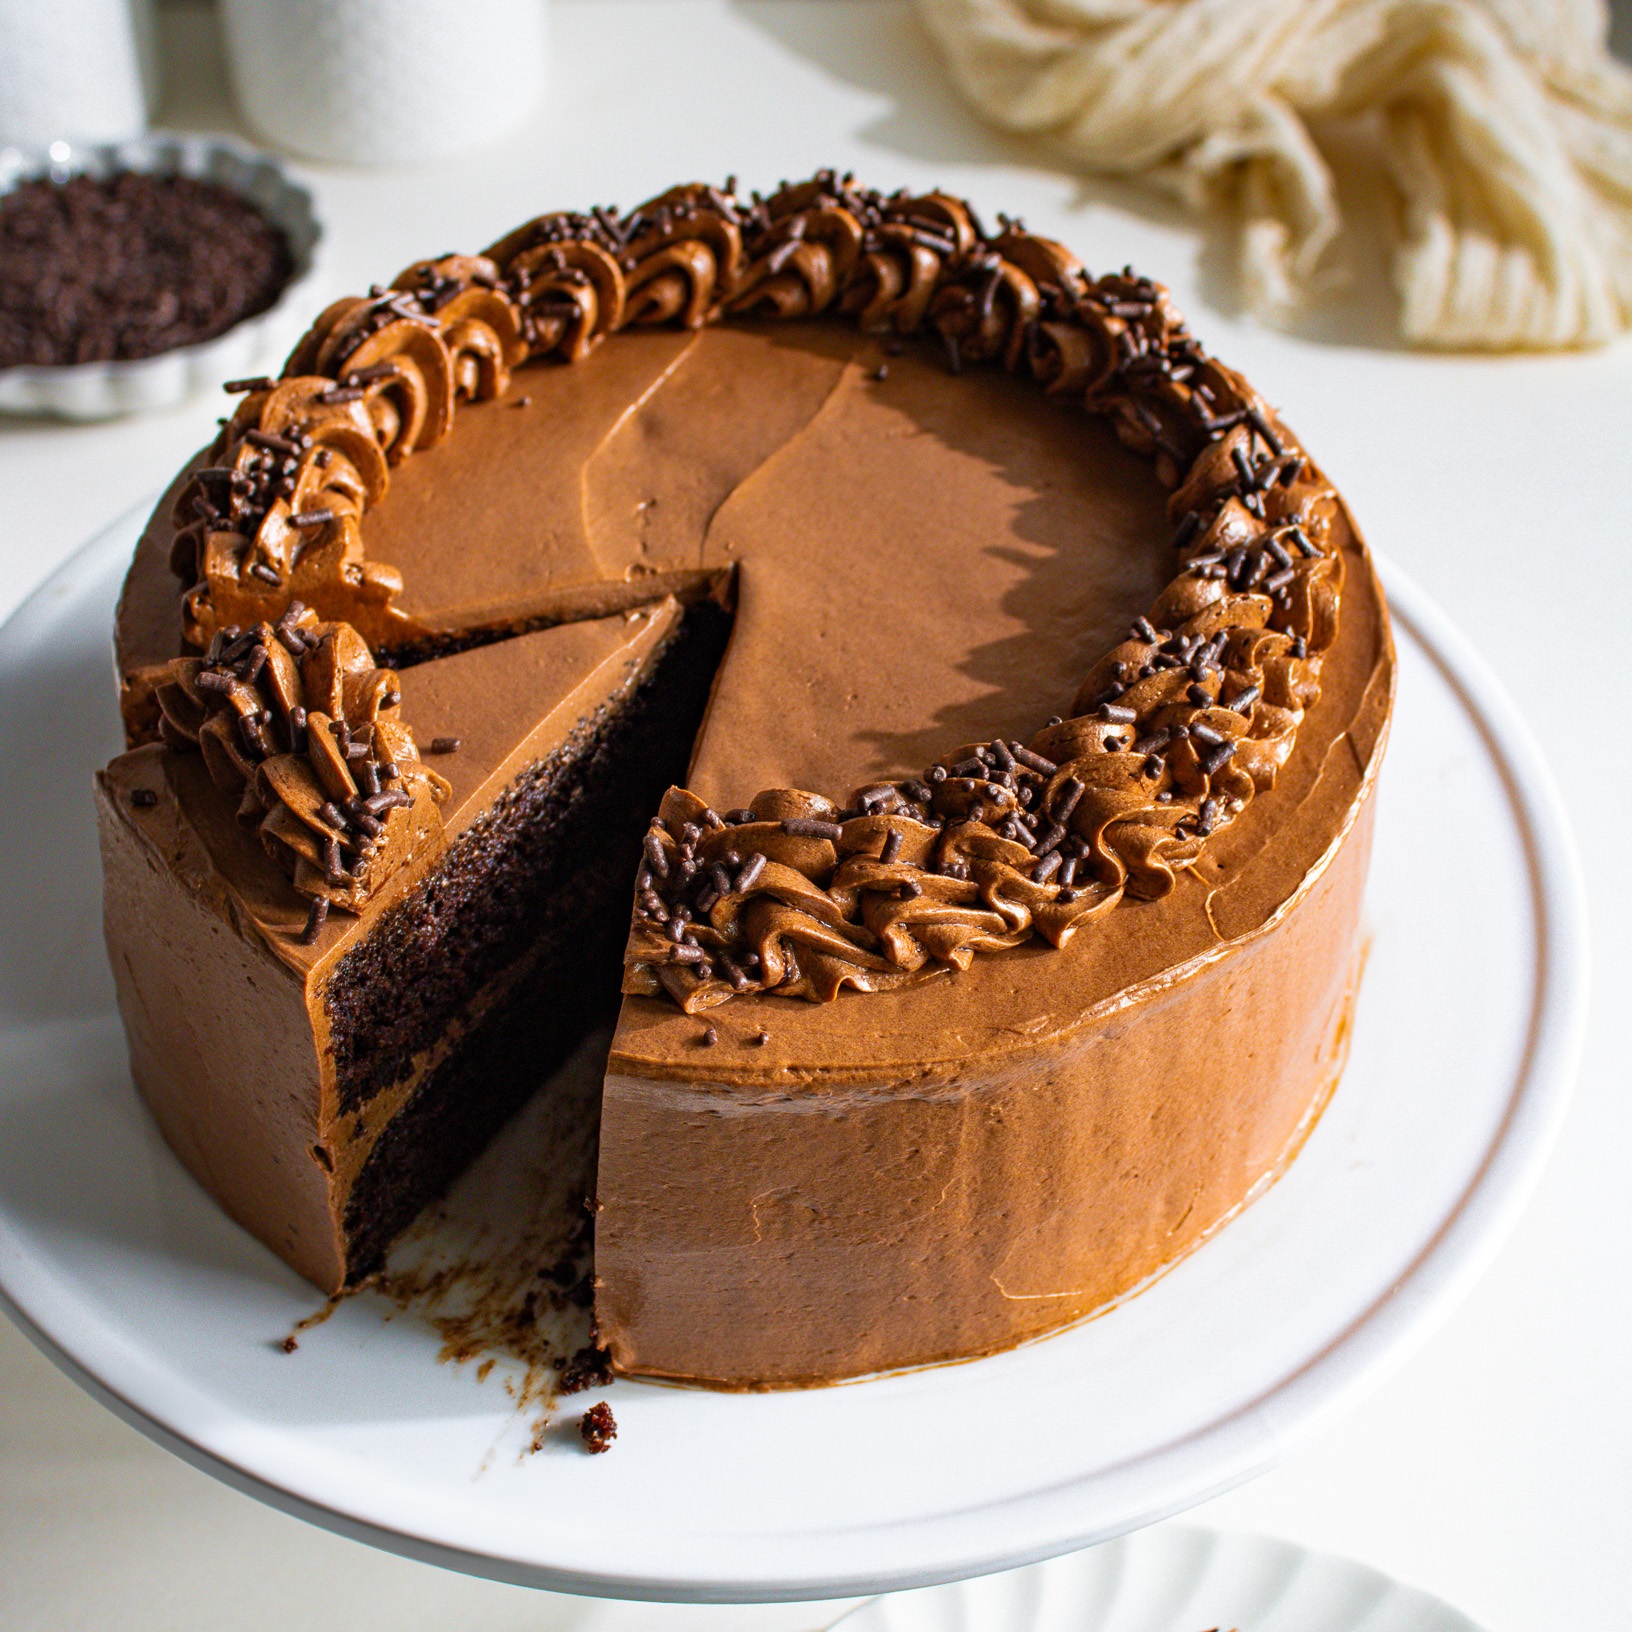
- Finally, decorate the cake with sprinkles or toppings of your choice to add a festive touch. For the best flavor and texture, serve this cake at room temperature.
Notes
- Cup vs. Weighing Scale: U.S. customary cup measurements are best viewed as rough estimates, as they can vary depending on how ingredients are scooped or packed. For greater accuracy and consistent results—especially in baking—it's highly recommended to weigh your ingredients using a digital kitchen scale in grams.
- Prepare Before You Begin: Before starting any recipe, measure and prep all your ingredients. Having everything ready in advance helps the process go more smoothly and reduces the chances of mistakes or missed steps.
- Use Proper Measuring Tools: For teaspoon (tsp) and tablespoon (tbsp) measurements, always use proper measuring spoons. Avoid using everyday cutlery, as it isn’t standardized and can affect accuracy.
- Milk: You may use any unsweetened dairy-free milk (such as almond, soy, or oat) or traditional whole dairy milk based on your preference.
- Lemon Juice: Can be substituted with apple cider vinegar or white vinegar, and vice versa. These ingredients provide the necessary acidity in recipes.
- Sugar: Cane sugar can be replaced with granulated or castor sugar. If you're following a vegan diet, ensure the sugar is vegan-friendly—some refined sugars are processed with bone char. Organic cane sugar is a safe vegan option.
- Whipping Cream: For vegan or dairy-free versions, use unsweetened plant-based whipping cream. Otherwise, any full-fat dairy whipping cream of your choice will work well.